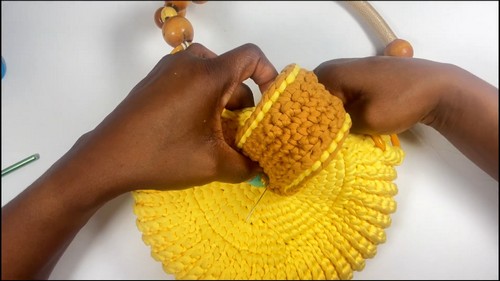
Crochet Oreo Bag: Step-by-Step Guide

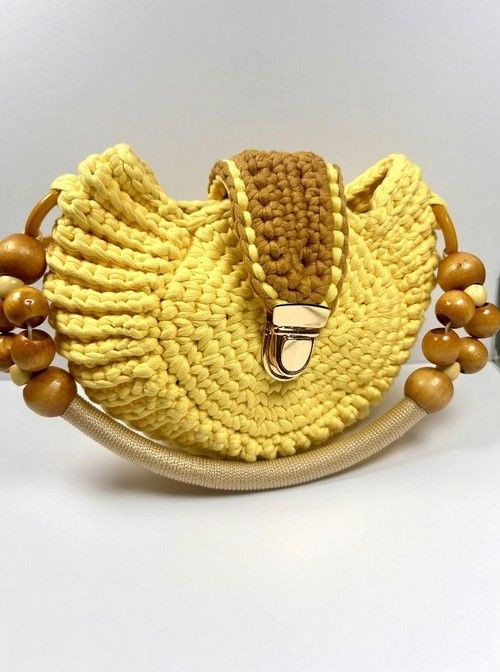
The crochet Oreo bag is a delightful accessory that resembles everyone's favorite sandwich cookie. Crafted with care and creativity, this charming bag is perfect for carrying your essentials in a whimsical and unique way. With its playful design and color options, it adds a fun touch to your outfit while being practical at the same time. Whether you're a crochet enthusiast looking for a new project or simply adore cute and quirky accessories, the Oreo bag is sure to bring a smile to your face every time you use it. So, why not treat yourself to this sweet and stylish bag that is as fun to make as it is to carry around?
Materials
- T-shirt yarn (black, brown, and yellow)
- 6mm crochet hook
- Scissors
- Yarn needle
- Bag handle (metal or acrylic recommended)
- Nylon thread (for sewing the lid)
Crocheting the Circles (Make 2)
Starting the Circle
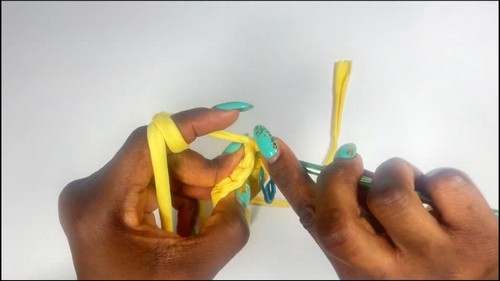
Wrap yarn around your palm and create a slip knot. Chain 1.
Make 5 single crochets into the chain. Tighten the center ring by pulling the longer yarn tail.
Pull the shorter yarn end to the back, insert your hook through two loops, yarn over with the longer yarn, and pull through. Insert hook into the first stitch, yarn over, pull a loop (you should now have 6 "braids").
Pull your loop slightly, insert into the shorter side, and pull through to the back.
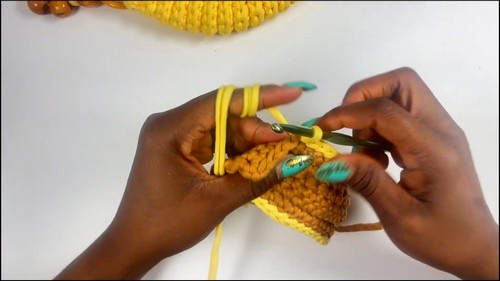
Round 2
Chain 1. Make 2 single crochets into each stitch around (insert between the single crochets from the previous round). Join with a slip stitch to the first stitch. Place a stitch marker in the first stitch of this round.
Round 3
Chain 1. Make 1 single crochet in the first stitch. In the next stitch, make 2 single crochets. Repeat the pattern: 1 sc, 2 sc in next stitch around. Join with a slip stitch to the first stitch.
Rounds 4 to 8
Increase the stitch count progressively:
- Round 4: 1 sc, 1 sc, 2 sc
- Round 5: 1 sc, 1 sc, 1 sc, 2 sc
Continue this increase pattern, adding one more single crochet between increases in each round. Keep the circle flat by adjusting stitch count evenly. End with a slip stitch, fasten off, and weave in the ends.
Use a needle and yarn to close the hole in the center. Repeat to make the second circle.
Assembling the Bag Sides
Preparing for Joining
Place both circles with the wrong sides facing each other. Use stitch markers to mark the same 10 stitches on each circle to line up the bag sides.
Joining the Sides
Remove a stitch marker and attach yarn at that stitch. Chain 14 to form the base panel. Attach the chain to the corresponding stitch on the second circle with a slip stitch. Chain 1, then:
- Make 2 slip stitches in the next 2 stitches.
- Make 10 single crochets in the next 10 stitches.
- Make 2 slip stitches in the next 2 stitches.
Slip stitch into the next braid on the circle, chain 1, and turn your work.
Working the Side Panel
Skip the first stitch, then:
- Work 2 slip stitches in back loops.
- Work 10 single crochets in back loops.
- Work 2 slip stitches in back loops.
Slip stitch to the next braid on the circle, chain 1, and turn. Repeat this pattern across until you reach the stitch marker on the other side. Slip stitch all around the bag mouth to finish. Fasten off and hide the yarn.
Attaching the Handle
Handle Placement
Align the handle at the top center of the bag opening. Make sure the yarn is inside the bag before starting.
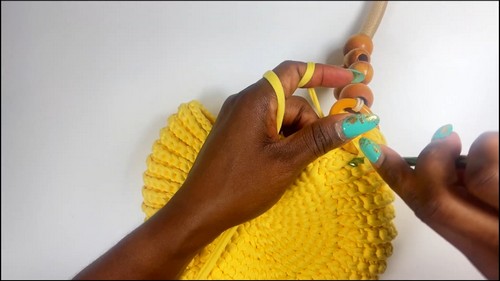
Sewing the Handle
Insert hook under the handle and through the bag. Pull up a loop and work a slip stitch. Alternate stitching:
- Top of the handle: pull up a loop and slip stitch.
- Bottom of the handle: pull up a loop and slip stitch.
Repeat across the handle attachment area. Pull yarn inside the bag and knot it with the other end. Cut and weave in the yarn. Repeat for the second handle.
Crocheting the Lid
Creating the Lid (Brown Yarn)
Make a slip knot and chain 20. Turn and single crochet along the back loops of the chain. In the last stitch, work 3 single crochets. Place a stitch marker in the center of the 3 stitches. Continue single crocheting down the opposite side of the chain.
Shaping the Lid
Chain 1 and turn your work. Single crochet in each stitch. When you reach the stitch marker, remove it and work 3 single crochets in that stitch. Replace the marker in the new center stitch. Continue rows by repeating the increase at the marker stitch. Repeat until desired lid shape and size is reached.
Finishing the Lid (Yellow Yarn)
Fasten off brown yarn. Join yellow yarn at the last stitch with a chain 1. Slip stitch around the entire edge of the lid for a neat finish. Fasten off and weave in all yarn tails.
Attaching the Lid to the Bag

Placing the Lid
Center the lid at the back opening of the bag. Align the midpoint of the lid with the bag’s top back edge. Use a clasp or clip to hold it in place.
Sewing the Lid
Use invisible nylon thread and a needle. Sew along the top back edge of the bag to attach the lid securely. Ensure stitches are tight and hidden.
- Funny Pictures
-
 Pics to Get the Excitement Today
-
 Funny Christmas Meme Dump
-
 Funniest Relatable Felines in the Form of Memes
- Recipes
-
 Cinnamon Sugar Swirl Cupcakes
-
 Cheesy Bacon Ranch Roasted Potatoes
-
 Blooming Onion Bites with Dipping Sauce
- Lifehacks
-
 7 Toilet and Bathroom Cleaning Hacks
-
 Tips & Hacks for Clean Carpets
-
 7 Kitchen Hacks & Simple Solutions
- Crochet Ideas
-
 Crochet Watermelon Amigurumi
-
 Crochet Shark Applique
-
 Crochet Pineapple Amigurumi
- DIY
-
 Yarn Wrapped Christmas Wreath Ornaments
-
 Egg Carton Snowman Ornament
-
 Stick Peppermint Candy Ornament
- Knitting Ideas
-
 Knitted Star Square Dishcloth
-
 Knitted Free 2025 Year Dishcloth
-
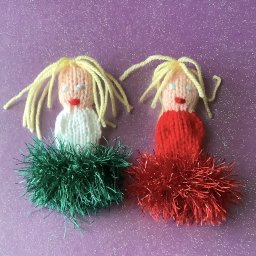 Knitted Belle Finger Puppet