How to Make a Crochet Messenger Bag

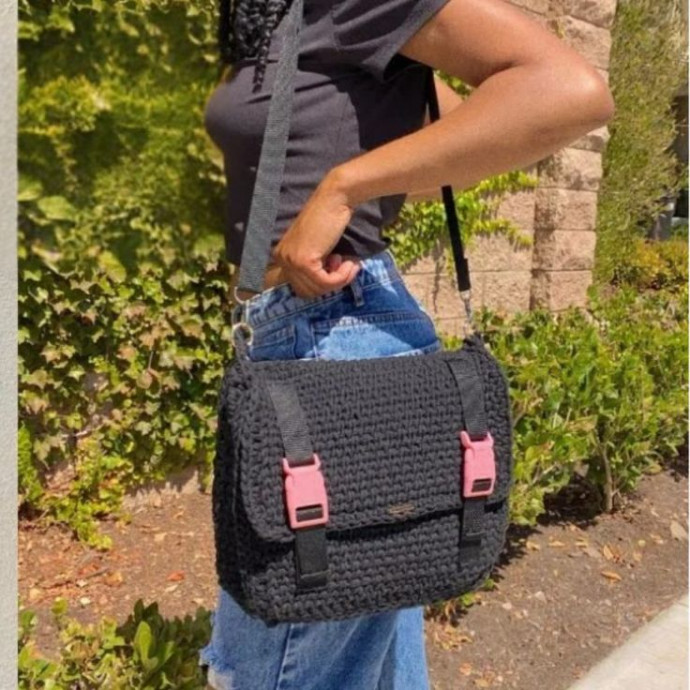
The crochet messenger bag is the perfect accessory for adding a touch of handmade charm to your everyday look! This stylish and versatile bag not only complements any outfit but also provides practical storage for all your essentials. With its intricate crochet design and comfortable crossbody strap, the messenger bag is sure to become your go-to accessory for running errands or hanging out with friends. Embrace the creativity and functionality of the crochet messenger bag and elevate your style with a unique touch!
Materials Needed
Below is a complete list of materials required to make the crochet messenger bag:
- Yarn: Quantity: 2 skeins of 3mm macramé cord yarn.
- Hook: Size: 6.5mm crochet hook.
- Thread for Sewing: Clear thread (to prevent visible thread marks).
- Needle: For sewing the panels together and additional strap components.
- Buckles: 2 buckles.
- Webbing (Strap): Quantity: 5 yards. Use a lighter to seal the edges of the webbing after cutting.
- O-Rings or D-Ring Swivel Hooks: 2 per bag (choose either).
- Crossbody Slider: 1-inch strap slider.
- Row Counter: Optional, but useful for tracking rows.
- Measuring Tape: For ensuring accurate dimensions.
- Scissors: To cut yarn and webbing.
- Lighter: To seal the webbing after cutting and prevent fraying.
Abbreviations
These abbreviations will be used throughout the pattern:
- ch: Chain
- sc: Single Crochet
- sl st: Slip Stitch
- v: Stitch “V” visible in knit stitch
- FO: Fasten Off
Step-by-Step Pattern
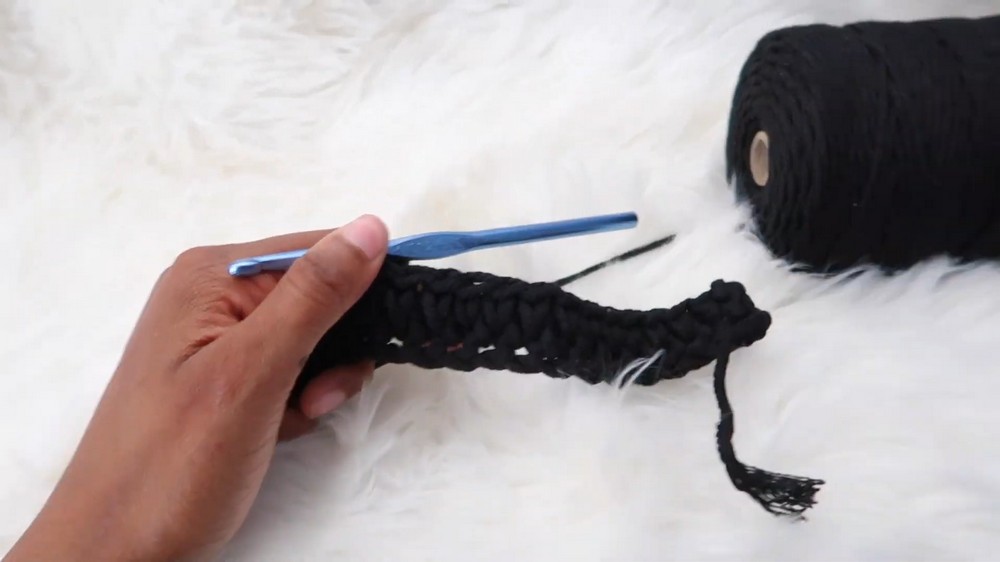
Step 1: Front and Back Panels (Make 2 Panels)
Foundation Chain:
Chain 23.
Row 1: Single crochet (sc) across all 23 stitches. At the end, chain 1 and turn.
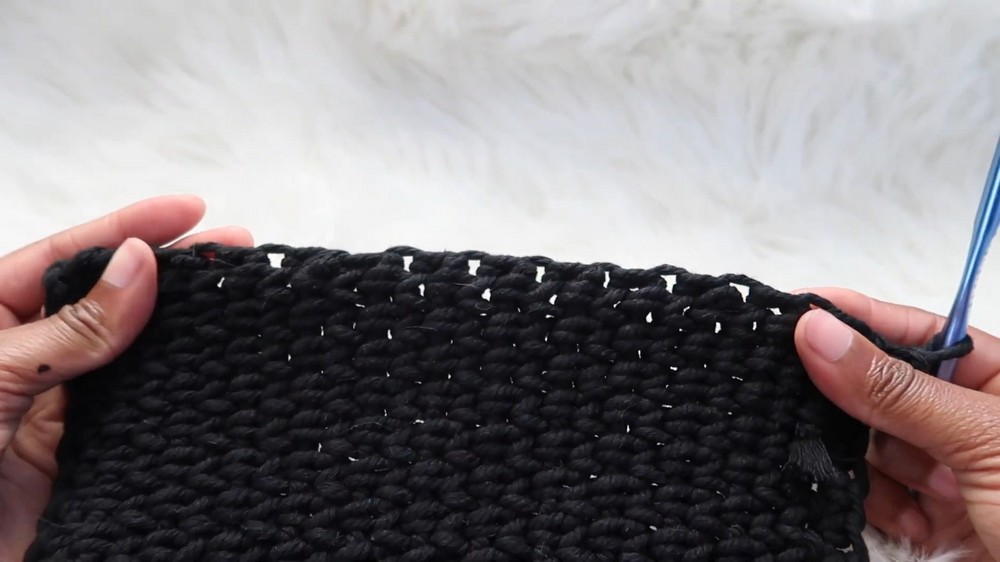
Row 2–until 8 inches: Work using the knit stitch. Skip the first “v” of the row and insert the hook through the second “v”. Complete a sc. Continue this process across all stitches. At the end of each row, chain 1, turn, and repeat until the panel reaches 8 inches in length.
Add Border: After the final row, chain 1, turn your work. Single crochet around all sides of the panel (including corners), ensuring 22 stitches on each edge. Chain 1 at each corner. Finish: FO and repeat the steps to create a second panel.
Step 2: Side Panels (Make 2 Panels)
Foundation Chain:
Chain 6.
Row 1: Sc across all 5 stitches (first chain skipped). Chain 1, turn.
Row 2–23: Use the knit stitch, following the same technique as above for 23 rows.
Add Border: Single crochet around all sides of the panel following the same border steps as the front/back panel. Finish: FO. Make a second side panel.
Step 3: Bottom Panel (Make 1 Panel)
Foundation Chain:
Chain 6.
Row 1: Sc across all 5 stitches. Chain 1, turn.
Rows 2–27: Use the knit stitch, working until the panel reaches 27 rows.
Border: Add a single crochet border as with the other panels.
Finish: FO.
Step 4: Assemble the Bag
Attach Side Panels: Attach yarn at the corner of one front panel and slip stitch the edges of the panel and the side panel together. Work one edge at a time. Repeat for both sides.
Attach Bottom Panel: Align the bottom panel with the side panels and attach with slip stitch.
Complete Assembly: Attach the other panel (either back or front) with slip stitches, working along all edges to form the bag structure.
Step 5: Front Flap
Start Flap: Attach yarn to a corner of the front panel. Sc across the edge.
Rows 2–18: Use the knit stitch for a total of 18 rows.
Border Flap: Sc around the entire flap edge. FO.
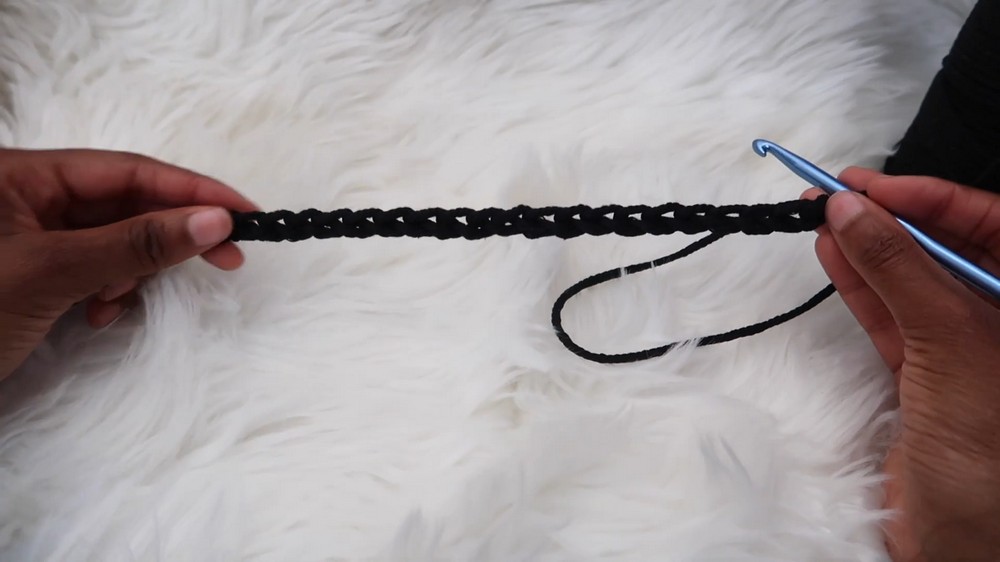
Step 6: Straps and Buckles
Prepare Buckles and Straps: Cut 4 pieces of webbing:
- Two measuring 5 inches (for buckles).
- Two measuring 7 inches (for attachment).
Use the lighter to seal the edges to prevent fraying.
Attach Buckles to Bag: Thread the 5-inch straps through the buckles and sew them onto the front flap edges of the bag.
Crossbody Strap: Measure and cut a piece of webbing to desired length (suggested: 48–52 inches). Attach the contrast strap to buckles or o-rings.
- Funny Pictures
-
 Pics to Get the Excitement Today
-
 Funny Christmas Meme Dump
-
 Funniest Relatable Felines in the Form of Memes
- Recipes
-
 Cappuccino Brownies
-
 Chicken Mushroom Tortellini Bake
-
 Spinach Pie
- Lifehacks
-
 8 Necessary Tips for Baking Bread
-
 Tips & Hacks for Clean Carpets
-
 10 Uses For Old TV Armoires
- Crochet Ideas
-
 Crochet Watermelon Amigurumi
-
 Crochet Shark Applique
-
 Crochet Pineapple Amigurumi
- DIY
-
 Yarn Wrapped Christmas Wreath Ornaments
-
 Egg Carton Snowman Ornament
-
 Stick Peppermint Candy Ornament
- Knitting Ideas
-
 Knitted Star Square Dishcloth
-
 Knitted Free 2025 Year Dishcloth
-
 Knitted Ribbed Adult Hat