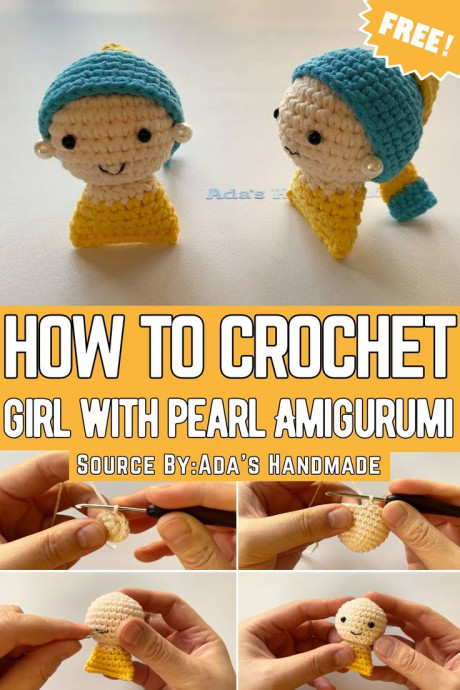
Crochet Girl With Pearl Amigurumi Guide

Introduction
The Crochet Girl with Pearl Amigurumi is an adorable handmade creation that adds a touch of charm to any space. This cute amigurumi doll captures the essence of the famous painting in a fun and whimsical way, making it a perfect gift for art lovers or anyone who appreciates unique décor pieces. Its intricate details and delicate design showcase the skill and creativity of the crafter, making it a delightful addition to any collection. Whether displayed on a shelf or given as a thoughtful present, the Crochet Girl with Pearl Amigurumi is sure to bring smiles and warmth wherever it goes.
Materials Needed
- Hook Size: 2.15mm crochet hook
- Yarn: 4-ply cotton yarn in multiple colors (main and complementary colors)
- Stuffing: Fiberfill or other suitable stuffing material for shaping the head
- Scissors: For snipping yarn and finishing edges
- Darning Needle: For sewing pieces together
Abbreviations and Crochet Stitches
| Abbreviation | Meaning |
|---|---|
| sc | Single Crochet |
| inc | Increase (2 sc in one stitch) |
| dec | Decrease (sc two stitches together) |
| ch | Chain |
| sl st | Slip Stitch |
Step-by-Step Instructions
Part 1: The Head
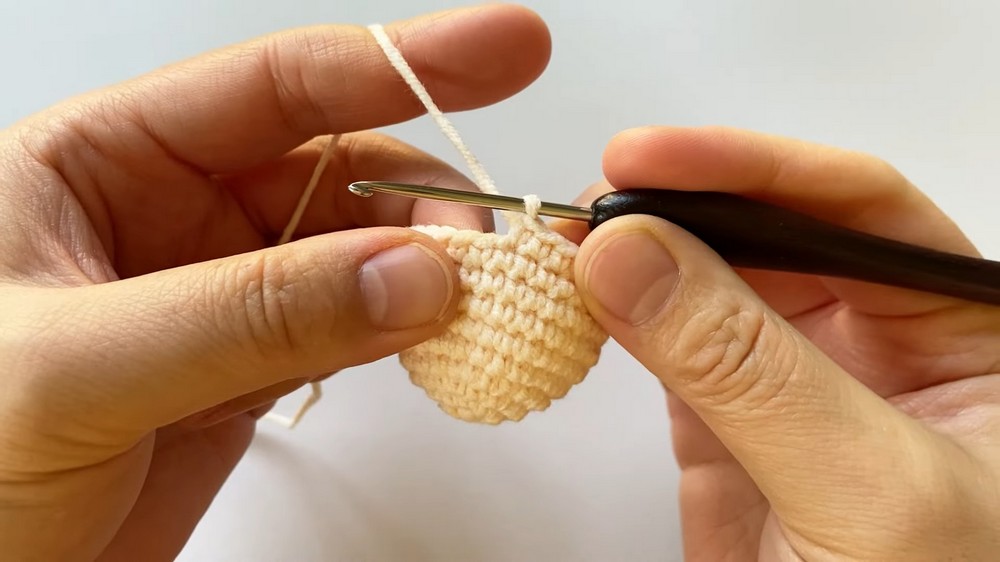
R1: Create a magic loop. Work 6 sc into the loop. Pull the yarn tight to close the loop. Slip stitch (sl st) in the first stitch and ch 1.
R2: 2 sc in each stitch around (12 sc). Sl st in the first stitch, ch 1.
R3: (sc, inc) × 6 = 18 sc. Round complete, ch 1.

R4: (sc, inc, sc) × 6 = 24 sc. Round complete, ch 1.
R5: (3 sc, inc) × 6 = 30 sc. Round complete, ch 1.
R6-R9: 1 sc in each stitch around (30 sc per round). Round 9 complete, ch 1.
R10: (3 sc, dec) × 6. Round complete, ch 1.
R11: (2 sc, dec) × 6. Round complete, ch 1.
R12: (sc, dec) × 6. Round complete. Start stuffing the piece. Ch 1.
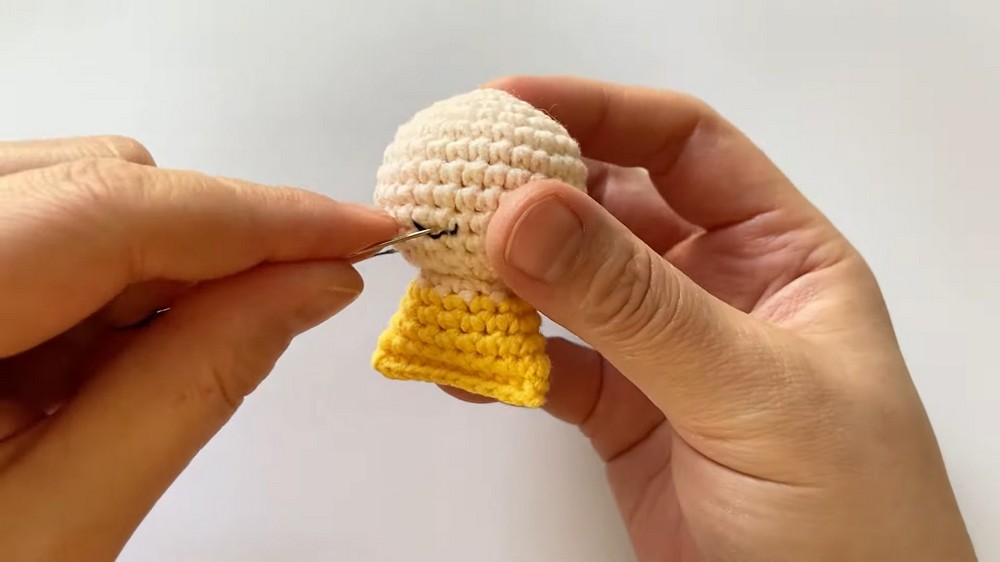
R13: dec × 6 (closing the top). Sl st in the first stitch, leave a long tail for sewing.
Part 2: The Headscarf
Step 1: Circular Base
R1: Create a magic loop. Work 6 sc into the loop. Pull the yarn tight to close the loop. Sl st in the first stitch and ch 1.
R2: 2 sc in each stitch around (12 sc). Sl st in the first stitch, ch 1.
R3: 1 sc in each stitch around (12 sc). Sl st in the first stitch, ch 1.
R4: (sc, inc) × 6 = 18 sc. (Back loops only!). Sl st in the first stitch, ch 1, leave a long tail for sewing.
Step 2: Edges
Return to the front loops of Round 4:
Ch 1, sl st in the next 4 stitches. Ch 1, turn.
1 sc in the next 4 stitches. Repeat this process to complete a single edge.
Step 3: Continue Scarf Rounds
R6-R10: 1 sc in each stitch around (30 sc per round). Round 10 complete, ch 1, then cut yarn.
Step 4: Decorative Details
Chain 12 using a contrasting yarn and connect with the first stitch of Round 4. Ch 1.
Add rounds of sc for finishing:
- R1: 1 sc in each chain around (12 sc). Change yarn color and sl st in the first stitch, ch 1.
- R2: (5 sc, inc) × 2. Sl st in the first stitch, ch 1.
- R3: (6 sc, inc) × 2. Sl st in the first stitch, ch 1.
- R4: (7 sc, inc) × 2. Sl st in the first stitch, ch 1.
- R5: (8 sc, inc) × 2. Sl st in the first stitch, ch 1.
Stitch the scarf edge onto the main piece using single crochet.
- Funny Pictures
-
 These are the Pics That Simply Describe Your Life
-
 Hilariously Accurate Parenting Memes That Show the Other Side of Parenthood
-
 Great Pics That Just Depict Our Lives
- Recipes
-
 Crispy Baked Avocado Fries
-
 Baked Beans and Hot Dogs with Biscuit Topping
-
 Roasted Rosemary Lemon Chicken Breasts
- Lifehacks
-
 Crochet Basics: Twisted Fringe
-
 7 Crochet Tips And Tricks
-
 How To Work Crochet Into Denim
- Crochet Ideas
-
 Crochet Snorlax Plushie Doll
-
 Crochet Cat in 1 Row
-
 Crochet Beautiful Penguin Toy
- DIY
-
 Popsicle Stick and Jingle Bell Christmas Tree Ornament
-
 Upcycled Mason Jar Chicken Vase
-
 Crochet Namaste Stephanie Doll
- Knitting Ideas
-
 Knitted Keepsake Bag
-
 Knitted Textured Heart Dishcloth
-
 Knitted Snowfall Dishcloth