Crochet Strawberry Girl Amigurumi Pattern

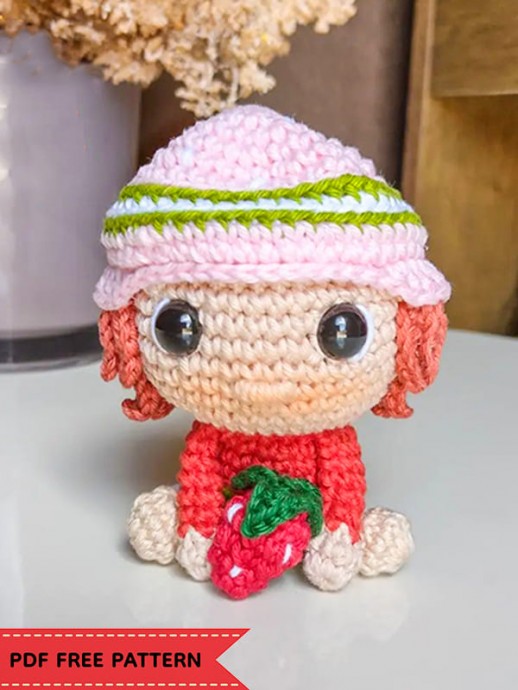
Create your very own adorable amigurumi doll with this crochet pattern for a sweet Strawberry Girl. Using basic crochet stitches and techniques, you can bring this charming character to life with just a few skeins of yarn and a crochet hook. The pattern includes step-by-step instructions and detailed photos to guide you through the process, making it perfect for both beginners and experienced crocheters alike. This cute Strawberry Girl amigurumi is the perfect project for anyone looking to add a touch of whimsy to their home decor or to create a unique handmade gift for a loved one. You can customize the doll with different colors and embellishments to make it truly your own. Whether you're a fan of amigurumi or just looking for a fun and creative crochet project, this Strawberry Girl pattern is sure to bring a smile to your face as you work on each stitch.
Requirements
Materials
- Yarn
- Locking eyes, 11 mm
- Filling, scissors
- 2 mm needle
Abbreviations
MR – magic ring
Sc – single crochet
Slst – slip stitch
Dc – double crochet
Ch – chain
Rnd – round
Inc – increase
Dec – decrease
BLO – back loop only
FLO – front loop only
(..) – total stitch at the end of each row
Return in 2nd ch from the needle
Let’s start crocheting the strawberry amigurumi girl pattern 🙂
Let’s crochet the arms and legs of the strawberry girl amigurumi pattern.
Arms
With whipped cream color
Rnd 1: 9 sc in MR (9)
Rnd 2: 9 sc (9)
Change to cherry color
Rnd 3: 2 sc, 2 dec, 3 sc (7)
Rnd 4: 7 sc BLO
Rnd 5-8: 7 sc (7)
Rnd 9: 4 sc closing the piece (4)
Legs
With porcelain color
Rnd 1: 12 sc in MR (12)
Rnd 2: 12 sc (12)
Rnd 3: 4 sc, 2 dec, 4 sc (10)
Change to white color
Rnd 4: 10 sc BLO
Switch to lemonade color
Rnd 5: 10 sc
Make 1 sl st and fasten off leaving the thread for sewing
Sew the legs between rows 3 and 7 and put some stuffing before finishing.
After completing the arms and legs of the amigurumi toy, let’s crochet the body part 🙂
Body
With lemonade color
Rnd 1: 6 sc in MR (6)
Rnd 2: 6 inc (12)
Rnd 3: (1 sc, 1 inc) x 6 (18)
Rnd 4: 1 sc, 1 inc, (2 sc, 1 inc) x 5, 1 sc (24)
Rnd 5-6: 24 sc (24)
Change to cherry color
Rnd 7: BLO, (6 sc, 1 dec) x 3 (21)
Rnd 8: 21 sc (21)
Rnd 9: 2 sc, 1 dec, (5 sc, 1 dec) x 2, 3 sc (18)
Rnd 10: 18 sc (18)
Rnd 11: 4 sc, 4 sc joining the 1st arm, 3 sc in the body, 4 sc joining the 2nd arm, 3 sc in the body (18)
Change to whipped cream color
Rnd 12: FLO, 18 inc (36)
Rnd 13: (5 sc, 1 inc) x 3 (42)
Rnd 14-19: 42 sc (42)
Rnd 20: 15 sc BLO, 16 sc (normal), 11 sc BLO (42)
Rnd 21: 42 sc (42)
Eyes between rows 17 and 18 with 7 points between them.
Put filling as it decreases
Rnd 22: (5 sc, 1 dec) x 6 (36)
Rnd 23: 2 sc, 1 dec, (4 sc, 1 dec) x 5, 2 sc (30)
Rnd 24: (3 sc, 1 dec) x 6 (24)
Rnd 25: 1 sc, 1 dec, (2 sc, 1 dec) x 5, 1 sc (18)
Rnd 26: (1 sc, 1 dec) x 6 (12)
Rnd 27: 6 dec (6)
Make 1 sl st and fasten off, close the inverted magic ring
Let’s crochet the hair of the amigurumi doll 🙂
Hair
With the Rum color, join a 19 row FLO yarn on the left side! Climb 6 ch, go back doing 1 sl st, 1 sc, 3 hdc, 1 sl st in the same loop, repeat this lock in the same spot! Slst in next loop, go up 10 ch, go back doing 1 sl st, 1 sc, 7 hdc, skip loop, sl st in the next one, repeat this until you reach the penultimate loop! In the last loop make 6 corr, go back making 1 sl st, 1 sc, 3 hdc, 1 sl st, in the same handle, repeat one more time! Fasten off and hide the thread!
Then just glue or sew the locks to the head!
Let’s crochet the free amigurumi strawberry pattern hat 🙂
Hat
With the color quartz!
Rnd 1: 6 sc at the MR (6)
Rnd 2: 6 inc (12)
Rnd 3: (1 sc, 1 inc) x 6 (18)
Rnd 4: 1 sc, 1 inc, (2 sc, 1 inc) x 5, 1 sc (24)
Rnd 5: (3 sc, 1 inc) x 6 (30)
Rnd 6: 2 sc, 1 inc, (4 sc, 1 inc) x 5, 2 sc (36)
Rnd 7: (5 sc, 1 inc) x 6 (42)
Rnd 8: 3 sc, 1 inc, (6 sc, 1 inc) x 5, 3 sc (48)
Change to lemonade color and make 1 row of BLO sl st, finished change to white color!
Rnd 9: 48 sc BLO (48)
Change to lemonade color and make a row of sl st BLO, finished switch to quartz color!
Rnd 10-11: 48 sc (48)
Rnd 12: FLO 12 dc, 1 hdc, 14 sl st, 1 hdc, 20 dc, 1 sl st, finish off and hide the wire!
Make the sl st of the hat loose, do not tighten the stitch!
Glue or sew the hat to the head, leave the 14 sl st in the front!
With the white thread make a few lines on the hat!
Embroider the nose with the whipped cream color between rows 16 and 15, involving 3 stitches!
Let’s crochet the strawberry in the hands of the free amigurumi doll 🙂
Strawberry
With the crimson color!
Rnd 1: 6 sc in MR (6)
Rnd 2: 6 sc (6)
Rnd 3: (1 sc, 1 inc) x 6 (18)
Put filling
Rnd 4: 9 dec (9)
Rnd 5: 3 dec (6); Make 1 sl st, fasten off and close the inverted magic ring using only the back straps and hide the wire!
With the moss green color, una FLO from row 5, go up 4 ch, go back doing 1 sc, 1 sc, 1 hdc, skip 1 base loop, sl st in next (repeat twice more), tie off and hide the thread!
With the white line make little lines on the strawberry!
Congratulations, you have completed the strawberry amigurumi girl pattern. 🙂
- Funny Pictures
-
 The Best Office Memes to Laugh and Remember Some Great Things
-
 Relatable Memes to Laugh Before Going to Sleep
-
 Friday Memes That Just Perfectly Describe Marriage and Parenting
- Recipes
-
 Russian Tea Cakes (Snowball Cookies)
-
 Rigatoni with Sausage, Tomatoes, and Zucchini
-
 Healthy Crab Cakes (Keto)
- Lifehacks
-
 How to Crochet a Harlequin Stitch
-
 Removing The Toughest Stains
-
 Crochet Basics: Crumpled Griddle Stitch
- Crochet Ideas
-
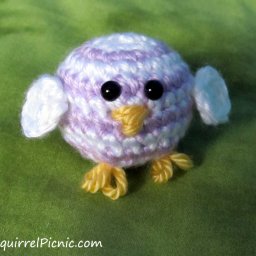 Crochet Baby Rainbow Chic
-
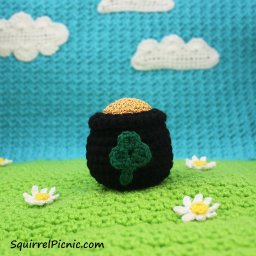 Crochet a Pot of Gold
-
 Crochet Monsieur and Madame Champagne
- DIY
-
 DIY Snowman Wreath
-
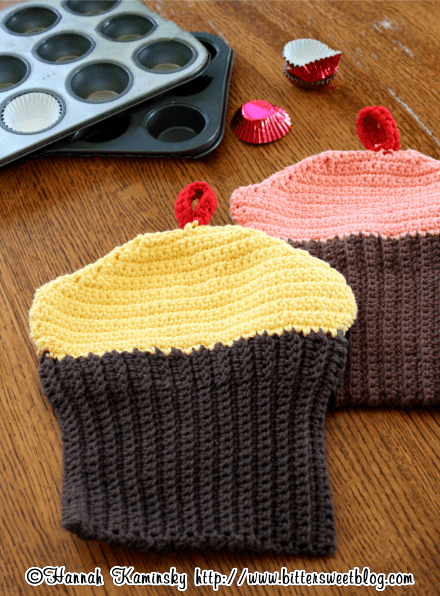 Crochet Cupcake Potholders
-
 Crochet Adorable Baked Cake
- Knitting Ideas
-
 Knitted Easter Bunny
-
 Knitted Mobile Phone/Glasses Case
-
 Knitted Beautiful Purse