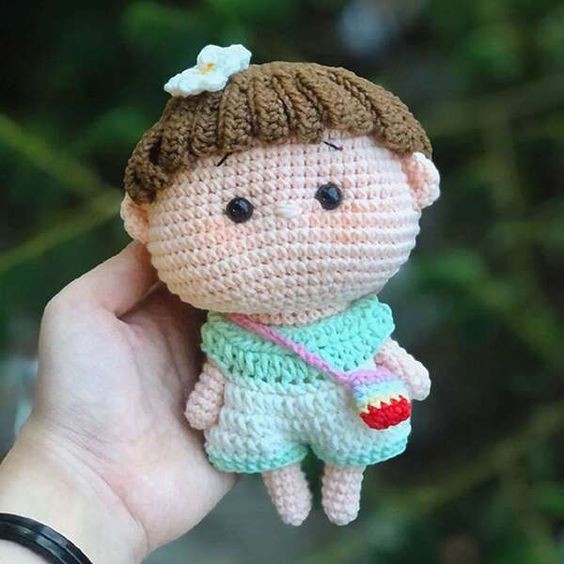
Crochet Little Girl Doll Crochet Pattern

Are you looking for a fun and creative project to make a special gift for a little girl in your life? Why not try your hand at crocheting a cute little girl doll? With just a few simple materials and some basic crochet stitches, you can create a one-of-a-kind doll that will bring joy and delight to any child. When you're done, you'll have a beautiful crocheted doll that any little girl will cherish. Whether it's for a birthday, holiday, or just because, this handmade gift will be a treasured keepsake for years to come. So grab your crochet hook and get started on creating your own adorable little girl doll today!
【Materials】
Yarn (color: skin, white, brown, green, yellow, purple, pink, black, red)
Eye accessories-8mm
Crochet hook-2mm
Toy stuffing
Needle
【Abbrevations】
MR-Magic Ring
sc-single crochet
inc-increase
dec-decrease
ch-chain stitch
hdc-half double crochet
ss-slip stitch
sp-space
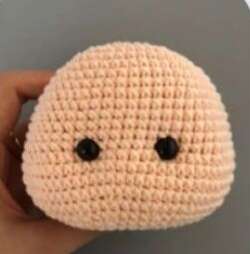
【Head】make with skin color
R1: MR 8 sc (8)
R2: 8 inc (16)
R3: (1 sc, 1 inc)*8 (24)
R4: (1 sc, 1 inc, 1 sc)*8 (32)
R5: (3 sc, 1 inc)*8 (40)
R6: (2 sc, 1 inc, 2 sc)*8 (48)
R7: 48 sc (48)
R8: (7 sc, 1 inc)*6 (54)
R9-10: 54 sc (54)
R11: (4 sc, 1 inc, 4 sc)*6 (60)
R12-16: 60 sc (60)
R17: 15 sc, ( 1sc, 1 inc)*6, Mark the position of eye 1, 6 sc, Mark the position of eye 2, (1 inc, 1 sc)*6, 15 sc (72)
R18-20: 72 sc (72)
R21: (7 sc, 1 dec)*8 (64)
R22: (3 sc, 1 dec, 3 sc)*8 (56)
R23: (5 sc, 1 dec)*8 (48)
R24: (2 sc, 1 dec, 2 sc)*8 (40)
R25: (3 sc, 1 dec)*8 (32)
R26: (1 sc, 1 dec, 1 sc)*8 (24)
Fasten off and leave long end for sewing.
Install eyes between R16 and R17, 5 stitches apart.
Stuff the cotton fully and pull out the shape of the eye socket.
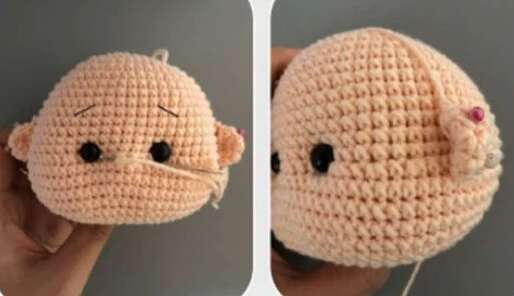
Embroider the nose using skin color thread between R17 and R18, between the eyes, 2 stitches wide, with the edge 2 stitches away from the eyes.
Embroider eyebrows using black thread at position R12, 2 stitches wide.
【Ear】x 2, make with skin color
R1: MR 6 sc
R2: 6 inc (12)
R3: 12 sc
Fasten off and leave long end for sewing.
Sew to the head between R15 and R18, 7 stitches from the eye.
Hand】x 2, make with skin color
R1: MR 4 sc
R2: 4 inc (8)
R3-10: 8 sc
Fasten off and weave in end.
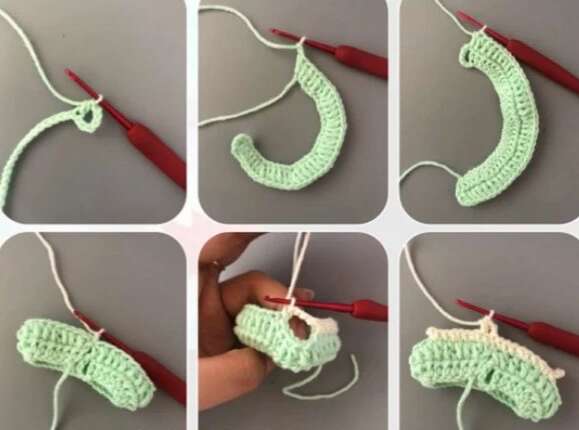
【Leg】x 2, make with skin color
R1: MR 6 sc
R2: (1 sc, 1 inc)*3 (9)
R3-10: 9 sc
The first leg: Break the yarn.
The second leg: Do not break the yarn. Continue to crochet the body.
【Body】make with skin color
R11: 3 ch, link the first leg, 9 sc, 3 sc, 9 sc, 3 sc (24)
R12: (3 sc, 1 inc)*6 (30)
R13-15: 30 sc (30)
R16: (13 sc, 1 dec)*2 (28)
R17: (6 sc, 1 dec, 6 sc)*2 (26)
R18: (11 sc, 1 dec)*2 (24)
R19: (2 sc, 1 dec, 2 sc)*4 (20)
Join hands below to crochet together.
R20: 5 sc(body), 8 sc(hand), 10 sc(body), 8 sc(hand), 5 sc(body) (36)
R21: (2 sc, 1 dec, 2 sc)*6 (30)
Fill the body, not the hands.
R22: (3 sc, 1 dec)*6 (24)
R23: 24 sc (24)
Filling. Fasten off and leave long end for sewing.

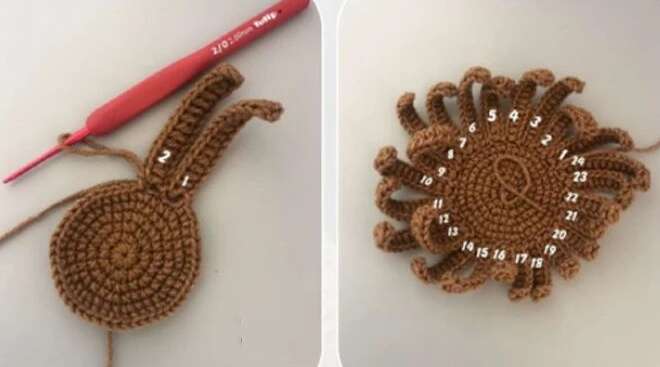
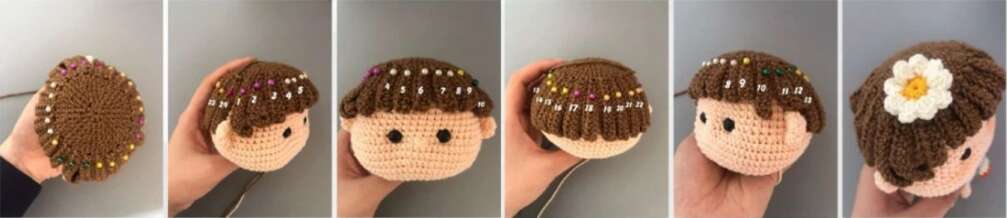
Hair】make with brown color
R1: MR 8 sc (8)
R2: 8 inc (16)
R3: (1 sc, 1 inc)*8 (24)
R4: (1 sc, 1 inc, 1 sc)*8 (32)
R5: (3 sc, 1 inc)*8 (40)
R6: (2 sc, 1 inc, 2 sc)*8 (48)
Start crocheting the hair one by one.
NO. 1: 16 ch, start crocheting from the third stitch from the bottom, 14 hdc, 1 sp, 1 ss
NO. 2: 14 ch, start crocheting from the third stitch from the bottom, 12 hdc, 1 sp, 1 ss
NO. 3: 12 ch, start crocheting from the third stitch from the bottom, 10 hdc, 1 sp, 1 ss
NO. 4-9: 10 ch, start crocheting from the third stitch from the bottom, 8 hdc, 1 sp, 1 ss
NO. 10: 12 ch, start crocheting from the third stitch from the bottom, 10 hdc, 1 sp, 1 ss
NO. 11: 14 ch, start crocheting from the third stitch from the bottom, 12 hdc, 1 sp, 1 ss
NO. 12-24: 16 ch, start crocheting from the third stitch from the bottom, 14 hdc, 1 sp, 1 ss
Fasten off and leave long end for sewing.
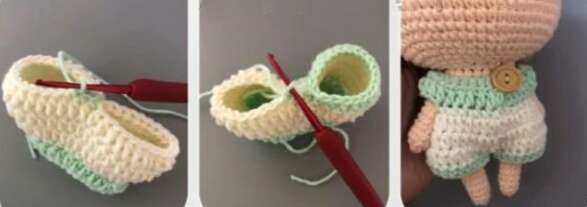
【Jumpsuit】make with green&white color
make with green color
R1: 36 ch, begin crocheting on the seventh stitch from the bottom. (4 hdc, 2 hdc in one stitch)*6, 2 ch, turn (36)
R2: 2 sp, 36 hdc (36)
change to white color
R3: 1 ss on the last stitch of R2, 1 ch, (1 sc, 1 inc)*3, 6 sp, 3 ch, (1 sc, 1 inc)*6, 3 ch, 6 sp, (1 sc, 1 inc)*3 (42)
R4-6: 1 ss on the last stitch of R3, 2 ch, 42 hdc (42)
change to green color, divide the stitches into two 21 stitches and crochet one circle of 21sc each.
Put the jumpsuit on your body and sew the buttons on the back.
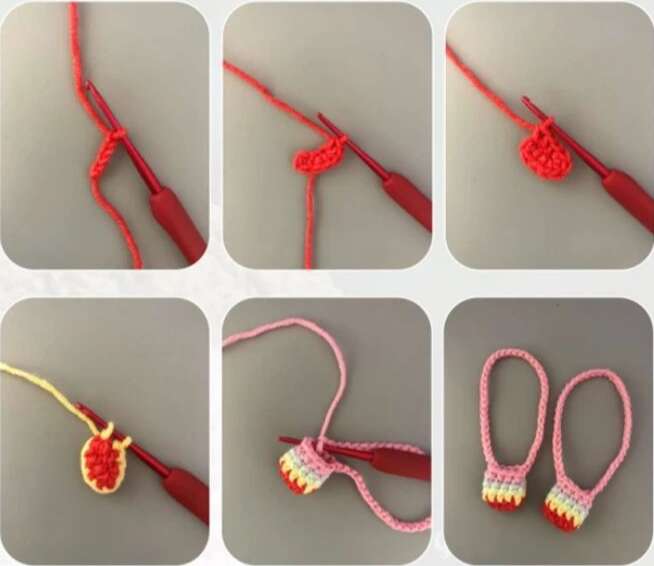
【Rainbow bag】make with red&yellow&green&purple&pink color
make with red color
R1: 4 ch, start crocheting from the penultimate stitch, 1 inc, 1 sc, 4 sc in one stitch, 1 sc, 1 inc (10)
change to yellow color
R2: 10 sc
change to green color
R3: 10 sc
change to purple color
R4: 10 sc
change to pink color
R5: 10 sc, 1 ss
Keep crocheting without breaking the thread. 40 ch, 1 ss lin to sixth stitch of R5.
Fasten off and weave in end.
【Little daisy】make with yellow&white color
make with yellow color
R1: MR 9 sc, 1 ss
change to white color
R2: (2 ch, 2 hdc, 2 ch, 1 ss), Repeat crochet until end.

【Assemble】
1.Sew the body to the head and apply blush appropriately on the cheeks.
2.Fix the hair with positioning pins and stick it with glue. The 1st to 13th hairs are on the forehead, and the 4th to 24th hairs are on the back.
3.Sew the daisy to the top of the head.
- Funny Pictures
-
 Cat Memes for the Purpose of Pure Entertainment
-
 A Friendly Reminder That Not Everything is Terrible
-
 Photos to Remind You That Life is Beautiful
- Recipes
-
 Paczki (Polish Donuts)
-
 Baked “Fried” Oreos
-
 Tiramisu Crepe Cake
- Lifehacks
-
 Triad Crochet Stitch + Blanket Pattern
-
 Crab Stitch Edging Tutorial
-
 7 Surprisingly Useful Things You Can Do With Expired Foods
- Crochet Ideas
-
 Crochet Ruby the Dragon
-
 Crochet Rowan the Rabbit
-
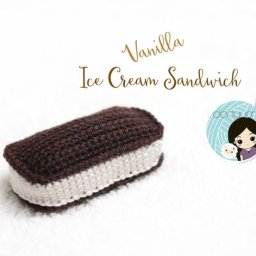 Crochet Vanilla Ice Cream Sandwich
- DIY
-
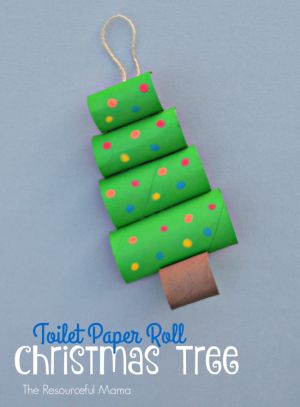 Toilet Paper Roll Christmas Tree
-
 DIY Disco Ball Ornaments
-
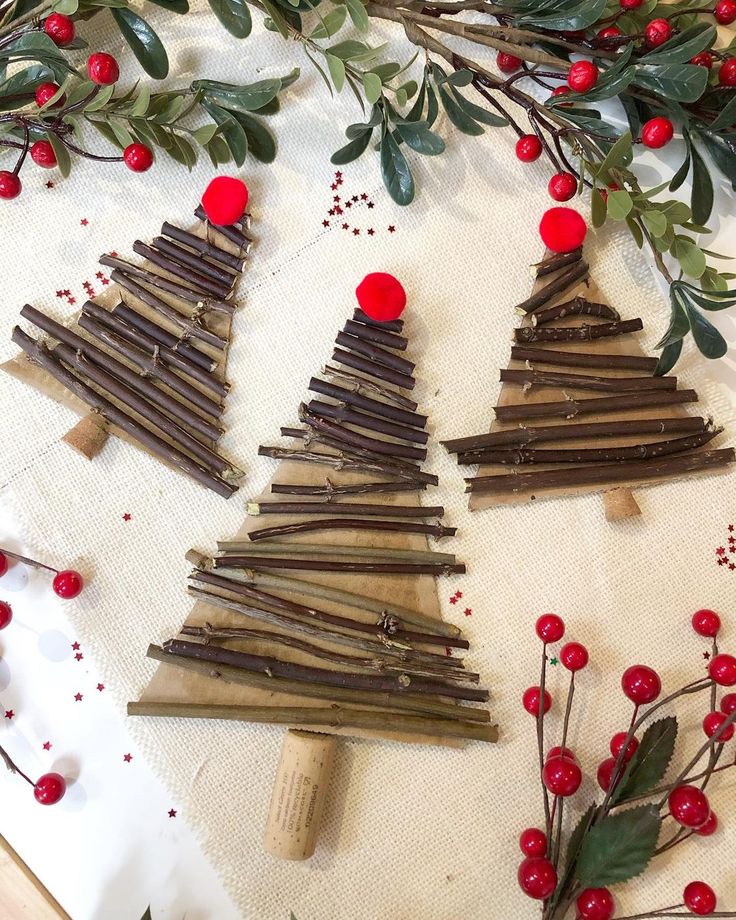 Easy Stick Trees
- Knitting Ideas
-
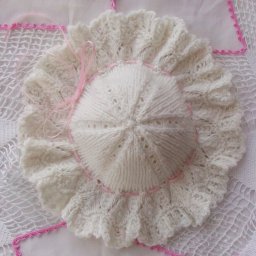 Knitted Beautiful Hat
-
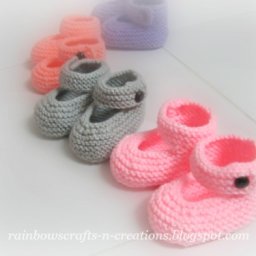 Knitted Simple Baby Boots
-
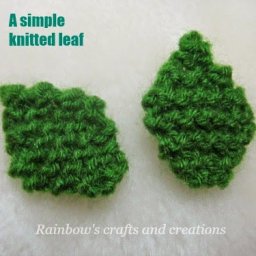 Knitted Simple Leaf