

Make This Adorable Crochet Teddy Bear Daisy Amigurumi — Step-by-Step Pattern & Tips

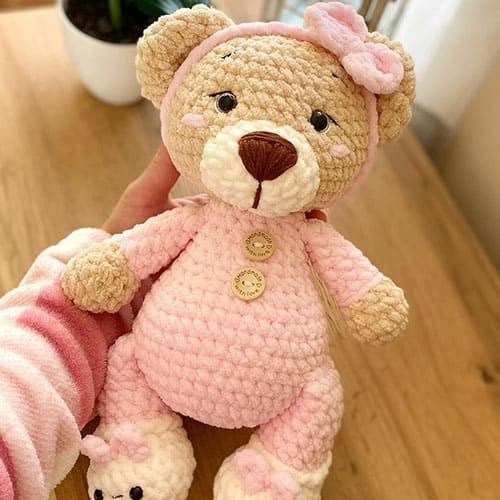
This Crochet Teddy Bear Daisy Amigurumi is a sweet, huggable project that combines the timeless charm of a teddy bear with a delicate daisy-inspired look. The pattern below walks you through the materials, abbreviations, and step-by-step instructions for the arms, legs, body, head, ears, face and tail, plus assembly. Suitable for crocheters familiar with basic amigurumi techniques. Customize colors and add daisy embellishments to make yours unique.
Crochet Teddy Bear Daisy Amigurumi is the sweetest and most huggable little creation you can make! This adorable amigurumi design combines the timeless charm of a teddy bear with the delicate beauty of daisy flowers. The soft yarn and intricate crochet stitches come together perfectly to bring this lovable bear to life. Whether you're making it as a gift for a dear friend or crafting it just for fun, this project is sure to bring a smile to your face. Get your crochet hooks ready and prepare for a fun and rewarding journey of creating your very own Crochet Teddy Bear Daisy Amigurumi!
Materials
To create the Crochet Teddy Bear Daisy Amigurumi, you will need the following materials:
- Plush yarn with a yardage of 100 g and 70 m, available in pink, milky, and light brown colors.
- Hook N. 6mm.
- Eyes 12 mm.
- Scissors.
- Stitch marker.
- Wide-eyed needle.
- Holofiber filling.
Abbreviations
Familiarize yourself with the abbreviations used in this guide:
- ch - chain
- mr - magic ring
- sc - single crochet
- inc - increase
- dec - decrease
- blo - back loop only
- slst - slip stitch
Arms
Start with the light brown color.
- 6 sc in mr
- 6 inc (12)
- (3sc, inc) * 3 (15)
- (3sc, dec) * 3 (12)
- (4sc, dec) * 2 (10)
- Change color to pink – 10 slst
- BLO, 10 sc
- (3sc, dec) * 2 (8)
- Rows 9-13: 8 sc (5 rows)
Do slst in the next stitch, stuff primarily the lower part of the arms, and cut the yarn.
Crochet 2 pieces.
Legs
Start with the milky color.
- 8 sc in mr
- 8 inc (16)
- (3sc, inc) * 4 (20)
- (9sc, inc) * 2 (22)
- 22 sc
- 1sc, (1sc, dec) * 3, 5sc, 1 dec, 5 sc (18)
- (dec, 1sc) * 3, 3sc, dec, 4 sc (14)
- Change color to pink – 14 slst
- BLO, 14 sc
- Rows 10-15: 14 sc (6 rows)
Do slst in the next stitch, stuff the legs, and cut the yarn.
Crochet 2 pieces.
Body
Use pink color for the body.
- 8 sc in mr
- 8 inc (16)
- (1sc, inc) * 8 (24)
- (2sc, inc) * 8 (32)
- (3sc, inc) * 8 (40)
- Rows 6-7: 40 sc (2 rows)
- Incorporate the legs: 7 sc together with a leg, 6 sc, inc, 6sc, 7 sc together with the other leg, 6 sc, inc, 6 sc (42)
- 3sc, inc, 20sc, inc, 17 sc (44)
- 44 sc
- (9sc, dec) * 4 (40)
- (8sc, dec) * 4 (36)
- (4sc, dec) * 6 (30)
- (3sc, dec) * 6 (24)
- 24 sc
- (10sc, dec) * 2 (22)
- (9sc, dec) * 2 (20)
- Incorporate the arms: 2sc, 4 sc together with an arm, 6sc, 4 sc together with the other arm, 4 sc (20)
- (8sc, dec) * 2 (18)
- Change yarn color to brown – 18 sc
Stuff the body with filling, distributing it first along the sides, then in the center.
Do not cut the yarn; continue crocheting in the round.
Head
Continue crocheting with brown color.
- 18 inc (36)
- (3sc, inc) * 9 (45)
- (14sc, inc) * 3 (48)
- Rows 24-26: 48 sc (3 rows)
- (10sc, dec) * 4 (44)
- (9sc, dec) * 4 (40)
- 40 sc
- (8sc, dec) * 4 (36)
- 36 sc
- (4sc, dec) * 6 (30)
- 30 sc
- (3sc, dec) * 6 (24)
- (1sc, dec) * 8 (16)
- 8 dec
Insert the eyes between the 30 and 31 row, at a distance of 6 sc.
Stuff the head as the opening narrows. Pay special attention to the neck. Distribute the stuffing along the sides, shape as needed, and add to the center if necessary.
Ears
- 8 sc in MR
- 8 inc (16)
- (3sc, inc) * 4 (20)
- Rows 4-5: 20 sc
Make slst and leave a long tail for sewing to the head.
Face
- 8 sc in MR
- 8 inc (16)
- 2sc, (1sc, inc)*2, 4sc, (1sc, inc)*2, 2 sc (20)
- 20 sc
Do slst and leave a long tail for sewing to the body.
Tail
- 6 sc in MR
- 6 inc (12)
- (3sc, inc) * 3 (15)
- (3sc, dec) * 3 (12)
Do slst and leave a long tail for sewing to the body.
Assembly
- Sew the ears between rows 4 and 11 (top view).
- Sew the face between rows 23 and 30, or to your liking.
- Sew the tail between rows 5 and 10 of the body, or as preferred.
- Join the two colors on the legs with sc.
- Embroider the nose to your taste. You can also attach a ready-made plastic nose.
- Secure the legs to the body with 2-3 stitches.
Your Crochet Teddy Bear Daisy is ready!
Tips & Variations
- Customize colors: switch the pink, milky and brown for any palette you like.
- Daisy detail: add small crocheted or felt daisy appliqués and sew them to the ear or body for the daisy look.
- Eyes: if making for small children, consider embroidering eyes instead of using plastic safety eyes.
- Stuffing: add stuffing gradually and shape as you go to avoid lumps and to define neck and limbs.
Finishing & Care
- Sew seams securely and weave in ends to prevent unraveling.
- Care: spot clean or hand wash gently and air dry to keep the plush texture intact.
- Funny Pictures
-
 Top Grinch Memes to Get You Into Christmas Spirit
-
 These Lazy Cat Memes are All You Need This Caturday
-
 Perfect Cat Memes to Fulfill the Plan for This Friday
- Recipes
-
 Quinoa Arugula Salad with Pineapple
-
 Chilaquiles Frittata Bake
-
 Fresh Melon and Sugar Snap Pea Salad
- Lifehacks
-
 Crochet pineapple edging
-
 Crochet Cable-Shell Edging
-
 Crochet Long Puff Stitch
- Crochet Ideas
-
 Crochet Pumpkin Bear
-
 Crochet Santa Placemat
-
 Crochet Lightweight Shawl
- DIY
-
 How to Crochet a Cute Cupcake Trinket Box — Free Step-by-Step Pattern
-
 Easy Watercolor Easter Eggs: Mess-Free Marker & Bag Method
-
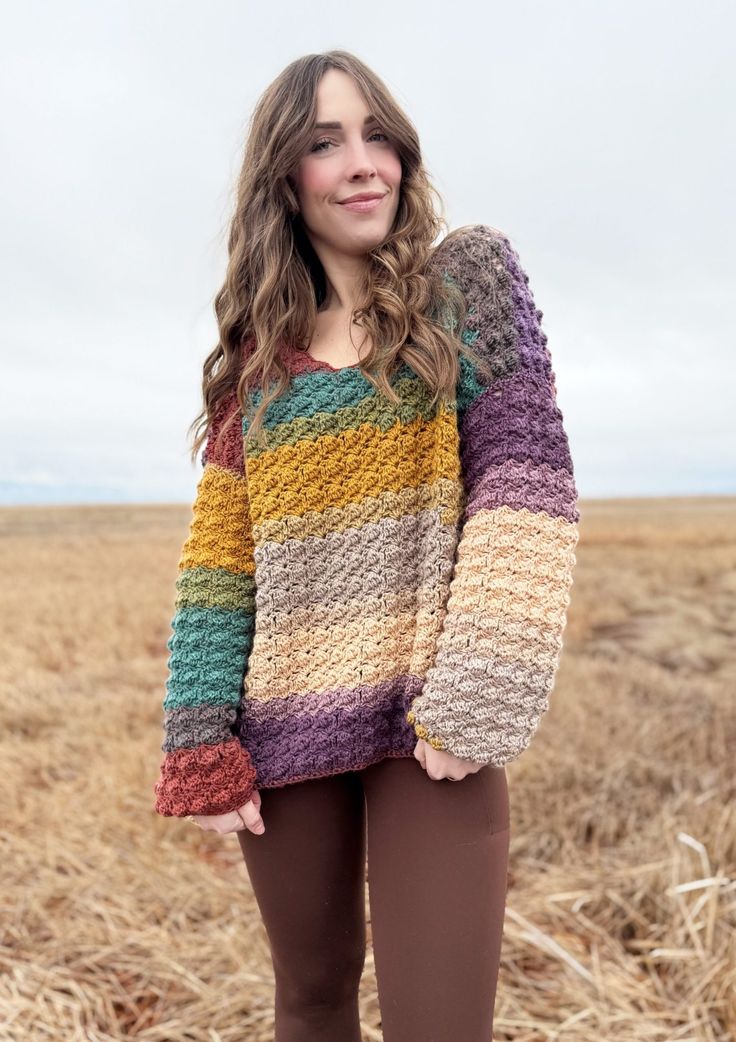 Crochet Echoes Pullover: Detailed Pattern & Tips for an Oversized Drop-Shoulder Sweater
- Knitting Ideas
-
 DIY Knitted Waffle Kitchen Towel — Easy Pattern for a Textured, Absorbent Cotton Towel
-
 Chic Knitted Pink Beret — Easy Pattern & Step-by-Step Instructions
-
 Cozy Top‑Down Knitted Raglan Sweater Pattern — Sizes S–L (Merino)