

Make This Cute Crochet Ragdoll Bunny Amigurumi — Free Step-by-Step Pattern

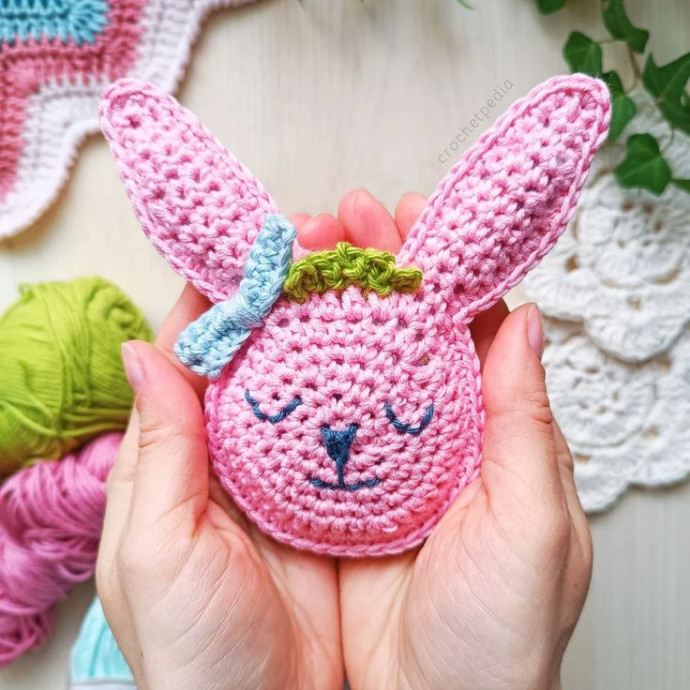
Crochet Ragdoll Bunny Amigurumi is an adorable and delightful handmade toy that brings joy and sweetness to both adults and children alike. This cute and cuddly bunny is perfect for snuggling and makes a charming addition to any toy collection or home decor. Its soft yarn and intricate design give it a unique and lovable personality that is sure to brighten anyone's day. Crochet Ragdoll Bunny Amigurumi is a wonderful gift that is guaranteed to bring smiles and warmth wherever it goes.
Materials and Tools
- Alison & Mae Cotton Bamboo, one skein of each color you want to use. You can use any worsted-weight yarn with a corresponding hook.
- 3.5 mm crochet hook
- Polyfill
- Stitch markers, scissors, yarn needle, embroidery thread (optional)
REMEMBER! If you choose a different yarn weight, remember to use a corresponding hook size, and be prepared for the final product to have different measurements.
Measurements
~13 cm tall (~5.12 inches)
Stitches and Abbreviations
- Magic ring
- ch – Chain stitch
- sl st – Slip stitch
- sc – Single crochet
- hdc – Half double crochet
- dc – Double crochet
- st – Stitch
- inc – Increase = 2 single crochets in one stitch
- dec – Decrease = sc2tog – Decrease using single crochet
- 2 hdc in one st – Increase using half double crochet
Ragdoll Bunny Free Crochet Pattern
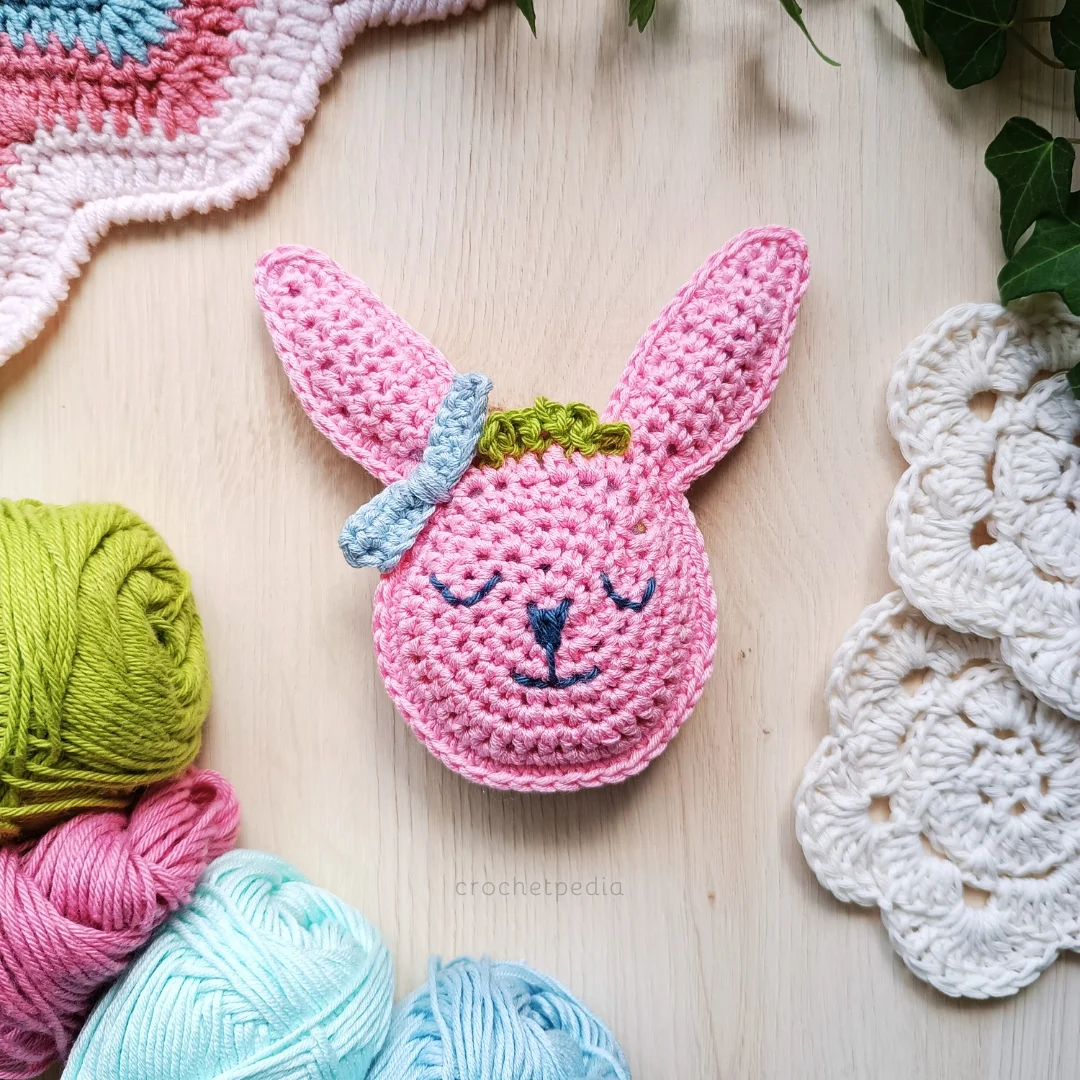
First, we crochet two flat bunny heads: a flat egg-shaped circle with two ears worked in back-and-forth rows. Then, we join the two parts using sc stitches and we fill the toy with polyfill as we go. Lastly, we add embroidery, fringe, and a bow.
Notes
- The numbers in brackets (#) signify the overall stitch count for a given row or round.
- 1 ch and 2 ch at the beginning of the round (turning chains) don’t count as a stitch and aren’t included in the overall stitch count.
The Bunny Face
Make the Circle:
Start: magic ring
Round 1: 6 sc into the loop, close with a slip stitch
Round 2: 1 ch, (inc = 2 sc in one st) x6, sl st (12)
Round 3: 1 ch, (inc, 1 sc) x6, sl st (18)
Round 4: 1 ch, (1 sc, inc, 1 sc) x6, sl st (24)
Round 5: 1 ch, (2 sc, inc, 1 sc) x6, sl st (30)
Round 6: 2 ch, (2 hdc in one st, 4 hdc) x6, sl st (36)
Shape the top:
1 ch, 1 sc, 2 hdc in one st, 2 dc in one st, 1 dc, 1 dc, 2 dc in one st, 2 hdc in one st, 1 sc.
Continue around:
Place the stitch marker on the first single crochet.
(5 sc, inc) x2, 4 sc, inc, 5 sc, inc, 5 sc.
You now have 44 stitches all around.
Ear One
Turn after every row.
Row 1 / RS: 1 sl st, 1 ch, 3 sc, turn. (3)
Row 2 / WS: 1 ch, 3 sc. (3)
Row 3 / RS: 1 ch, inc, 1 sc, inc (5)
Rows 4-7: 1 ch, 5 sc (5)
Row 8 / WS: 1 ch, 3 sc, dec (4)
Row 9 / RS: 1 ch, 4 sc (4)
Row 10 / WS: 1 ch, 2 sc, dec (3)
Row 11 / RS: 1 ch, 3 sc (3)
Row 12 / WS: 1 ch, 1 sc, dec (2)
Row 13 / RS: 1 ch, dec (1)
Cut the yarn and secure the last stitch.
Ear Two
Turn the work wrong side up and attach the yarn to the stitch marked with the marker. You start on the other side, but the instructions remain the same.
Turn after every row.
Row 1 / WS: 1 sl st, 1 ch, 3 sc, turn. (3)
Row 2 / RS: 1 ch, 3 sc. (3)
Row 3 / WS: 1 ch, inc, 1 sc, inc (5)
Rows 4-7: 1 ch, 5 sc (5)
Row 8 / RS: 1 ch, 3 sc, dec (4)
Row 9 / WS: 1 ch, 4 sc (4)
Row 10 / RS: 1 ch, 2 sc, dec (3)
Row 11 / WS: 1 ch, 3 sc (3)
Row 12 / RS: 1 ch, 1 sc, dec (2)
Row 13 / WS: 1 ch, dec (1)
Cut the yarn and secure the last stitch.
Make two of these bunny faces.
Joining Two Parts
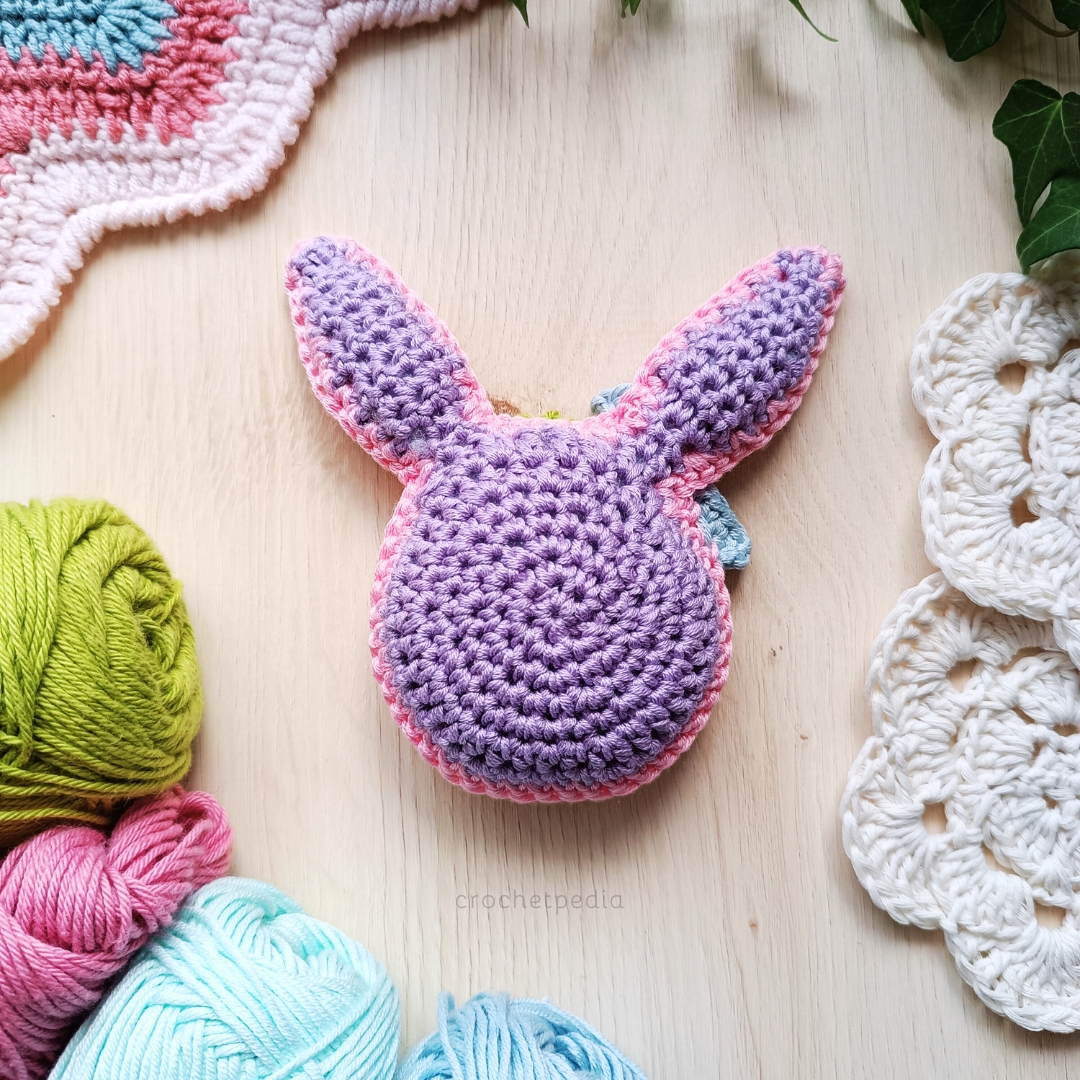
Put one piece on the other wrong side inside.
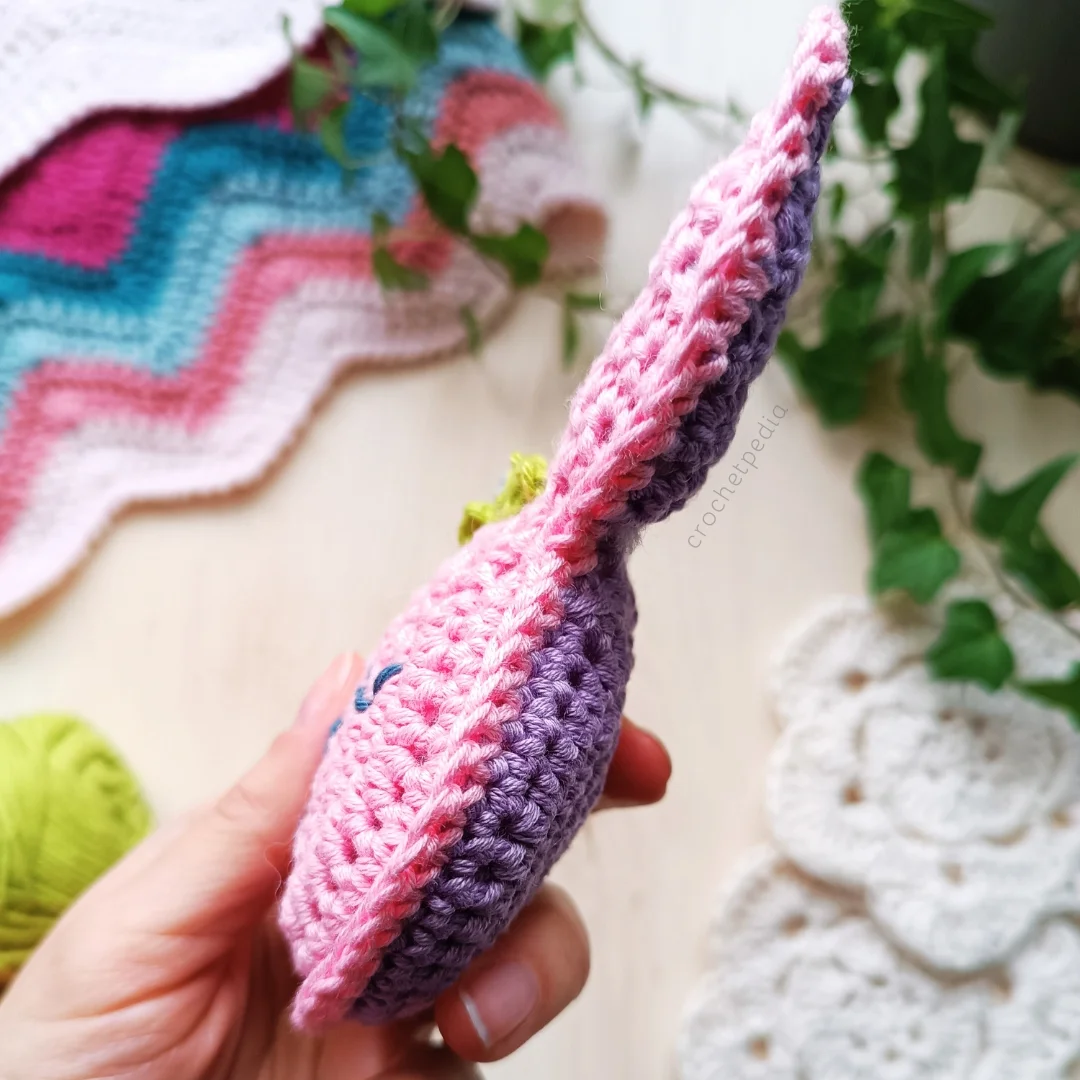
Take the color of yarn you used for the front of the face and attach it to the inside corner of the Ear Two (in the crevice – as shown in the photo below).
Join two parts by working single crochet stitches along the edge through both parts at once.
When you reach the top of the ear, work 3 sc in the top stitch. Add increases wherever you feel the need to make the edge more rounded.
Stuff the ear with polyfill before you continue. It may be harder to fill it later on because of the small opening.
Continue working all around the bunny face, roughly 1 sc per 1 row or stitch.
Crochet around Ear One and stuff it.
Fill the Bunny Face.
Continue to close the ragdoll. When you reach your starting point, slip stitch in the first sc, cut the yarn, and weave in the ends.
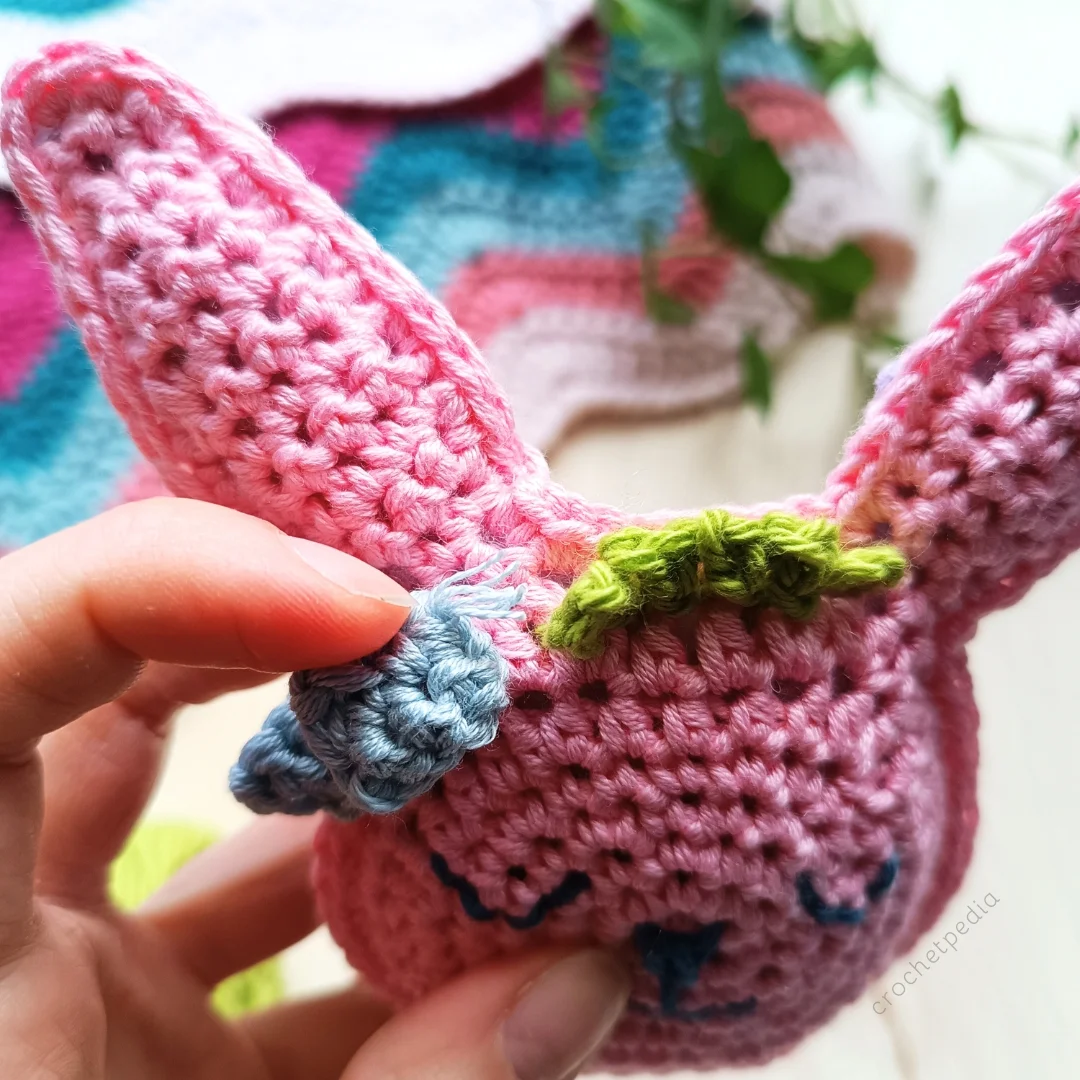
Embroidery
Use a tapestry needle and yarn in a contrasting color to create the bunny face. Hide the yarn inside the doll by weaving it through the filling (it will get stuck there). You can make two faces showing different emotions on each side.
Fringe
Find 6 central stitches between the bunny ears.
Attach the yarn to the first stitch on your right, inserting the hook under the stitch.
Chain 5 and slip stitch it to the next stitch, again going under.
Repeat until you reach the last of your 6 stitches. Make a slip stitch, cut the yarn, and hide the ends.
Bow
Take another color of yarn and make a small rectangle:
Start: Chain 10.
Row 1: 1 ch, 1 sc in each stitch, turn. (10)
Row 2: 1 ch, 1 sc in each stitch. (10)
Cut the yarn and weave in the ends.
Sew it with lots of yarn to the bunny head, creating the thick center of the bow. Weave the ends inside the crochet ragdoll bunny.
- Funny Pictures
-
 Top Cat Memes to Let You Feel Happy
-
 The Most Life Bonded Memes You’ll See Today
-
 Job Memes You Should Probably See on Monday
- Recipes
-
 Vegan Dinner Rolls (Soft & Fluffy)
-
 Easy Cheesy Scalloped Potatoes
-
 Cranberry Orange Scones
- Lifehacks
-
 Granny Circle Placemats
-
 Bobble Shell Stitch Crochet Border Photo Tutorial
-
 How to Crochet the Flower Puff Stitch Photo Tutorial
- Crochet Ideas
-
 Crochet Spiral Messy Bun Hat Pattern — Cozy Beanie for Messy Buns
-
 Boho Crochet Crop Top Pattern — Easy Summer Top (Sizes S–L)
-
 Make a Cute Crochet Heart Keychain — Easy Step-by-Step Pattern
- DIY
-
 DIY Butterfly Terrarium Jar: Easy Step-by-Step Craft to Make Paper Butterflies Flutter in a Jar
-
 Cozy Crochet Summit Scarf Pattern — Easy Berry Stitch Scarf (90″ x 10.5″)
-
 Cozy Crochet Woven Lines Chunky Throw — Pattern & Instructions
- Knitting Ideas
-
 Wave Stitch Knitting Pattern — Easy 8-Row Repeat for Scarves, Blankets & Sweaters
-
 How to Knit the Stockinette Chevron Stitch — Elegant Zigzag Pattern for Scarves, Blankets & Sweaters
-
 Norwegian Fir Stitch: Cozy Nordic Knit Pattern for Scarves, Hats & Sweaters