

Adorable Crochet Amigurumi Easter Egg Bunny — Step-by-Step Pattern

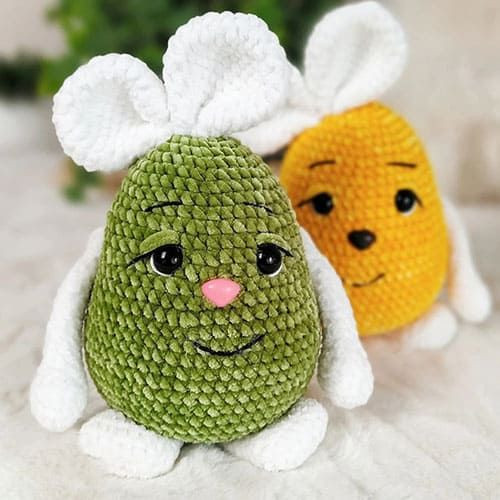
The Crochet Amigurumi Easter Egg Bunny is the cutest addition to your holiday decorations! This adorable bunny is perfect for spreading Easter joy with its fluffy yarn and sweet details. Whether you're making it as a gift for a loved one or simply to add a touch of whimsy to your own space, this little bunny will surely bring smiles all around. With its pastel colors and charming design, creating this crochet amigurumi Easter egg bunny is not only fun but also a wonderful way to celebrate the season in a playful and crafty way.
Recommended Materials
To make the Crochet Amigurumi Easter Egg Bunny, you will need the following materials:
- Katia velvet mini (50g/75m), one skein in any color for making the egg, and a skein in white for making the arms, feet, ears, and tail.
- Some black and white yarn for embroidering eyes (eyebrows, eyelashes), I used Schachenmayr Catania.
- Toy eyes 12 mm.
- Brown nose for mascots 16 mm.
- Fiberfill.
- Crochet hook size: 3 mm.
- Knitting/tapestry needle.
- Strong sewing thread.
- Stitch marker.
- Quick-drying gel glue.
Easter Egg Instructions
We crochet the egg with a 3 mm hook and colored yarn. It doesn’t matter if the stitch marker is at the back or the front.
- R1. 7 sc in MR
- R2. inc*7 =14 sc
- R3. (sc, inc)*7 = 21 sc
- R4. (2sc, inc)*7 = 28 sc
- R5. 28 sc
- R6. (3sc, inc)*7 = 35 sc
- R7. 35 sc
- R8. (4sc, inc)*7 = 42 sc
- R9-10. 42 sc
- R11. (5sc, inc)*7 = 49 sc
- R12-13. 49 sc
- R14. (6sc, inc)*7 = 56 sc
- R15-16. 56 sc
- R17. (7sc, inc)*7 = 63 sc
- R18-27. (10 times) 63 sc
- R28. (7sc, dec)*7 = 56 sc
- R29. 56 sc
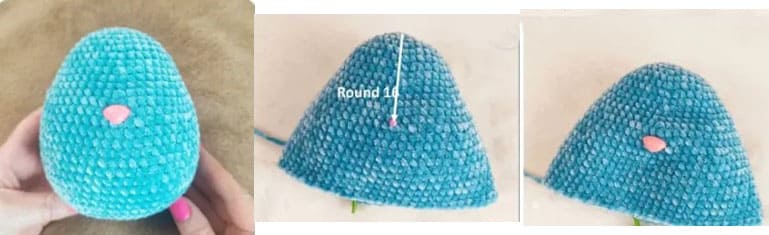
- Insert the nose at the height of row 16.
- R30. (6sc, dec)*7 = 49 sc
- R31. (5sc, dec)*7 = 42 sc
- R32. (4sc, dec)*7 = 35 sc
- R33. (3sc, dec)*7 = 28 sc
- Fill the egg with stuffing for plush toys.
- R34. (2sc, dec)*7 = 21 sc
- R35. (sc, dec)*7 = 14 sc
- R36. dec*7
Finish off and hide the yarn end inside.
Paws Instructions
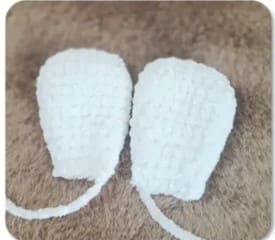
The paws are made with white yarn.
- R1. 6 sc in MR
- R2. inc *6 = 12 sc
- R3-5. (3 times) 12 sc
- R6. 2 sc, dec*4, 2 sc = 8 sc
- R7-17. (11 times) 8 sc
- R18. dec* 4.
Do not stuff the paws. Finish off and hide the end yarn inside.
Feet Instructions
The feet, just like the paws, are made with white yarn.
- R1. 7 ch, start from the second chain stitch, 5 sc, 3 sc into the last chain stitch 4 sc, inc = 14 sc
- R2. inc, 4 sc, inc*3, 4 sc, inc*2 = 20 sc
- R3-4. 20 sc
- R5. (8sc, dec)*2 = 18 sc
- R6-7. 18 sc
- R8. (4sc, dec)*3 = 15 sc
- R9. 15 sc
- R10. (3sc, dec)*3 = 12 sc
- R11. 12 sc
- R12. dec*6
Do not stuff the feet. Finish off and hide the yarn end inside.
Ears Instructions
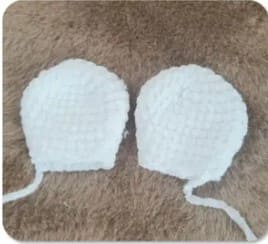
The ears are made with white yarn.
- R1. 7 sc in MR
- R2. inc*7 = 14 sc
- R3. (sc, inc)*7 = 14 sc
- R4. (2sc, inc)*7 = 21 sc
- R5-6. 28 sc
- R7. (12sc, dec)*2 = 26 sc
- R8. (11sc, dec)*2 = 24 sc
- R9. (10sc, dec)*2 = 22 sc
- R10. (9sc, dec)*2 = 20 sc
- R11. (8sc, dec)*2 = 18 sc
- R12. 18 sc
Finish off, leaving a longer yarn end for sewing the ears.
Tail Instructions
The tail is made with white yarn.
- R1. 6 sc in MR
- R2. inc*6 = 12 sc
- R3. (sc, inc)*6 = 18 sc
- R4. (2sc, inc)*6 = 24 sc
- R5-7. 24 sc
- R8. (2sc, dec)*6 = 18 sc
- R9. (sc, dec)*6 = 12 sc
- R10. dec*6
Finish off and hide the yarn end.
Sewing Details
We start with the eyes- we will sew them at the height of row 12. First, mark the center just above the nose using pins, then measure 4 single crochet stitches from the center on each side, as shown in the picture.
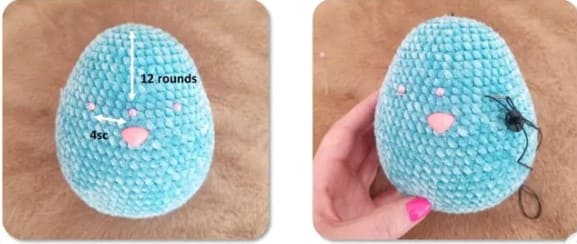
Sewing the eyes starts from the top of the egg. First, sew one eye, then the other, and finish again at the top of the head. Remember to insert the yarn into the magic ring and bring it out at the same spot- this way, after tying the ends, you can easily hide them inside the egg.
Embroider the outlines around the eyes using white yarn. First mark their placement with pins. To prevent the yarn from slipping under the eyes, it’s a good idea to glue them with fast drying gel adhesive. Start again from the top of the head.
Embroider the eyelids using the same yarn as the egg. Start from the top, first stitching one eyelid, then moving on to the other. Finish again at the top of the head.
Embroider the eyelashes and eyebrows using black yarn. First, mark their size with pins, then embroider the eyelashes on one eye, followed by the other.
Do not finish off yet- move on to embroidering the eyebrows. First, mark their size, then stitch them using the same yarn. Finish at the top of the egg, tie a knot, and hide it inside.
Sew the feet so that they slightly overlap the egg and face outward. After attaching the paws, sew the tail on the opposite side.
Now, it’s time for the ears. First, fold one ear in half and sew it, then repeat the same with the other. Next, place both ears together and sew them to each other. Attach the finished ears to the top of the egg, either in the center or slightly to the side, depending on your preference.
Finally, embroider the smile. First, mark the position and size of the mouth with pins. I stitched my egg’s smile two rows below the nose, with a width of 6 single crochet stitches. In the row below, I mark two points to create a nice curve.
🧶 Listen while you crochet
3 cozy stories from a little yarn shop
Enjoyed it? A like and a subscribe help our little channel grow 💛
- Funny Pictures
-
 Relationship Memes to Send to Your Special Someone
-
 Parental Humor Memes That Perfectly Sum up What Having Children is Like
-
 Funny and True Phrases to Look At
- Recipes
-
 Pumpkin Mousse (10 minute no-bake dessert!)
-
 Baked Lemon Chicken and Potatoes
-
 Sour Cream Coffee Cake
- Lifehacks
-
 3D Marshmallow Stitch Crochet Tutorial
-
 Crochet the Easy Crumpled Griddle Stitch
-
 Multicolored Checkerboard Stitch Crochet Tutorial
- Crochet Ideas
-
 Adorable Crochet Sloth: Easy Amigurumi Pattern & Step-by-Step Instructions
-
 Crochet Summer Blush Tank — Top-Down Pattern for Sizes XS–5X
-
 Crochet Plush Sheep Amigurumi — Step-by-Step Pattern to Make a Fluffy Toy
- DIY
-
 Turn Bottle Caps into Adorable Recycled Easter Bunny Decorations — Easy DIY
-
 Adorable DIY Easter Egg Bunnies — Easy Step-by-Step Craft for All Ages
-
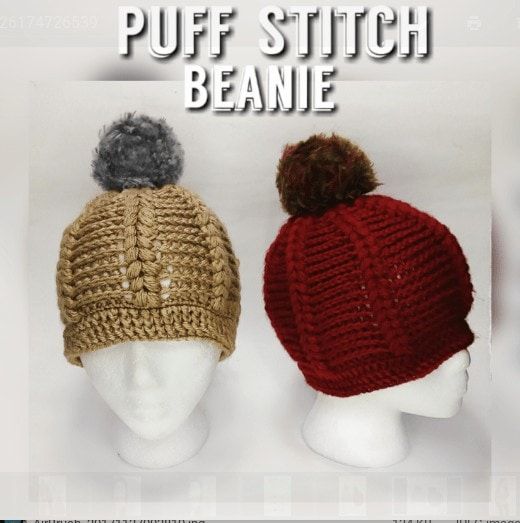 Free Crochet Braided Puff Stitch Hat Pattern — Child (3–5) & Adult Sizes
- Knitting Ideas
-
 Knitted Eyelet Skirt Pattern — Medium (Waist 34 in) with Ribbon Eyelets & Drawstring
-
 Delicate Knitted Lace Cap — Free Pattern, Measurements & Step-by-Step Instructions
-
 Knitted Slung Bag Pattern — Easy Cotton Beach Tote (Rowan Denim)