Crochet Toilet Paper Roll Cover

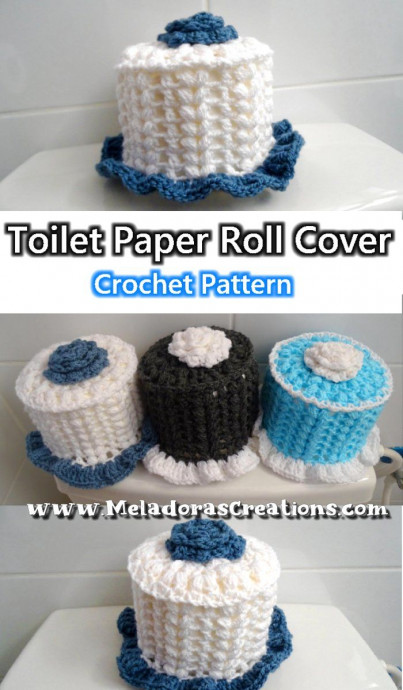
Crochet toilet paper roll covers are not just practical but also add a touch of charm to your bathroom decor. These handmade covers come in a variety of colors and patterns, making them a fun and unique way to spruce up your space. Additionally, they provide a cozy and inviting feel while keeping your spare toilet paper rolls neatly organized. Whether you opt for a simple design or a more intricate one, crochet toilet paper roll covers are a delightful addition to any bathroom. So, why not add a splash of creativity to your home with these adorable and functional accessories?
Materials Needed
For this project, you will need:
- HOOK: 5 mm hook or size H hook for the US
- YARN: two colors skeins of worsted weight yarn, 4 ply US, 10 ply AU
- A tapestry needle
- Stitch markers (I used 5 to 7 bits of string as markers)
Size of Toilet Paper Roll
This pattern is designed to fit a roll of toilet paper that is 5 inches to 12 cms across the top & 15 1/5 inches or 39 ½ cms in circumference.
Abbreviations
- ch = Chain
- sl st = Slip Stitch
- st = Stitch
- sk = Skip
- Sk a st = Skip a stitch
- beg = beginning
- YO = Yarn Over
- SC = Single Crochet
- DC = Double Crochet
- TRC = Triple Crochet
- SCFS = Single Crochet Foundation Stitch
- TCFS = Triple Crochet Foundation Stitch
- V stitch = DC ch 1 DC
Special Stitch
Puff Stitch: You will YO then insert your hook into the desired stitch. Then pull up a loop. Repeat this 2 more times, giving you 7 loops on your hook. YO and pull through all your loops.
Repeat what’s in between | for # amount of times.
Repeat what’s in between * for the rest of the round.
Top of Holder – First Piece
Using your MAIN Color (I used white)
To Start:
ch 4, sl st in 1st beg ch to form a ring.
Round 1
ch 2 & DC into ring, ch 1
*|DC 2 & ch 1| repeat 4 more times.*
To end round: Don’t ch 1 after the last DC, just sl st into beg ch 2.
You should have 12 DC’s and 6 ch 1 spaces.
Round 2
Ch 2 & crochet a single Puff St here. We’ll be ending our round by creating the second one later. * Ch 2, then Puff stitch in next st and ch 1. Puff stitch in the SAME st.* repeat for the round.
To end round: Finish your second puff stitch and
Ch 1. sl st into the Ch 1 space to end.
Round 3
Ch 2 & crochet a single Puff St here. * Ch 2,
DC, CH 2, DC to create a V st in the next Ch 2 space.
Then Ch 1 & Puff St, Ch 2, Puff St, ch 1, into the next Ch 2 space *
To end round: Finish your second Puff St and
Ch 1. sl st into the Ch 1 space to end.
Round 4
Ch 2 & crochet a single Puff St here. Ch 2 *Then Puff St, ch 2, Puff stitch Ch 2, in the V st. Then Puff St, ch 2, Puff stitch Ch 2 in between the 2 Puff Stitches.*
Repeat for the round,
To end round: Finish your second Puff St and
Ch 1. sl st into the Ch 1 space to end.
Then Ch 1 and cut your yarn, leaving a bit of a tail that can be hidden later with a tapestry needle, cut your yarn.
Side of Holder – Second Piece
Using your MAIN Color Again
Round 1
SCFS 40 then sl st in first beg SC to form a ring. CH 2
Round 2
Skip the first stitch (The one you just slip stitched into) and second stitch and put a *Puff stitch in next st and ch 1. Puff stitch in the SAME st and ch 1. Sk a st and DC in next, Sk a st* Repeat for the round.
To end round: sl st in top of ch 2
Round 3
Ch 2
Now using the space between the two puff stitches from the last row, you’ll want to *Puff st & ch 1, Puff st & ch 1 into that space. Sk a st and DC in DC. Sk a st* Repeat for the round.
To end round: sl st in top of ch 2
Rounds 4 – 7
Repeat Round 3.
To end on Round 7, sl st in top of ch 2, ch 1, and leaving a bit of a tail that can be hidden later with a tapestry needle, cut your yarn.
Connecting Your Pieces
It makes it so much easier to mark your piece for sewing when you have them on the toilet paper roll, so go grab one and put the side piece on. Make sure the stitches are going in the right direction! Then grab your top piece and set it on top. Use the front or back side, whichever way you like best.
I cut bits of string from my secondary color to use as marker holders here.
There are more Puff Stitches on the Side piece than there are on the Top piece, so you won’t be able to line the puffs exactly perfectly, but you can for a lot of them. Do your best.
Then insert your hook under a stitch on both pieces and put a tail here to hold it in place. Repeat this around the whole piece until it’s all tied down. This will help keep it in place as you sew, as well as help you crochet more evenly. Once you have it marked, then remove the toilet paper roll for the sewing portion.
I DID NOT turn my piece inside out. I like the more even border it leaves behind.
Create a slip knot with your MAIN COLOR again and insert your hook going in through a stitch on both pieces. Pull up a loop, 2 loops on your hook, YO and pull through both loops to create your SC attachment.
*Ch 1, skip a stitch and SC in next* repeat to attach. Remove your markers as you go.
Tips for Keeping Your Sewing Even
Now while your pieces aren’t perfectly aligned, I did find a way to keep it more even at the start anyway.
I attached my yarn at a place where my puff stitches were aligned on both V Puff stitches on my Side piece and Top Piece and did my SC attachment there.
Then SC and ch 1 on both sides of my DC’s on the Side piece which ended up in the same ch 2 space on my TOP piece. Doing that helped me stay a bit more even, but as I said, the pieces aren’t perfectly aligned, so you can only get away with it a few times. Just wanted to mention it in case it helps you keep it more even.
Once you’re done attaching both pieces, then it’s time to make the bottom ruffle, so turn your piece over. We’ll be crocheting on the bottom side of the stitch.
Creating the Bottom Ruffle
Grab your SECONDARY color now.
I used both loops of the stitch when crocheting here at the bottom.
TCFS attach your yarn to any stitch on the bottom of your piece. TRC 2 more times in this same stitch.
*TRC 3 in all your sts around*
To end: ch 1 and leaving a bit of a tail that can be hidden later with a tapestry needle, cut your yarn.
- Funny Pictures
-
 Feline Memes to Feel Better
-
 Best Funny Pics of the Day Especially for You
-
 Pictures That Have No Right to be This Funny
- Recipes
-
 Strawberry Banana Bread
-
 Kraut-Tots
-
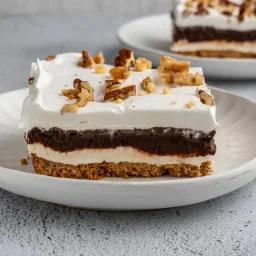 Chocolate Delight Dessert
- Lifehacks
-
 7 Crochet Tips & Tricks
-
 Raspberry Crochet Stitch
-
 Crochet Tutorial: Popcorn Stitch + Printed PDF
- Crochet Ideas
-
 Crochet Snorlax Plushie Doll
-
 Crochet Cat in 1 Row
-
 Crochet Tiny Chick Amigurumi
- DIY
-
 Popsicle Stick and Jingle Bell Christmas Tree Ornament
-
 Upcycled Mason Jar Chicken Vase
-
 Make A Candle Holder From Plastic Spoons
- Knitting Ideas
-
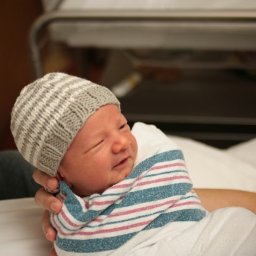 Knitted Newborn Striped Beanie
-
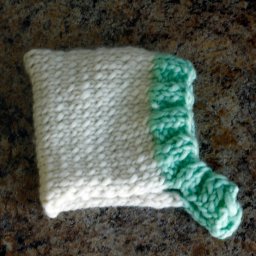 Knitted Chunky Newborn Pixie Hat
-
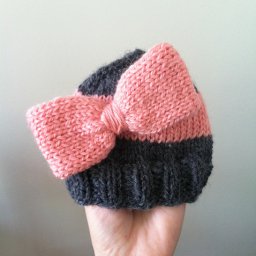 Knitted Big Bow Hat