Crochet Pillow Cover

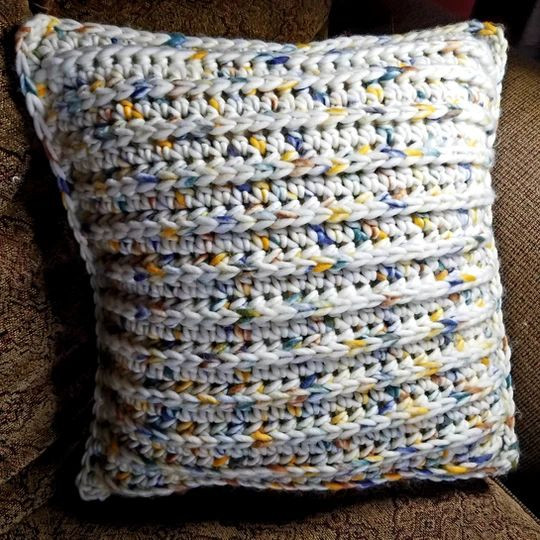
Crocheting your own pillow cover is a wonderful way to add a personal touch to your home decor while also relaxing and unleashing your creativity. It's a fantastic project for both beginners and experienced crocheters alike, allowing you to choose your favorite colors, textures, and patterns to match your existing furniture or create a whole new look. With the satisfaction of creating something beautiful with your own hands, a crochet pillow cover makes a cozy and stylish addition to any room. Whether you're looking to spruce up your living room or give a thoughtful handmade gift, crocheting a pillow cover is a fun and rewarding endeavor that can brighten up your space and bring a touch of homemade charm to your furniture.
Project Materials
RND 1: 10 mm size N crochet hook
RND 2: 375 yards super bulky (6) weight yarn
RND 3: Yarn Bee WATERCOLOR HUES
RND 4: Needle for weaving in ends
RND 5: Scissors
RND 6: Pillow form
Crochet Terms
- CH: Chain
- HDC: Half Double Crochet
- FPHDC: Front Post Half Double Crochet
- SL ST: Slip Stitch
- F/O: Finish Off
Crochet Pattern – Upcycle an Old Pillow
You will begin by making 2 identical panels. These panels are easy to make because you are simply repeating 2 rows until you reach the desired size. My pillow was approximately 17″ x 17″. You will want to make your starting chain just slightly longer than the pillow.
Panels: Make 2
Row 1: Chain 31, HDC in 2nd chain and across, ch1, turn. (30) For smaller (or larger) pillow forms adjust the starting chain length. Make sure your starting chain is an uneven number of stitches.
Row 2: FPHDC 29, HDC in last stitch, ch1, turn. (30)
Row 3: HDC across, ch1, turn. (30)
Rows 4 – 25: Repeat Rows 2 & 3. F/O.
Do not cut yarn on the second panel.
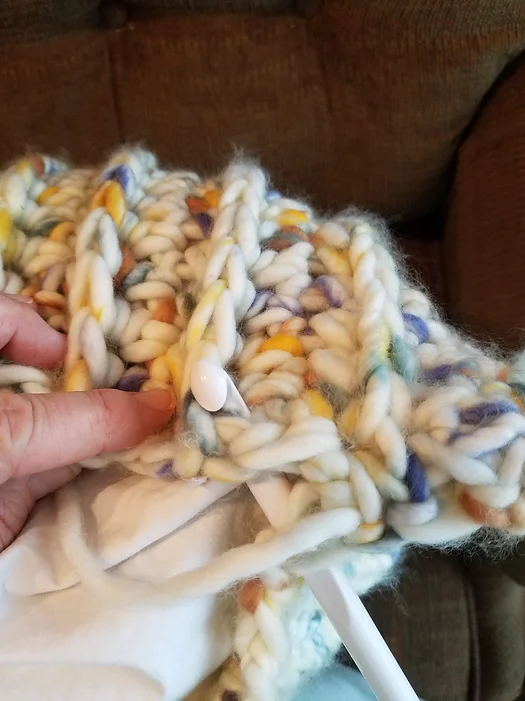
Joining the Panels
Place panels with wrong sides facing each other and SC across the bottom working 3 SC stitches into the corner. Turn to work up the side of the panels. You will be working an SC into the space before each raised rib row and after each raised rib row. Work 3 SC stitches into the corner, then SC across the top of the panels. Insert the pillow form and SC across the final side. SL ST into the first stitch of the edging and F/O. Weave in all ends and enjoy!

Joining the panels:
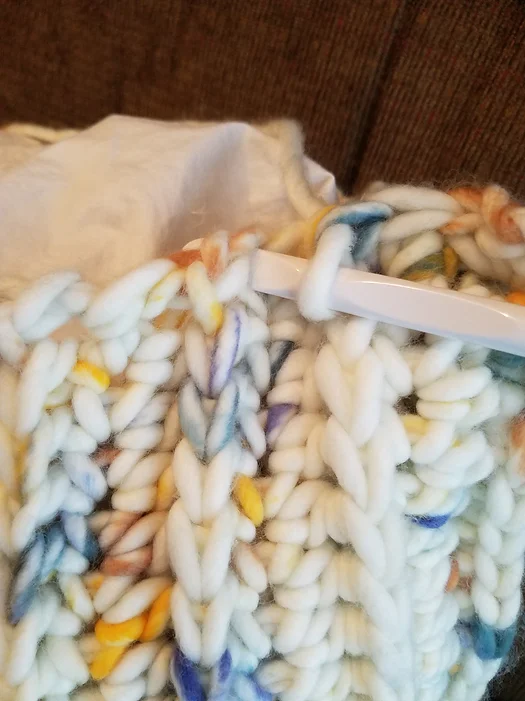
Insert hook into the space before the raised rib row.
Make sure you insert the hook into the same space on the back panel so your rows line up.

Insert hook into space after the Ribbed Row.
- Funny Pictures
-
 These are the Pics That Simply Describe Your Life
-
 Hilariously Accurate Parenting Memes That Show the Other Side of Parenthood
-
 Great Pics That Just Depict Our Lives
- Recipes
-
 Strawberry Banana Bread
-
 Baked Beans and Hot Dogs with Biscuit Topping
-
 Roasted Rosemary Lemon Chicken Breasts
- Lifehacks
-
 Crochet Tutorial: Flower Puff Stitch
-
 8 Basic Crochet Tips
-
 7 Crochet Tips And Tricks
- Crochet Ideas
-
 Crochet Snorlax Plushie Doll
-
 Crochet Cat in 1 Row
-
 Crochet Beautiful Penguin Toy
- DIY
-
 Popsicle Stick and Jingle Bell Christmas Tree Ornament
-
 Upcycled Mason Jar Chicken Vase
-
 Crochet Namaste Stephanie Doll
- Knitting Ideas
-
 Knitted Keepsake Bag
-
 Knitted Textured Heart Dishcloth
-
 Knitted Snowfall Dishcloth