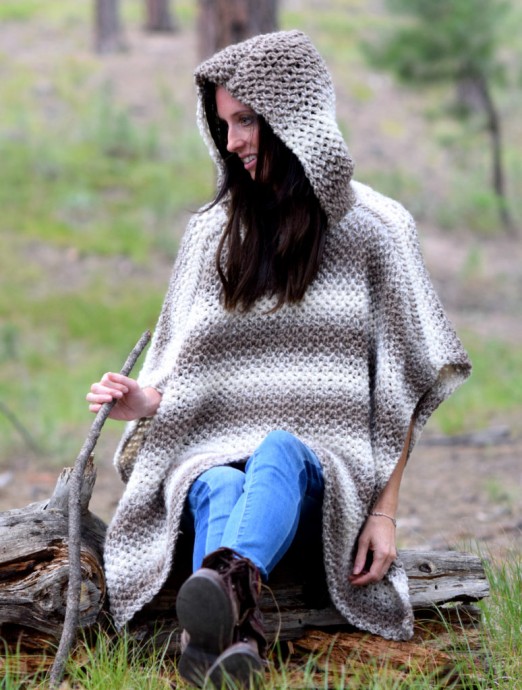
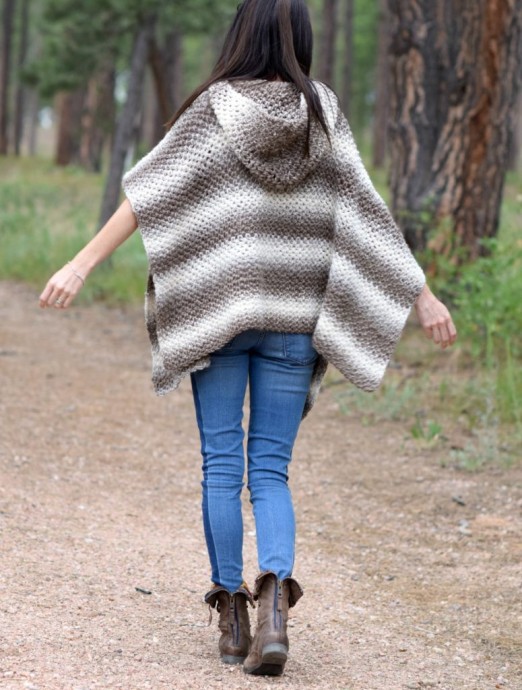
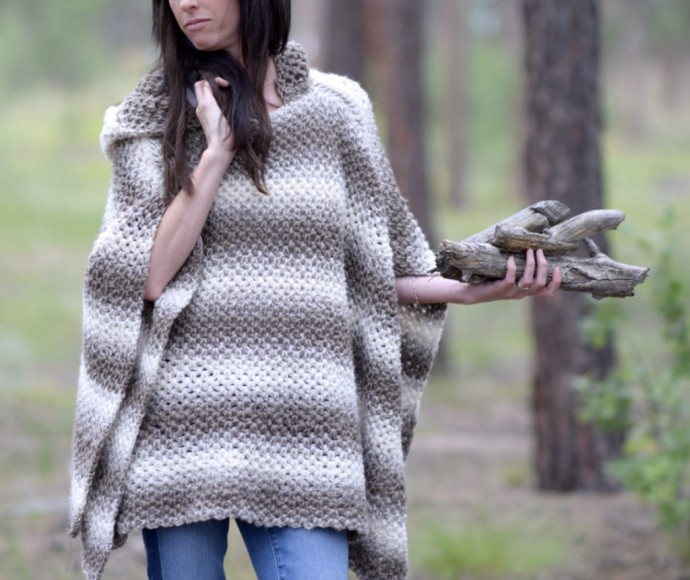
How to Crochet a Cozy Poncho with a Hood

You’ll Need
4 skeins of Lion Brand Scarfie in Cream/Taupe (150 g/skein);
Crochet hook 6.5 mm;
Scissors;
Tapestry needle.
Size
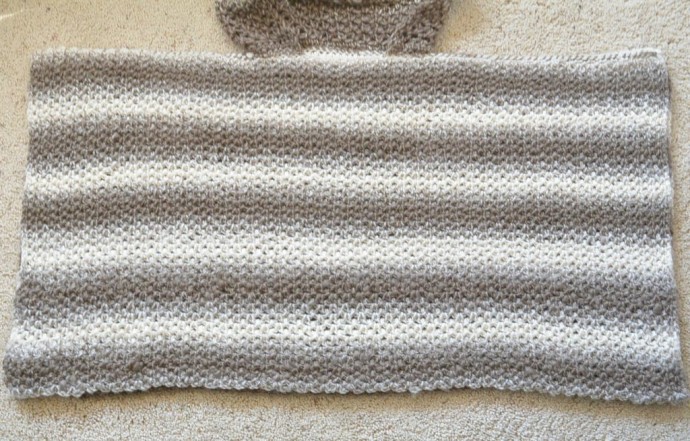
Poncho measures approximately 36” across and 21 ½” from top to bottom. Hood measures approximately 12 ½” tall and 10” deep.
Stitches Control
2 ¾ sts x 3 ½ rows per inch.
Note
This pattern is worked flat in two panels (rectangles) and seamed at the shoulders to finish. The hood is crocheted as a rectangle, then folded and seamed along the top.
Instructions
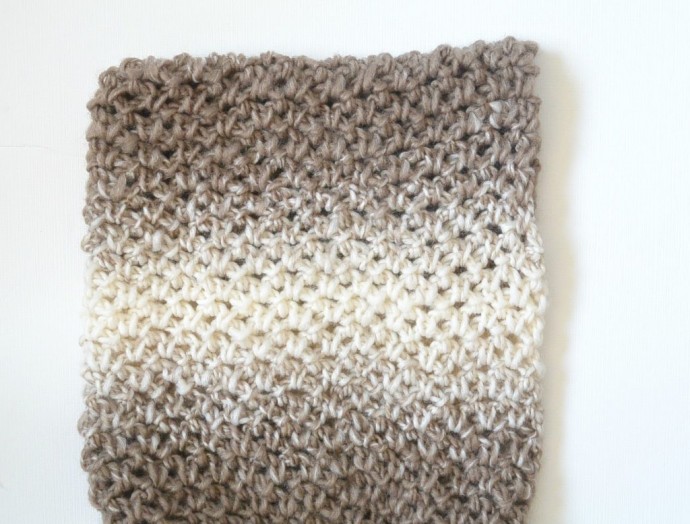
RND 1: Ch 101
ROW 1: Sc across, ch 2, turn (100 stitches)
ROW 2: Skip the first stitch in the foundation row and slip stitch into the next stitch; *ch 2, sk st, sl stitch into next stitch; repeat from * across to last stitch. Ch 2, turn. (100 stitches)
ROW 3: Sl st into the 1st group of ch 2 stitches below, *ch 2, sl st into next group of ch 2 stitches below. Repeat from * across. Ch 2, turn. (100 stitches)
Repeat row 3 until the piece measures 21.5” tall (or for a total of approximately 74 rows). Tie off and weave in ends.
Repeat the pattern above to make a second panel.
Seam
Place panels one on top of the other. Seam along each shoulder, leaving a 10¾” wide space in the center for the head and neck opening (If your poncho is 36” wide, you will seam just over 12.5 inches inward on each side of the poncho). Tie off and weave in ends.
Hood
There are two ways that you can make and attach the hood, so feel free to choose what you find to be the easiest:
Option 1: Crochet Hood First and Attach to Poncho
With this method, you will crochet a rectangle and seam the top to create the hood. You will then attach it to the poncho with a simple whip stitch.
RND 1: Ch 57
ROW 1: Sc across, ch 2, turn (56 stitches)
ROW 2: Skip the first stitch in the foundation row and slip stitch into the next stitch; *ch 2, sk st, sl stitch into next stitch; repeat from * across to last stitch. Ch 2, turn. (56 stitches)
ROW 3: Sl st into the 1st group of ch 2 stitches below, *ch 2, sl st into the next group of ch 2 stitches below. Repeat from * across. Ch 2, turn. (56 stitches)
Repeat row 3 until your piece measures approximately 12.5” tall or as tall as you’d like. The rectangle should measure approximately 20” in length and 12 ½” tall. Fold rectangle in half to create a hood that measures approximately 10” x 12 ½”. Seam the top of the hood closed.
Next, carefully whip stitch the seam of the bottom of the hood to the poncho evenly around the neckline, leaving an opening in the front (as pictured below) of approximately 4 ¾ inches. Check it every few inches to ensure that the hood is centered. If it helps, you can secure it around the neck with safety pins and crochet, then release the pins as you go. It can be a challenge to ensure that it’s centered, so this is helpful to keep it in place as you work around the neckline.
Option 2: Attach Hood to Poncho Directly
*The other option is to lay the poncho flat on a table or floor. Attach yarn approximately 2 ¾ inches in, on the left, front side of the poncho neckline. Single crochet evenly around until you’ve worked around the neck and have reached 2 ¾ inches inward on the opposite side (56 stitches around). From there, work the same stitch pattern as is worked for the poncho over those 56 stitches until the hood reaches approximately 12.5” in height. Seam the top of the hood closed.
- Funny Pictures
-
 Hilarious Memes for Those Bored to Tears
-
 Weekly Treat of Funniest Parenting Memes for Good Laugh out Loud Right Now
-
 Really Funny Pics to End These Weekend Perfectly
- Recipes
-
 Crispy Baked Avocado Fries
-
 Scrambled Chickpea and Spinach Pitas
-
 Cinnamon Pancakes
- Lifehacks
-
 Crochet Basics: Aligned Cobble Stitch
-
 Brick Stitch Crochet Tutorial
-
 Crochet Basics: Wattle Stitch
- Crochet Ideas
-
 Crochet Snorlax Plushie Doll
-
 Crochet Beautiful Penguin Toy
-
 Crochet Tiny Snowman
- DIY
-
 DIY Santa Craft For Kids
-
 Paper Plate Angel Craft
-
 Upcycled Mason Jar Chicken Vase
- Knitting Ideas
-
 Knitted Bridger Cowl
-
 Knitted Keepsake Bag
-
 Knitted Cutie Cupcake Dolls