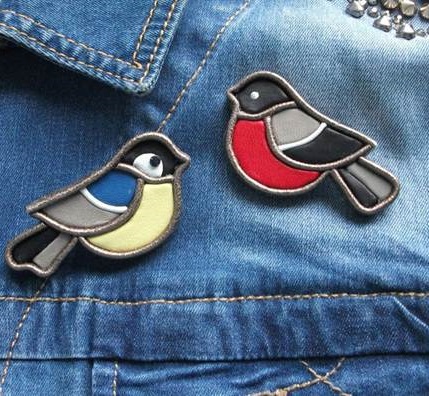
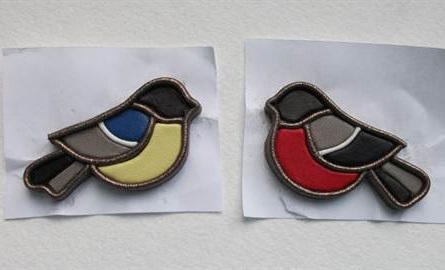
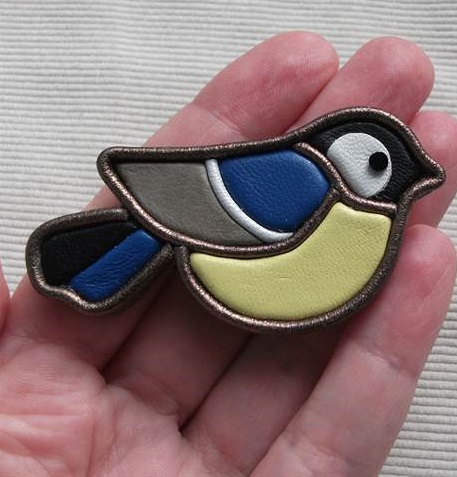
How to Make a Leather Bird Brooch

You'll Need:
Pin for brooch base;
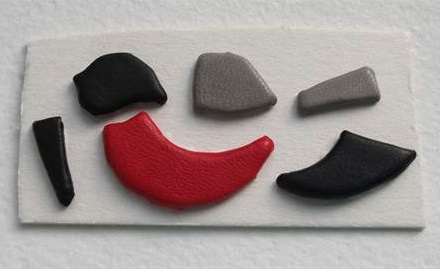
Pieces of leather for the birds and straps;
Glue;
Thick cardboard.
Instructions
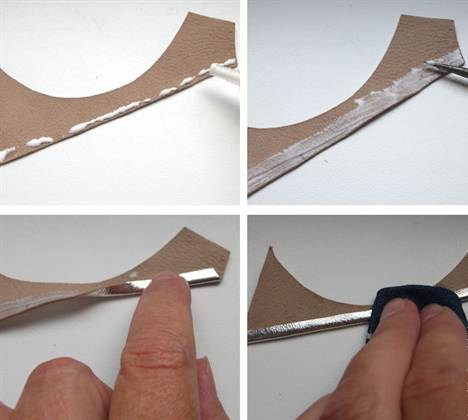
Start by gluing the thin straps made from the leather prepared for the edging.
Use quick-drying glue for this step, ensuring the width of the bundle is between 3-4 mm. The straps can be cut to various lengths depending on your material.
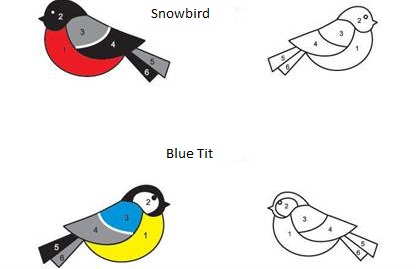
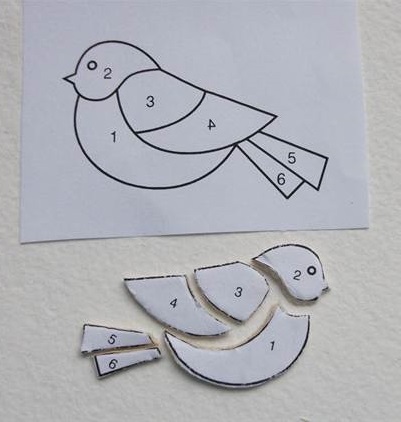
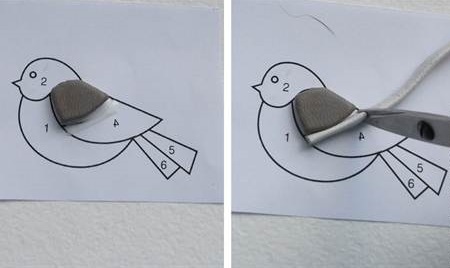
Next, print out the brooch patterns. These patterns should be printed in the full size of the finished product. Cut them out, glue them to cardboard, and use them as stencils for your mosaics.
The glued drawing, along with the cardboard, should be carefully cut along the contour using small scissors.
Now, cut the puzzle into the marked elements. Each piece should be placed according to the color version of the bird, cut out with an additional margin of 4 mm instead of following the contour.
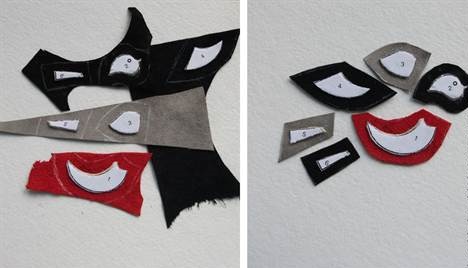
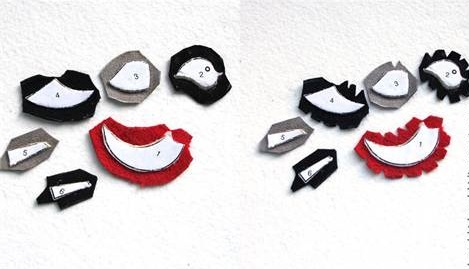
After each piece is cut, wrap it in the leather material and secure it with glue. Keep in mind that leather can gather when bent, so be sure to remove any excess material. Make incisions and trim away the excess.
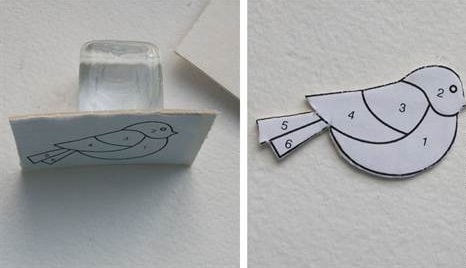
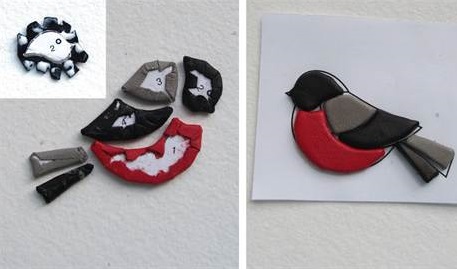
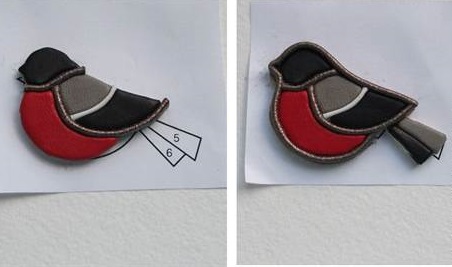
Once each part is covered in leather, assemble all the elements according to the printed layout.
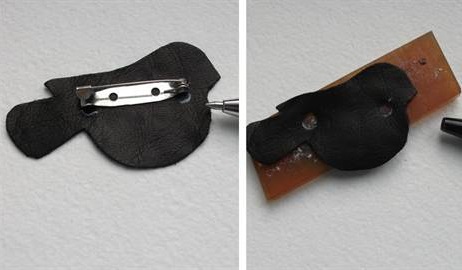
To secure the assembly, glue all parts to the cardboard, which helps to give volume to the brooch.
Begin with the internal elements, starting with the wing on the paper with a glue piece. Continue doing the same for the rest of the bird, ensuring you do not forget the straps. Finally, glue the tail last.
Once the entire product is assembled, allow it to dry for a day.
- Funny Pictures
-
 These are the Pics That Simply Describe Your Life
-
 Hilariously Accurate Parenting Memes That Show the Other Side of Parenthood
-
 Great Pics That Just Depict Our Lives
- Recipes
-
 Crispy Baked Avocado Fries
-
 Baked Beans and Hot Dogs with Biscuit Topping
-
 Roasted Rosemary Lemon Chicken Breasts
- Lifehacks
-
 Crochet Basics: Twisted Fringe
-
 7 Crochet Tips And Tricks
-
 How To Work Crochet Into Denim
- Crochet Ideas
-
 Crochet Snorlax Plushie Doll
-
 Crochet Cat in 1 Row
-
 Crochet Beautiful Penguin Toy
- DIY
-
 Popsicle Stick and Jingle Bell Christmas Tree Ornament
-
 DIY Santa Craft For Kids
-
 Paper Plate Angel Craft
- Knitting Ideas
-
 Knitted Bridger Cowl
-
 Knitted Keepsake Bag
-
 Knitted Cutie Cupcake Dolls