How to Create a Stunning Crochet Rose Brooch

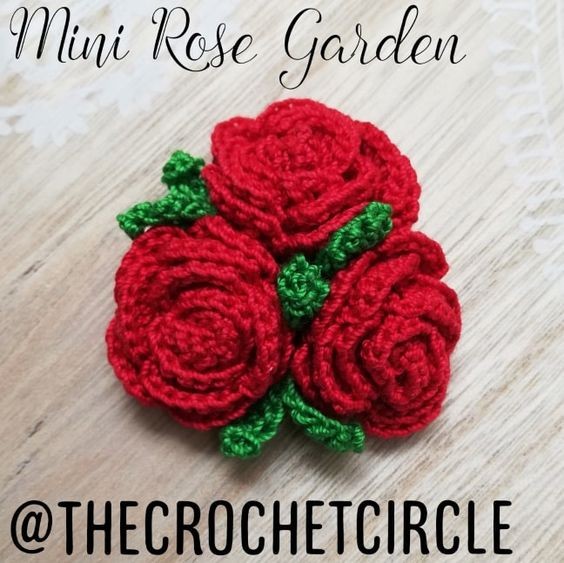
Create your own unique fashion statement with a stunning Crochet Rose Brooch. This exquisite accessory is perfect for adding a touch of elegance and charm to any outfit. Handcrafted with love and attention to detail, each brooch is a work of art that showcases the beauty of crochet. Whether you want to add a pop of color to your favorite jacket or embellish a plain handbag, the Crochet Rose Brooch is the perfect choice. It can be easily attached to any fabric using the secure pin back, ensuring that it stays in place all day long. This versatile accessory can be worn on special occasions or as an everyday accessory, allowing you to express your unique style and personality.
Materials Needed for the Project:
- crochet hook
- yarn (appropriate size for the crochet hook)
- scissors
- needle
- pin
The Stitches Used in This Pattern Are:
- sl st – slip stitch
- ch – chain stitch
- sc – single crochet stitch
- dc – double crochet stitch
Pattern for the Crochet Rose Flower:

In the picture below you can see all the parts I used to make the crochet rose brooch.
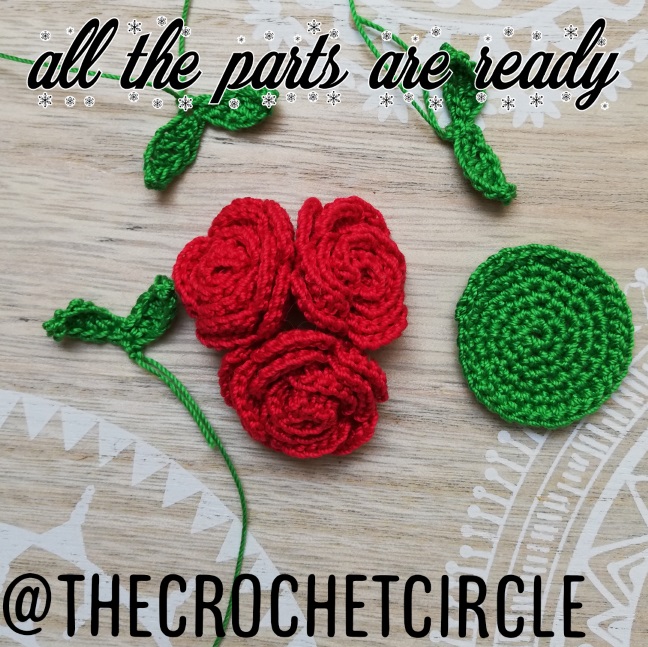
I made 3 crochet roses and put them together on a base. Made few extra small crochet leaves.
Pattern for the Micro Leaf:
The pattern for the micro crochet leaves is:
- ch 7, turn and in the 2nd stitch from the hook I do
- sc, hdc, dc, dc, hdc, sc
- ch 7, turn and in the 2nd stitch from the hook I do
- sc, hdc, dc, dc, hdc, sc, ss in the sc of previous leaf
All the pieces are sewn onto the base. The base is just a flat circle with the base of 6 stitches. And you can adjust it to your size of yarn and number of roses.
I made the base 36 stitches large. If you need a bigger base just do more rows in increase.
Pattern for the Base:
- magic ring
- R1: 6sc – 6st
- R2: 6inc – 12st
- R3: {sc, inc} x6 – 18st
- R4: {sc, inc, sc} x6 – 24st
- R5: {inc, 3sc} x6 – 30st
- R6: {2sc, inc, 2sc} x6 – 36st
- ... and so on...
Position the roses on the base and sew them on. If you need more leaves, make another leaf. You can put the leaves all the way around the base also. I just put them in the spaces where I thought it would need to fill a bit of empty space or where I wanted to divide the roses. Let your inspiration flow and make your unique crochet brooch.
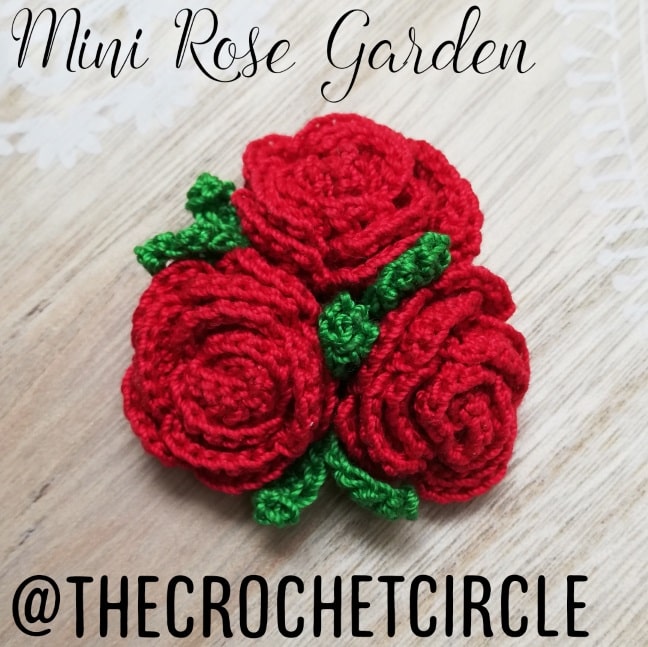
Happy crafting!
- Funny Pictures
-
 Hilarious Memes for Those Bored to Tears
-
 Weekly Treat of Funniest Parenting Memes for Good Laugh out Loud Right Now
-
 Really Funny Pics to End These Weekend Perfectly
- Recipes
-
 Crispy Baked Avocado Fries
-
 Scrambled Chickpea and Spinach Pitas
-
 Cinnamon Pancakes
- Lifehacks
-
 Crochet Basics: Aligned Cobble Stitch
-
 Brick Stitch Crochet Tutorial
-
 Crochet Basics: Wattle Stitch
- Crochet Ideas
-
 Crochet Snorlax Plushie Doll
-
 Crochet Beautiful Penguin Toy
-
 Crochet Tiny Snowman
- DIY
-
 DIY Santa Craft For Kids
-
 Paper Plate Angel Craft
-
 Upcycled Mason Jar Chicken Vase
- Knitting Ideas
-
 Knitted Bridger Cowl
-
 Knitted Keepsake Bag
-
 Knitted Cutie Cupcake Dolls