How to Make a Crochet Bird Amigurumi

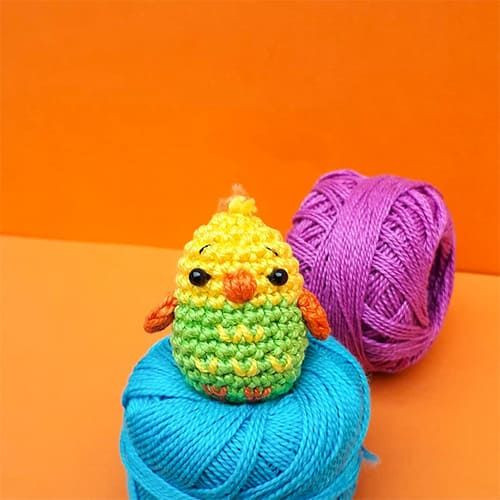
Crochet Bird Amigurumi Overview
Crochet bird amigurumi are the cutest little feathered friends you can create through the art of crocheting! These delightful creations bring a touch of whimsy and charm to any space. Whether you are a seasoned crocheter or just starting out, making a bird amigurumi is a fun and rewarding project. With endless color possibilities and different bird species to crochet, you can let your creativity soar and bring these adorable critters to life with just a hook and some yarn. So grab your crochet supplies and get ready to craft your own flock of handmade treasures that are sure to bring a smile to anyone's face!
Materials Needed
- Crochet hook 2.00 mm
- Cotton yarn
- 3 mm black beads
- Various sized sewing needle, tailor pins, scissors
- Soft stuffing
Abbreviations
MR: Magic ring
Sc: Single crochet
Dec: Decrease
Inc: Increase
Dc: Double crochet
Hdc: Half double crochet
Slst: Slip stitch
Body Instructions
- Chain 4 to start (GREEN)
Sc in 2nd ch from hook and in each of the next 2 chains.
Work 2 more sc in the same space as the last ch.
Sc in the next space and 2 sc in the same space as the very first sc. (Photo n.1) - 2 sc in the first sc of the previous round. Sc in next sc. 2 sc in each of the next 3 sc. Sc in next sc. 2 sc in each of the next 2 sc. (Photo n.2)
- 2 sc in first sc from previous round, 1 sc in next sc. Sc in next sc (2 sc in next sc, 1 sc in next sc)×3. 3 sc. (18 sc) (Photo n.3)
- Rounds 4-8: 18 sc (GREEN)
- Rounds 9-11: 18 sc (YELLOW)
- Round 12: (1 sc, 1 dec)×6 (12 sc)
Stuff. - Round 13: 6 dec. (6 sc)
Using a needle, weave the yarn through the front loops and pull the yarn tightly, then hide the thread. (Photo n.4)
Wings Instructions
(Photo n.5)
Make a magic ring: 1 sc, 1 hdc, 1 dc, 1 hdc, 1 sc.
Fasten off, leave a long tail for sewing.
Assembly and Design
- Eyes: Place on the 10th-11th round, 3 stitches apart.
- Wings: Attach on the 9th-8th round.
- Beak: Embroider it between the eyes.
- You can add some cute details to your toy to make it special (legs, tail, etc.).
- Funny Pictures
-
 Feline Memes to Feel Better
-
 Best Funny Pics of the Day Especially for You
-
 Pictures That Have No Right to be This Funny
- Recipes
-
 Strawberry Banana Bread
-
 Baked Beans and Hot Dogs with Biscuit Topping
-
 Roasted Rosemary Lemon Chicken Breasts
- Lifehacks
-
 Crochet Tutorial: Flower Puff Stitch
-
 8 Basic Crochet Tips
-
 7 Crochet Tips And Tricks
- Crochet Ideas
-
 Crochet Snorlax Plushie Doll
-
 Crochet Cat in 1 Row
-
 Crochet Beautiful Penguin Toy
- DIY
-
 Popsicle Stick and Jingle Bell Christmas Tree Ornament
-
 Upcycled Mason Jar Chicken Vase
-
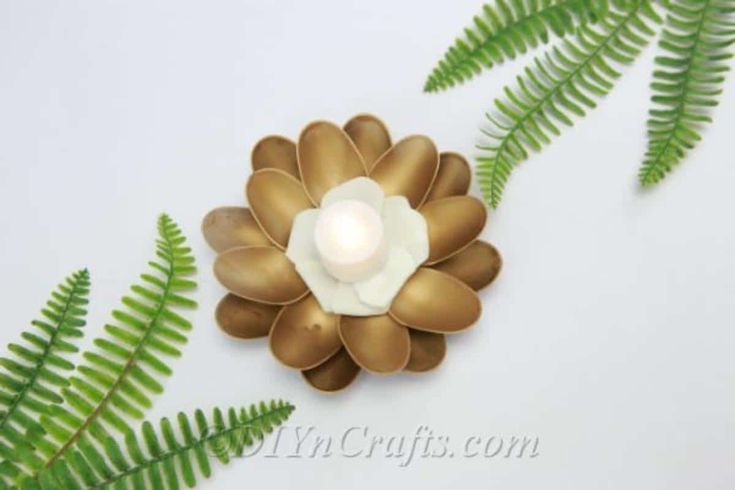 Make A Candle Holder From Plastic Spoons
- Knitting Ideas
-
 Knitted Newborn Striped Beanie
-
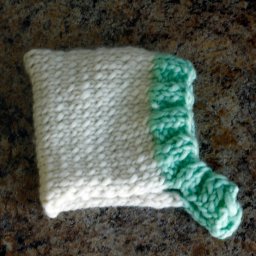 Knitted Chunky Newborn Pixie Hat
-
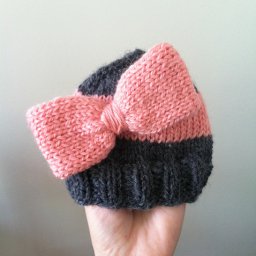 Knitted Big Bow Hat