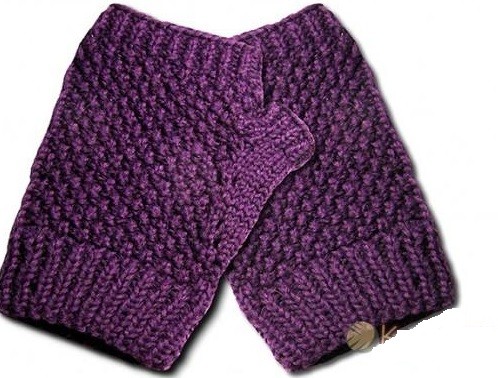
How to Knit Stylish Mittens: A Comprehensive Guide

You'll Need
70g of yarn;
Knitting needles 2.5;
Pin.
Instructions
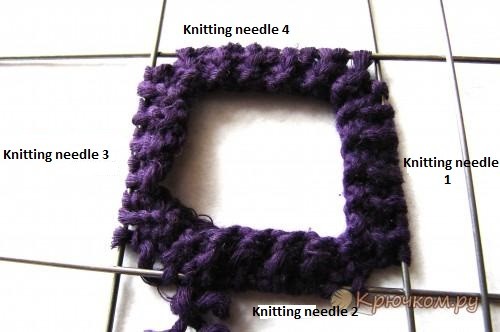
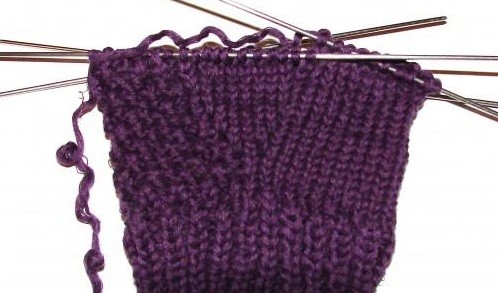
Total quantity of stitches for mitten's cuff is 40. Cast on two knitting needles together, bind the rest end with the main yarn - make a knot. Knit with 1 x 1 rib and divide the stitches on 4 knitting needles - 10 stitches for each needle. Knitting needles are numbered from the knot. While making the left mitten, the ornament will be made on the 1st and 2nd knitting needles, and the palm of the mitten (knitting needles number 3 and 4) will be made with knit stitches. Make the gusset, adding stitches between knitting needles 2 and 3. For the right mitten, it is vice versa, and the gusset will be between knitting needles 4 and 1.
Knitting the Cuff
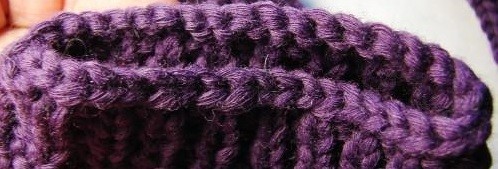
Knit the cuff of the left mitten (the height is about 3.5 cm).
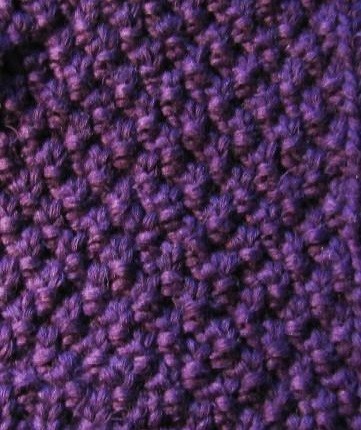
For the right side of the mitten knit in the following way:
- 1st row: 1 knit stitch, 1 purl;
- 2nd row: 1 knit stitch, 1 purl;
- 3rd row: 1 purl, 1 knit stitch;
- 4th row: 1 purl, 1 knit stitch.
Repeat from the 1st to 4th rows.
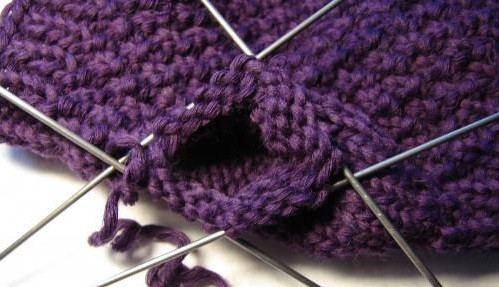
Creating the Gusset for the Thumb
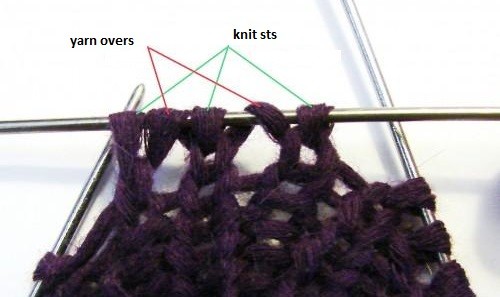
Gusset for the thumb: 2 knit stitches on knitting needle 1. Then, start making the ornament on knitting needles 1 and 2, turning to knitting needles 3 and 4 - knit stitches. Widen the 2 knit stitches at the beginning of knitting needle 1 in the following way: 1 knit stitch, yarn over, 1 knit stitch, yarn over.
Make 2 rows and widen the gusset again: on knitting needle 1 make 1 knit stitch, yarn over, 3 knit stitches, yarn over, 1 knit stitch - the gusset increases to 5 stitches, and you need 11 stitches.
The right mitten has the ornament from the opposite side of the gusset.
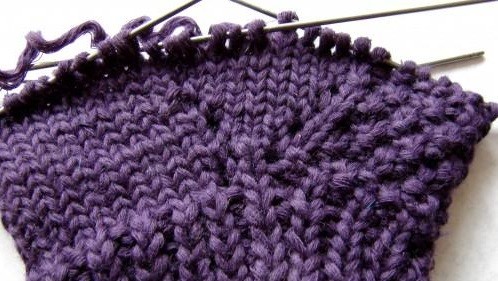
Continuing the Knitting
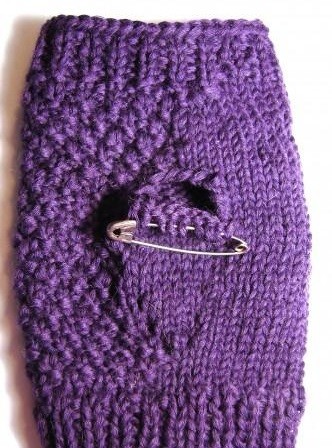
Continue knitting to the thumb base. Then, on knitting needle 1, make 1 knit stitch, transfer 9 stitches to the pin. On the same needle, where 1 knit stitch is cast on, 4 chain stitches and knit 1 knit stitch from knitting needle 1. Continue according to the ornament.
From the pin continue knitting the ornament from the middle of the first phalanx of the second finger. Then, turn to 1 x 1 rib (2 cm).
Finishing the Mitten
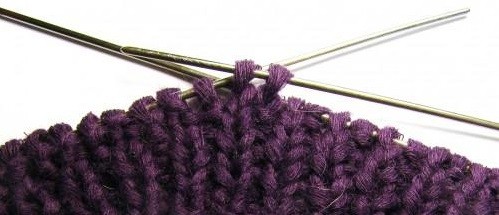
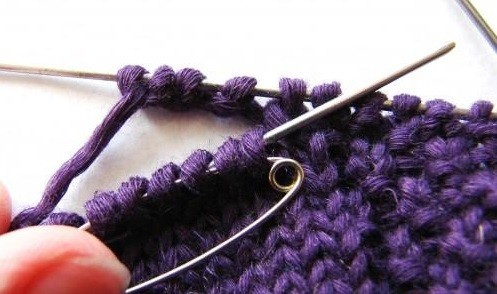
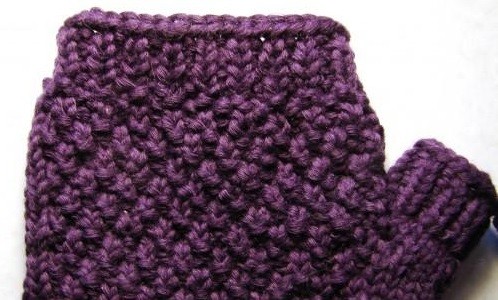
Bind off the upper stitches of the mitten with the "stitch in stitch" method.
Return to the thumb: you have 9 stitches on the pin, 4 stitches in the upper row from the pin, take 5 stitches from the side - 18 stitches, which should be divided among 4 knitting needles and knit 2-3 rows with right side rows rib.
Finish the "thumb" with 1 x 1 rib (2-3 cm), bind off the stitches with the "stitch in stitch" method.
- Funny Pictures
-
 Cute Cat Memes That Will Make Your Day Brighter
-
 Spot-on and Funny Memes About Introverts Struggles
-
 Top Wonderful Cat Memes on Their Way to Better Your Day
- Recipes
-
 Creamy Old Fashioned Rice Pudding
-
 Russian Tea Cakes (Snowball Cookies)
-
 Rigatoni with Sausage, Tomatoes, and Zucchini
- Lifehacks
-
 How to Crochet a Harlequin Stitch
-
 Removing The Toughest Stains
-
 Crochet Basics: Crumpled Griddle Stitch
- Crochet Ideas
-
 Crochet Christmas Tree
-
 Crochet Goblet of Fire
-
 Crochet Adorable Ammonite
- DIY
-
 DIY Snowman Wreath
-
 Mini Santa Sleigh Ornament
-
 Crochet Gingerbread House Blanket
- Knitting Ideas
-
 Knitted Easter Bunny
-
 Knitted Mobile Phone/Glasses Case
-
 Knitted Cabled Wallet