Crochet Cozy Slippers: Your Ultimate Guide
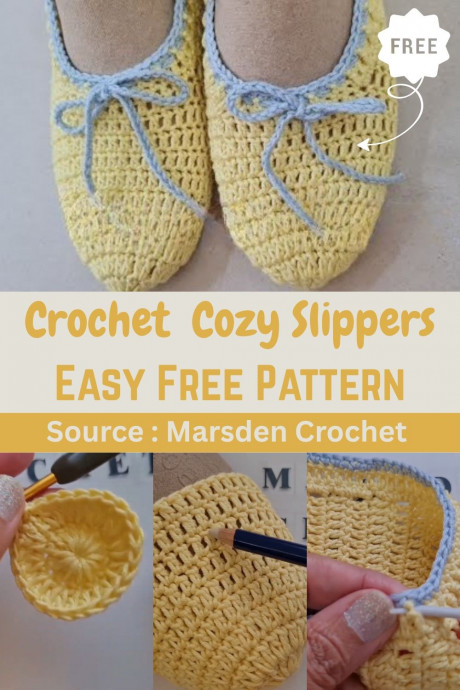
Crochet cozy slippers are the perfect combination of style and comfort for your feet. Whether you're relaxing at home or strolling around, these soft and warm slippers will make every step cozy and delightful. The intricate crochet patterns not only add a touch of charm but also ensure that your feet stay warm and snug. With a variety of colors and designs to choose from, you can find the perfect pair to match your style. Treat yourself or make them as a thoughtful gift for a loved one - either way, these crochet cozy slippers are sure to become a favorite in no time!
Materials Needed
- Yarn
- Crochet Hook
Starting the Slipper (Toe Area)
Foundation Chain
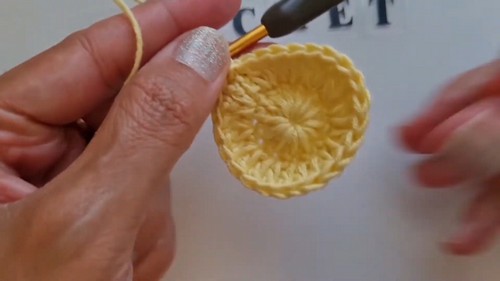
Make a slip knot and chain 4 stitches.
Forming a Circle
Join the last chain to the first chain with a slip stitch to form a circle.
Row 1 (Increasing)
Chain 2 (these do not count as a stitch).
Work 12 double crochet stitches into the circle.
Close the row with a slip stitch into the first double crochet.
Row 2 (Increasing)
Chain 2 (these do not count as a stitch).
Work 2 double crochet stitches into each stitch from the previous row to create an increase in every stitch.
Close the row with a slip stitch into the first double crochet.
Row 3 (Increasing)
Chain 2 (these do not count as a stitch).
The increase pattern for this row is:
- 1 double crochet in the first stitch.
- 2 double crochet in the next stitch.
- Repeat this pattern around (1 double crochet, 2 double crochet, etc.).
Close the row with a slip stitch into the first double crochet.
Body of the Slipper (No Increase)
Rows 4-9 (No Increase)
Chain 2 (these do not count as a stitch).
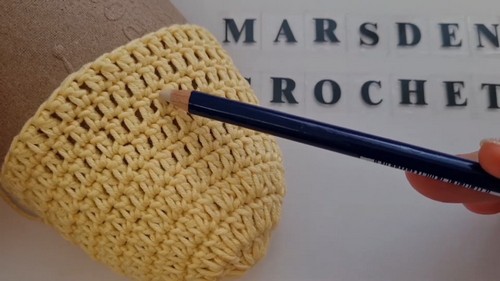
Work 1 double crochet into each stitch from the previous row (no increasing).
Repeat this for a total of 6 rows (Row 4 through Row 9).
Shaping the Slipper Opening
Row 10 (Partial Row)
Chain 2 (these do not count as a stitch).
Work double crochet stitches into each stitch, but leave the last 10 stitches unworked.
Turning and Continuing Rows
Chain 2 (these do not count as a stitch).
Turn your work.
Work 1 double crochet into each stitch across the row.
Continue working rows in this manner (1 double crochet in each stitch, turning at the end of each row) until you have a total of 14 rows from where you started the partial rows.
Finishing the Slipper
Seaming the Back
Fold the slipper with the wrong side out.
Join the back edges together using a slip stitch through the front loop of one side and the back loop of the other side.
Alternatively, you can use a sewing needle to seam the back.
Edging with Single Crochet
Turn the slipper right side out.
Work single crochet stitches around the entire opening of the slipper.
Edging with Double Crochet and Single Crochet
Work double crochet stitches along the sides of the slipper opening.
When you reach the front 10 stitches (the unworked section from Row 10), work single crochet stitches over them.
Continue with double crochet stitches on the other side.
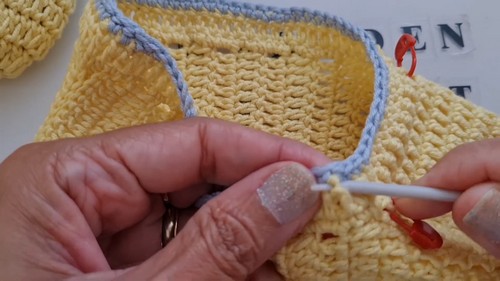
Final Edging with Different Color (Single Crochet)
Attach a different color yarn.
Work single crochet stitches around the entire edge of the slipper.
Creating the Tie
Using the darker or different colored yarn, chain 150 stitches.
Weaving the Tie
Thread the chain through the double crochet stitches around the opening of the slipper, specifically under the single crochet edging.
Skip two stitches between the ends of the tie at the front.
Tie the ends of the tie securely and trim any excess yarn.
Tie the tie into a bow if desired.


