Crochet Redeeming Love Cross Applique

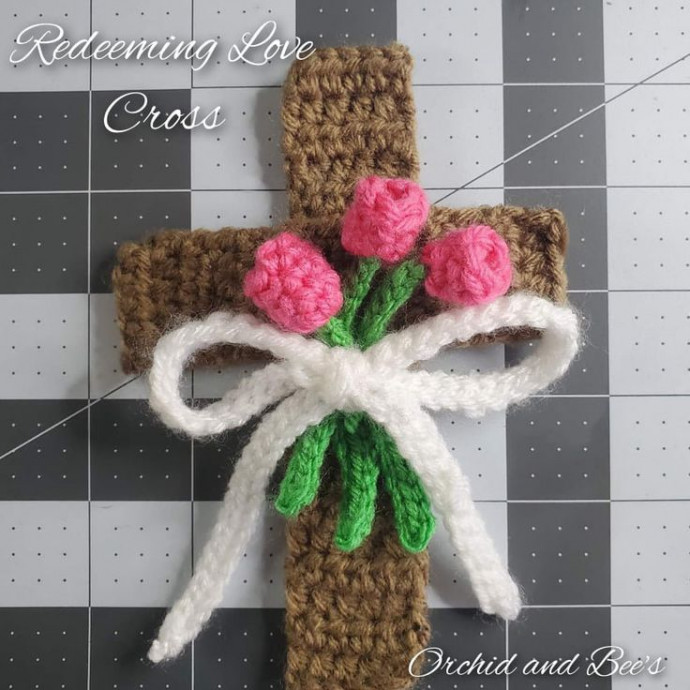
The Crochet Redeeming Love Cross Applique is a beautiful and intricate design that adds a heartfelt touch to any project. Whether you're embellishing a blanket, scarf, or bag, this applique is sure to bring a sense of warmth and love to your creation. With its delicate details and symbolism, it's a perfect way to showcase your faith and creativity. You'll enjoy the process of crocheting this piece as much as you'll love the end result. Happy crafting!
Materials
- Worsted Weight 4 yarn
- Brown
- White
- Green
- Pink
- Hook - G 4mm & E 3.5mm
- Scissors
- Hot Glue - optional for assembly
- Yarn Needle
- Ribbon if you do not want to crochet a bow
Stitches
- MR - Magic Ring *tutorial at end of pattern
- Ch - chain
- Sc - single crochet
- Sl st - slip stitch
- Hdc - half double crochet
- Sp - space
- St(s) - stitch(es)
- #st - complete # number of sts in same space
- St # - complete stitch in next # number of spaces
Pattern Info
This Cross is the perfect applique for blankets, totes, pillows, shadow boxes, and more! The possibilities are endless! It is approximately 4 inches wide by 6 inches tall. You can make it smaller or larger by going down or up a hook size.
Skill Level / Language
Skill level - beginner.
Pattern Instructions
Note: leave long tails if sewing together or weave in ends if gluing together.
Note: beginning/turning chains do not count as stitches.
Vertical Section of Cross: Brown - G 4mm
Begin: Ch 6
Row 1: Hdc in 2nd ch from hook, hdc 4, ch 1. (5st)
Row 2 - 20: Turn, hdc 5, ch 1. Fasten off after the last st of row 20. (5st)
Horizontal Section of Cross: Brown - G 4mm
Begin: Ch 6
Row 1: Hdc in 2nd ch from hook, hdc 4, ch 1. (5st)
Row 2 - 14: Turn, hdc 5, ch 1. Fasten off after the last st of row 14. (5st)
Bow: White - G 4mm
Note: as an alternative, you can use a ribbon if you do not want a crocheted bow.
Begin: Ch 81, or make as many chs for your desired size.
Row 1: Sl st in the 2nd ch from the hook, sl st to the end, fasten off. Tie the tails in a knot to round off the end. Tie piece into bow, like you would a shoelace, make adjustments as necessary to get the look that you want from your bow. (80st)
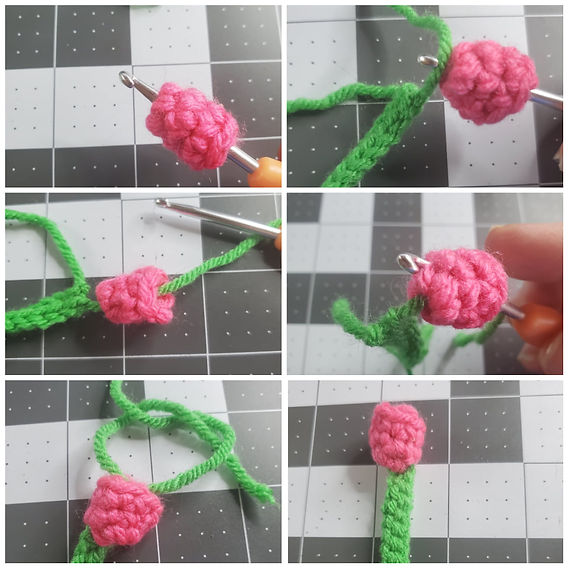
Tulip Flower: Pink - make 3 or as many as desired - G 4mm or smaller hook for different sizes of flower
Begin: MR, ch 1.
Round 1: Sc 5 in MR, pull tight to close, work in continuous rounds from here.
Round 2 - 3: Sc 5, fasten off after last st of round 3, weave in end. (5st)
Note: I turned my piece inside out after the last st to get the best shape. Try both ways to see which looks the best to you.
Tulip Stems: Green - E 3.5mm hook - make 3 or as many as needed for the tulip flowers
Begin: Ch 17 or as many chs as you would like to get the length you prefer.
Round 1: Sl st in the 2nd ch from the hook, sl st 15, fasten off, leave tails. With your hook, insert it through the bottom of the tulip flower and pull one tail of the stem through. Put your hook through a second space in the bottom of the flower one more time and pull through the second tail. Tie the two tails in a knot; this will attach your stem to the bottom of your flower. Trim your tails, put a dot of glue on the inside of the flower if desired to help keep the knot secure. (16st)
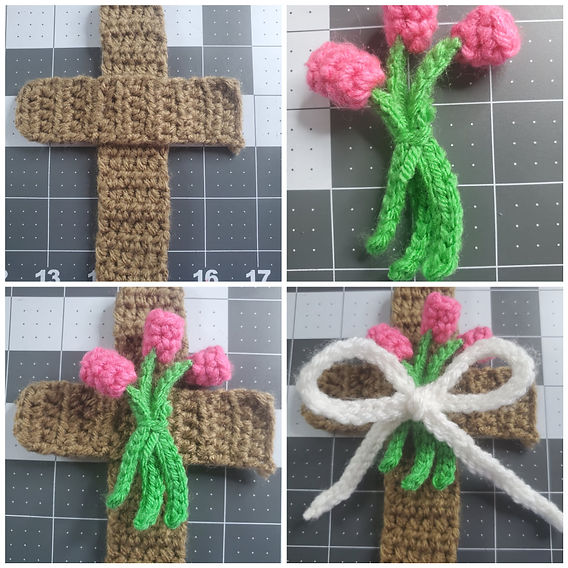
Final Assembly
Note: I assemble my appliques with hot glue, which is a fast and safe method. The glue adheres to the fibers quite well and the applique is very secure. The hot glue packaging that I use says it is non-toxic so it is safe, in my opinion, as well. In addition, you can machine wash on cold, and lay flat to dry or tumble dry/lowest heat setting. You may also use other fabric-safe glue or use the traditional method of sewing your pieces together.
Note: see photo for assembly assistance.
How I Assembled the Cross
I lay out all my pieces to get the look I want first. You can use pins to hold it together if you desire and/or take a picture of your layout with your phone to reference as you are putting it together.
First, I attached the horizontal section about 10 rows from the bottom of the vertical section.
Next, I took a separate piece of green yarn and tied a knot around my flowers, to make it like a bouquet and attached the unit to the center of the cross. Massage flowers to get your desired shape.
Last, I attached the bow on top of the bouquet.
- Funny Pictures
-
 Hilarious Memes for Those Bored to Tears
-
 Weekly Treat of Funniest Parenting Memes for Good Laugh out Loud Right Now
-
 Really Funny Pics to End These Weekend Perfectly
- Recipes
-
 Crispy Baked Avocado Fries
-
 Scrambled Chickpea and Spinach Pitas
-
 Cinnamon Pancakes
- Lifehacks
-
 Crochet Basics: Aligned Cobble Stitch
-
 Brick Stitch Crochet Tutorial
-
 Crochet Basics: Wattle Stitch
- Crochet Ideas
-
 Crochet Snorlax Plushie Doll
-
 Crochet Beautiful Penguin Toy
-
 Crochet Tiny Snowman
- DIY
-
 DIY Santa Craft For Kids
-
 Paper Plate Angel Craft
-
 Upcycled Mason Jar Chicken Vase
- Knitting Ideas
-
 Knitted Bridger Cowl
-
 Knitted Keepsake Bag
-
 Knitted Cutie Cupcake Dolls