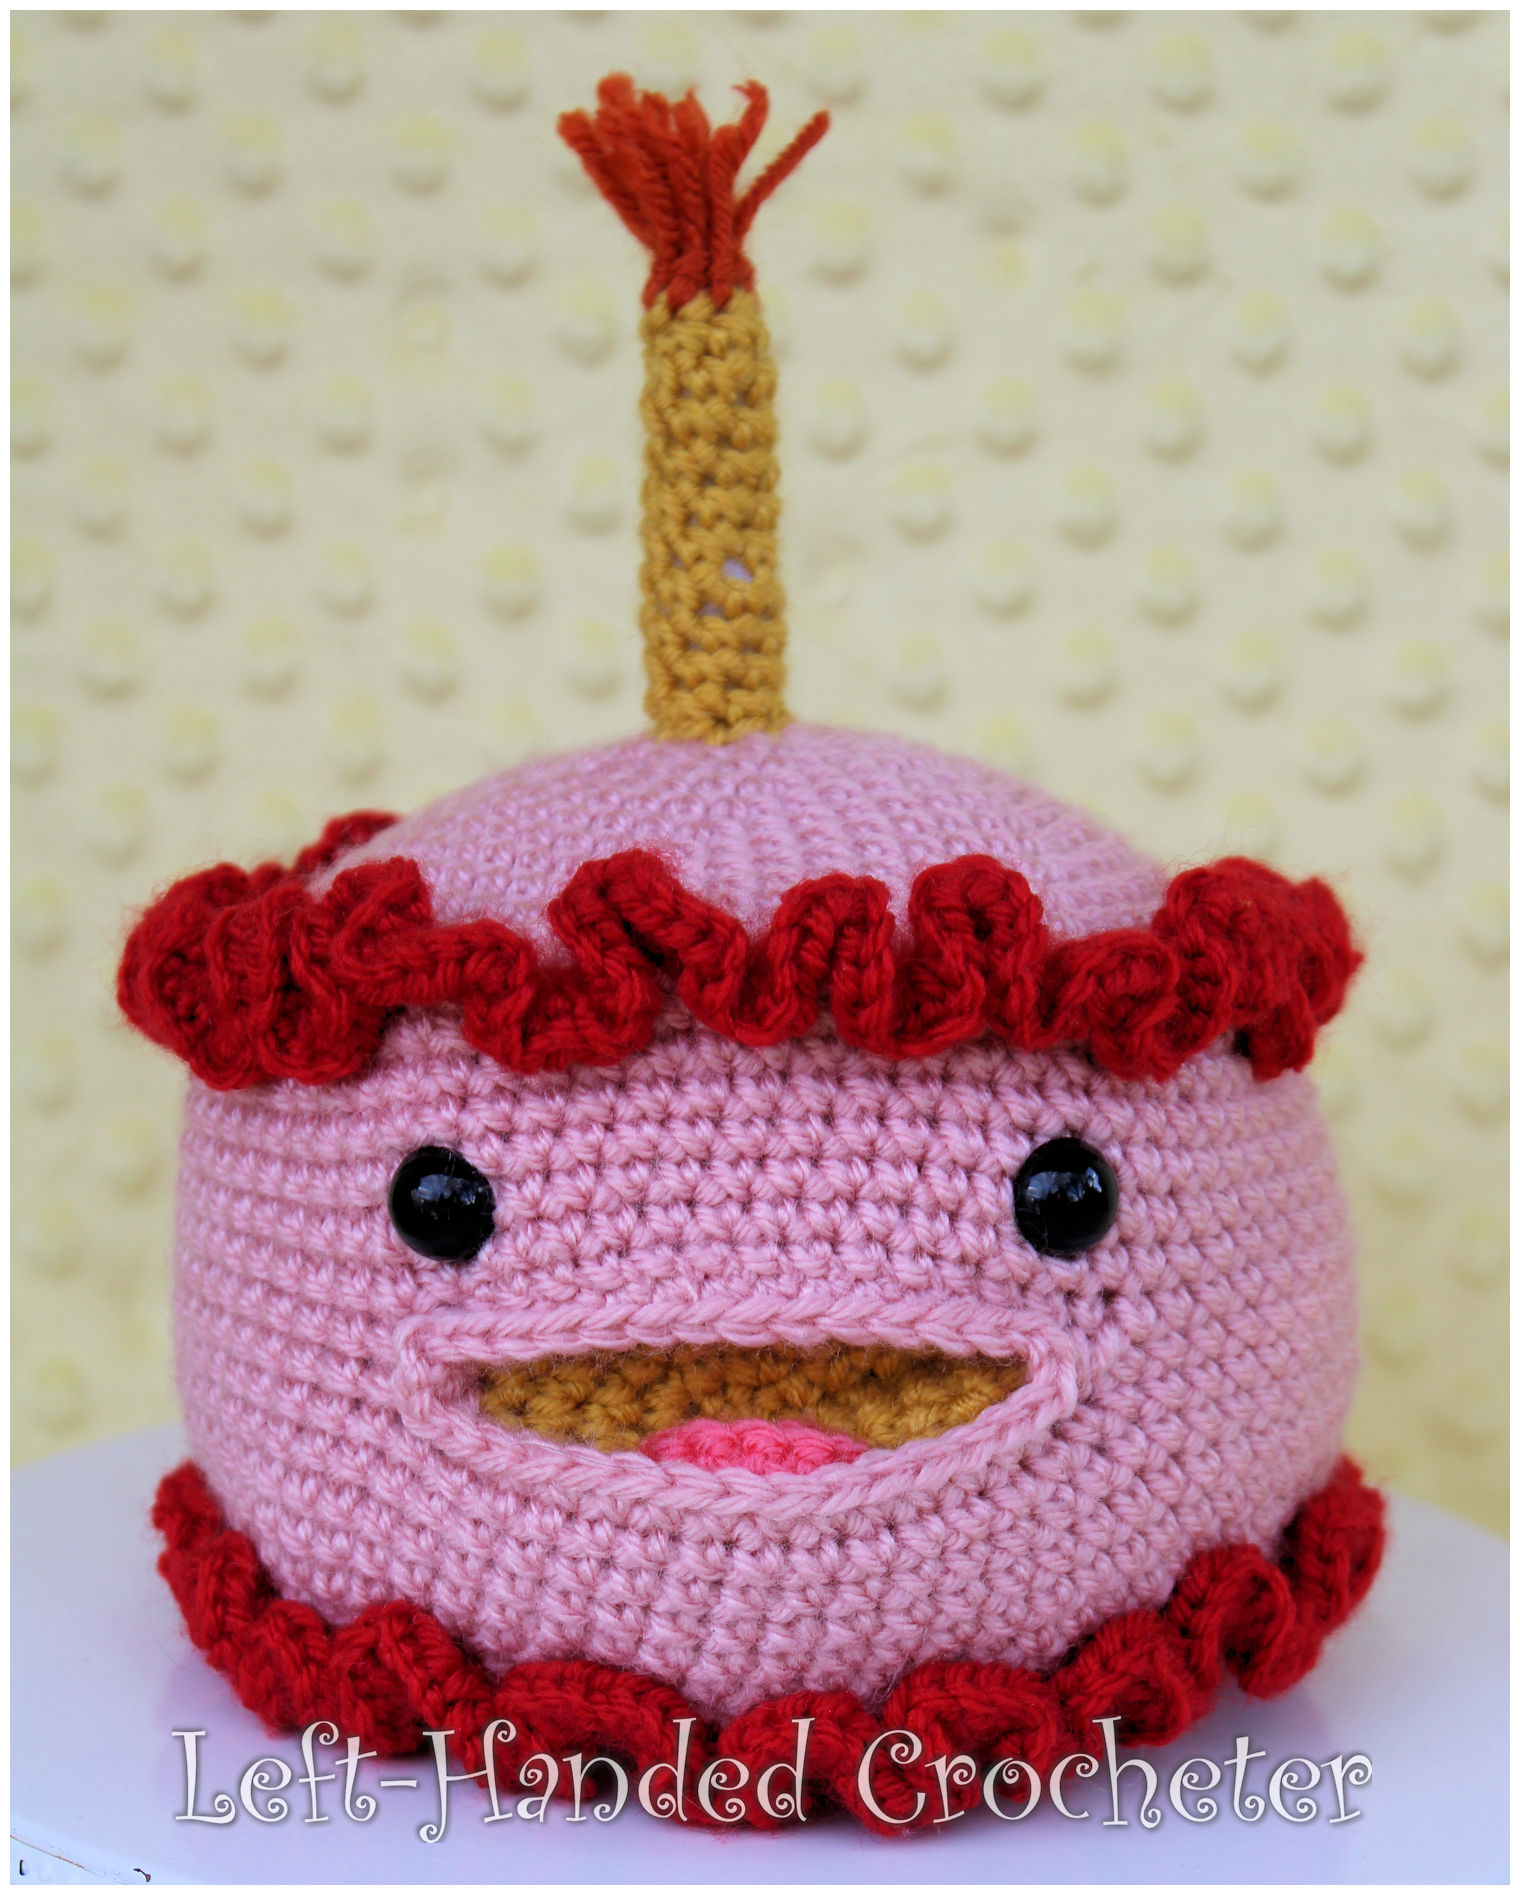
Crochet Smiling Birthday Cake Tutorial


Celebrate special occasions with a touch of handmade charm by creating a Crochet Smiling Birthday Cake! This delightful and whimsical crochet project brings a fun and cozy vibe to any birthday celebration. The smiling cake design adds a cheerful and heartwarming touch to the festivities, making it a unique and memorable gift for your loved ones. With its colorful yarn and intricate stitches, this crochet creation is sure to spread joy and happiness on the special day. So grab your crochet hook and yarn, and get ready to craft a sweet and smile-inducing birthday cake that will bring a sprinkle of happiness to the occasion!
Abbreviations
ch: chain
sc: single crochet
sl st: slip stitch
inc: increase (2 single crochets in one loop)
dec: decrease (pull yarn through loop, pull yarn through second loop, yarn over and pull through all loops)
Materials Needed
Any worsted weight yarn will work. I used Lion Brand Vanna’s Choice for most of the ones I made.
H (5mm) crochet hook
15mm safety eyes
Yarn needle
Poly-fil
This pattern is worked “in-the-round”, and stitches are worked through both loops unless otherwise noted.
Top and Bottom
Ch 3. Sl st to first ch to create circle. (Instead, you can perform the “magic circle” if you’d like.)
Row 1: ch 1, 10 sc inside of circle. (10 stitches)
Row 2: *Inc in first stitch, sc in next stitch, repeat from * around. (15 stitches)
Row 3: *Inc in first stitch, sc in next 2 stitches, repeat from * around. (20 stitches)
Row 4: *Inc in first stitch, sc in next 3 stitches, repeat from * around. (25 stitches)
Row 5: *Inc in first stitch, sc in next 4 stitches, repeat from * around. (30 stitches)
Row 6: *Inc in first stitch, sc in next 5 stitches, repeat from * around. (35 stitches)
Row 7: *Inc in first stitch, sc in next 6 stitches, repeat from * around. (40 stitches)
Row 8: *Inc in first stitch, sc in next 7 stitches, repeat from * around. (45 stitches)
Row 9: *Inc in first stitch, sc in next 8 stitches, repeat from * around. (50 stitches)
Row 10: *Inc in first stitch, sc in next 9 stitches, repeat from * around. (55 stitches)
Row 11: *Inc in first stitch, sc in next 10 stitches, repeat from * around. (60 stitches)
Row 12: *Inc in first stitch, sc in next 11 stitches, repeat from * around. (65 stitches)
Row 13: *Inc in first stitch, sc in next 12 stitches, repeat from * around. (70 stitches)
Tie off.
Cake Round
Ch 70. Sl st to first ch to form a ring.
Row 1: Sc in each ch around. (70 stitches)
Rows 2-6: Sc in each stitch around. (70 stitches)
Row 7: Sc in first 27 stitches, ch 15, skip 15 and sc in the last 28 stitches. (Hole for mouth made.)
Row 8: Sc in each stitch around, working a sc into each ch of the ch 15. (70 stitches)
Rows 9-14: Sc in each stitch around. (70 stitches)
Tie off.
Mouth
Ch 3. Sl st to first ch to create circle. (Instead, you can perform the “magic circle” if you’d like.)
Row 1: ch 1, 10 sc inside of circle. (10 stitches)
Row 2: *Inc in first stitch, sc in next stitch, repeat from * around. (15 stitches)
Row 3: *Inc in first stitch, sc in next 2 stitches, repeat from * around. (20 stitches)
Row 4: *Inc in first stitch, sc in next 3 stitches, repeat from * around. (25 stitches)
Row 5: *Inc in first stitch, sc in next 4 stitches, repeat from * around. (30 stitches)
Fold the mouth in half and sc across the back to create the crease. Tie off.
Tongue
Ch 3. Sl st to first ch to create circle. (Instead, you can perform the “magic circle” if you’d like.)
Row 1: ch 1, 10 sc inside of circle. (10 stitches)
Row 2: Sc in first 8 stitches. Leave last 2 stitches unworked. (8 stitches)
Tie off. Sew tongue to mouth only at the flat end so it sticks out.
Insert mouth inside of cake round and line it up with the opening. Using the same color as the cake round, sc the pieces together.
Line the top piece up with the top of the cake round and sc together using your trim color. For the second row, work 4 sc’s into each stitch. Tie off. Position and insert the safety eyes.
Stuff your cake, making sure the poly-fil doesn’t push the mouth outward. Line up the bottom piece and repeat the instructions for the top.
Candle
Ch 3. Sl st to first ch to create circle. (Instead, you can perform the “magic circle” if you’d like.)
Row 1: ch 1, 6 sc inside of circle. (6 stitches)
Rows 2-10: Sc in each stitch around. (6 stitches)
Tie off. Stuff with poly-fil. Loop and attach pieces of orange yarn to the top for the flames. Sew onto top of cake.
There you have your finished cake.
- Funny Pictures
-
 Hilarious Memes for Those Bored to Tears
-
 Weekly Treat of Funniest Parenting Memes for Good Laugh out Loud Right Now
-
 Really Funny Pics to End These Weekend Perfectly
- Recipes
-
 Crispy Baked Avocado Fries
-
 Scrambled Chickpea and Spinach Pitas
-
 Cinnamon Pancakes
- Lifehacks
-
 Crochet Basics: Aligned Cobble Stitch
-
 Brick Stitch Crochet Tutorial
-
 Crochet Basics: Wattle Stitch
- Crochet Ideas
-
 Crochet Snorlax Plushie Doll
-
 Crochet Beautiful Penguin Toy
-
 Crochet Tiny Snowman
- DIY
-
 DIY Santa Craft For Kids
-
 Paper Plate Angel Craft
-
 Upcycled Mason Jar Chicken Vase
- Knitting Ideas
-
 Knitted Bridger Cowl
-
 Knitted Keepsake Bag
-
 Knitted Cutie Cupcake Dolls