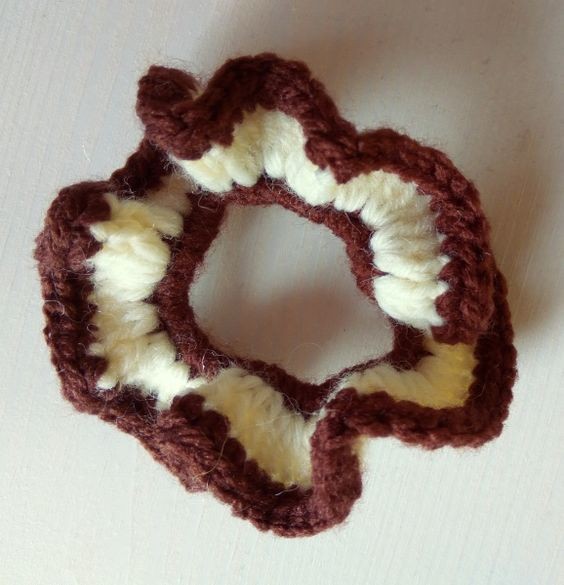
How to Make an Adorable Crocheted Hairband

Crocheting an adorable hairband is not only a fun and creative project but also a great way to accessorize your outfits with a personal touch. With a variety of yarn colors and textures to choose from, you can easily customize the hairband to suit your style or gift it to someone special. Whether you're a seasoned crocheter or just starting out, this project is perfect for all skill levels and can be a relaxing way to unwind after a busy day. So grab your crochet hook and let's get started on making a cute and cozy hairband that will surely turn heads and bring a smile to your face every time you wear it.
Materials
- 3 mm crochet hook
- Yarn recommended for the hook
- Rubber band
- Scissors
Abbreviations
- ch – chain
- st – stitch
- sl st – slip stitch
- sc – single crochet
- dc – double crochet
- At the end of every round total number of stitches is shown in brackets
Instructions
Round 1: 31 sc in the rubber band (31). Important: the size of the hair band I made is quite small, it fits better for children. If you want a bigger hairband, just make more stitches, stretch the gummy and look if it is big enough for you. In other words, the 31 stitches is a minimal size.
Round 2: 3 dc in next 31 st (93)
Round 3: sc in all 93 st (93)
The hairband is finished!
- Funny Pictures
-
 These are the Pics That Simply Describe Your Life
-
 Hilariously Accurate Parenting Memes That Show the Other Side of Parenthood
-
 Great Pics That Just Depict Our Lives
- Recipes
-
 Crispy Baked Avocado Fries
-
 Baked Beans and Hot Dogs with Biscuit Topping
-
 Roasted Rosemary Lemon Chicken Breasts
- Lifehacks
-
 Crochet Basics: Twisted Fringe
-
 7 Crochet Tips And Tricks
-
 How To Work Crochet Into Denim
- Crochet Ideas
-
 Crochet Snorlax Plushie Doll
-
 Crochet Cat in 1 Row
-
 Crochet Beautiful Penguin Toy
- DIY
-
 Popsicle Stick and Jingle Bell Christmas Tree Ornament
-
 Upcycled Mason Jar Chicken Vase
-
 Crochet Namaste Stephanie Doll
- Knitting Ideas
-
 Knitted Keepsake Bag
-
 Knitted Textured Heart Dishcloth
-
 Knitted Snowfall Dishcloth