Crochet Textured Dishcloth: A Practical Kitchen Essential

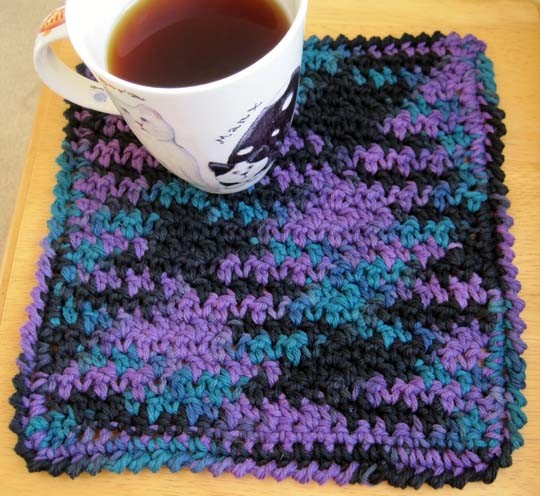
What a wonderful project! A Crochet Textured Dishcloth is a practical and functional item that can add a touch of handmade charm to any kitchen. You can use a sturdy yarn and a variety of stitches to create a dishcloth with a unique texture that's perfect for drying dishes, wiping down countertops, or cleaning up spills. The textured design will provide extra grip and scrubbing power, making it a must-have for any home cook or baker. Plus, the finished dishcloth can be easily washed and reused multiple times, making it an eco-friendly addition to any kitchen routine.
Project Details
Skill Level: Easy
Size: Approx. 9” square
Materials Needed
- 1 cone worsted wt. cotton [Note: quantity on cone yarn will be sufficient for several mats] – or – 150 yds. worsted wt. cotton of choice
- Size H/8 (5 mm) crochet hook
- Tapestry needle
Gauge
Gauge: In pattern, 12 sts & 11 rows = 4” on size H/8 (5 mm) hook
Textured Pattern Stitch
Textured pattern stitch: *Sc in next dc, dc in next sc, rep from * across.
Stitches and Terms
- beginning (beg)
- chain (ch)
- double crochet (dc)
- each (ea)
- hook (hk)
- reverse single crochet (rev sc)
- round (rnd)
- single crochet (sc)
- slip stitch (sl st)
- stitch (st)
Special Stitches
Reverse single crochet (rev sc): Single crochet in each stitch as directed, working from left to right (instead of in the usual direction from right to left).
Instructions for the Dishcloth
Table Mat
Row 1: Ch 25, sc in 2nd ch from hk and in ea ch across, turn (24 sc)
Row 2: Ch 1, sc in first sc, dc in next sc, *sc in next sc, dc in next sc, rep from * across, turn.
Row 3: Ch 1, sc in first dc, dc in next sc, *sc in next dc, dc in next sc, rep from * across, turn.
Rep Row 3 until piece measures 8” from beg.
Border Instructions
Rnd 1: Ch 1, work 24 sc across top of piece; pivot piece (to work along left side) and work 24 sc evenly in ends of rows along left side; pivot piece (to work along opposite side of foundation ch) and work 24 sc across foundation ch; pivot piece (to work along remaining side) and work 24 sc evenly in ends of rows along remaining side; join with sl st to beg ch-1, do not turn.
Rnd 2: Ch 1, work in rev sc (see Special Stitches) in ea sc around entire piece, join with sl st. Fasten off and weave in all tails.
- Funny Pictures
-
 Hilarious Memes for Those Bored to Tears
-
 Weekly Treat of Funniest Parenting Memes for Good Laugh out Loud Right Now
-
 Really Funny Pics to End These Weekend Perfectly
- Recipes
-
 Crispy Baked Avocado Fries
-
 Scrambled Chickpea and Spinach Pitas
-
 Cinnamon Pancakes
- Lifehacks
-
 Crochet Basics: Aligned Cobble Stitch
-
 Brick Stitch Crochet Tutorial
-
 Crochet Basics: Wattle Stitch
- Crochet Ideas
-
 Crochet Snorlax Plushie Doll
-
 Crochet Beautiful Penguin Toy
-
 Crochet Tiny Snowman
- DIY
-
 DIY Santa Craft For Kids
-
 Paper Plate Angel Craft
-
 Upcycled Mason Jar Chicken Vase
- Knitting Ideas
-
 Knitted Bridger Cowl
-
 Knitted Keepsake Bag
-
 Knitted Cutie Cupcake Dolls