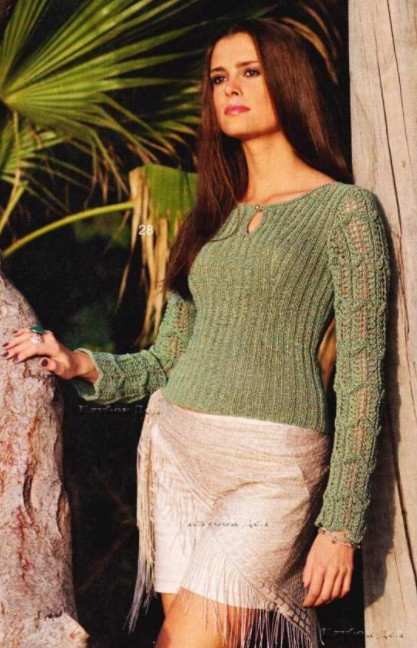
Knitting Instructions for Garments with Green Pertinio Yarn


You’ll Need:
500 (550) 650g of green Pertinio yarn (82% cotton, 14% viscose, 4% lurex; 100m/50g);
Knitting needles 4;
Circular knitting needles 3;
Crochet hook 3;
1 button.
Size:
S (M) L.
Used Patterns
Rib A:
The quantity of sts is multiple 4 + 2 selvage sts.
RS row: 1 selvage st, * 1 knit st, 2 purls, 1 knit st*; repeat from * to *, 1 selvage st;
WS row: as sts face.
Rib B:
The quantity of sts is multiple 4 + 2 selvage sts.
RS row: 1 selvage st, * 1 purl, 2 knit sts, 1 purl*; repeat from * to *, 1 selvage st;
WS row: as sts face.
Wrong-Side Pattern:
In RS row – purls, in WS row – knit sts.
Wavy Pattern:
The quantity of sts is multiple 12 + 1 + 2 selvage sts. Work due to the scheme, on which both RS and WS rows are stated. Start with 1 selvage st and sts before pattern repeat, pattern repeat, finish with 1 selvage st.
Stockinette Stitch:
In RS row – knit sts, in WS row – purls.
Special Decreases:
In the beginning of row: 1 selvage st and 1 broaching;
In the end of row: knit 2 tog before selvege st.
Stitches Control:
Rib: 24 sts x 28 rows = 10 x 10 cm;
Wavy pattern: 25 sts x 27 rows = 10 x 10 cm.
Instructions
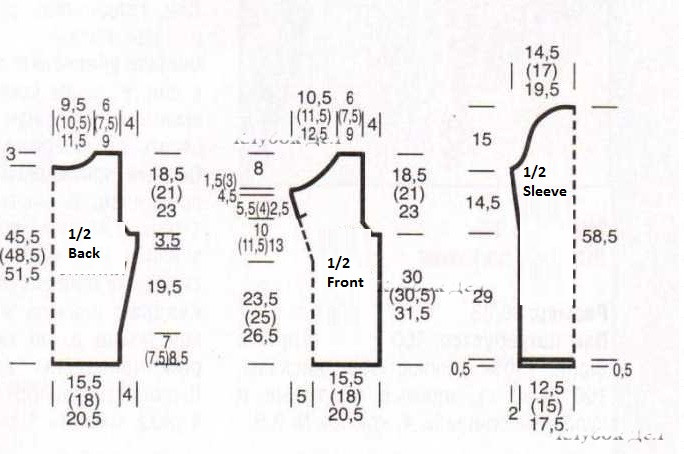
Back:
Cast on 74 (86) 98 sts and work with rib A. In 7 cm = 20 rows (7.5 cm = 22 rows) 8.5 cm = 24 rows from the set-up row, increase 1 st from both sides for chamfers and 9 x 1 st in every 6th row = 94 (106) 118 sts, include the increased sts in the pattern. In 30 cm = 84 rows (30.5 cm = 86 rows) 31.5 cm = 88 rows from the set-up row, bind off 3 sts from both sides for arm-holes and decrease 7 x 1 st in every 2nd row. In 45.5 cm = 128 rows (48.5 cm = 136 rows) 51.5 cm = 144 rows from the set-up row, bind off the central 34 (38) 42 sts for neck-hole and finish both sides separately. For smooth rounding, bind off 3 x 2 sts in every 2nd row. In 48.5 cm = 136 rows (51.5 cm = 144 rows) 54.5 cm = 152 rows from the set-up row, bind off the rest 14 (18) 22 sts of shoulder from each side.
Front:
Cast on 74 (86) 98 sts and work with B (A) B rib. Make increases at chest instead of chamfers in the following way: in 23.5 cm = 66 rows (25 cm = 70 rows) 26.5 cm = 74 rows from the set-up row, mark the central 32 sts and increase 1 cross purl from across thread of yarn from both sides of marked sts (= between 2 purls). Repeat these increases x 11 times in every 4th row, make cross knit st for the next 2 increases and then, cross purls for 2 increases. At the same time, make arm-holes from both sides in the same way as for back. In 33.5 cm = 94 rows (36.5 cm = 102 rows) 39.5 cm = 110 rows from the set-up row, divide your work in the center for vent and finish both sides separately. In 40.5 cm = 114 rows (43.5 cm = 122 rows) 46.5 cm = 130 rows from the set-up row, bind off 12 (14) 16 sts from inwards for smooth rounding and 6 x 2 sts, 1 x 1 st in every 2nd row. Bind off the rest 14 (18) 22 sts of shoulder from each side at the height of back.
Sleeves:
Cast on 63 (75) 87 sts and make 0.5 cm = 2 rows of wrong-side pattern for placket. Then, work with wavy pattern. In 29 cm = 78 rows from placket, increase 1 st from both sides for sleeve chamfers and bind off 4 x 1 st of stockinette stitch in every 6th row = 73 (85) 97 sts. In 43.5 cm = 118 rows from placket, bind off 3 sts from both sides for sleeve caps, 15 x 1 st, 3 x 2 sts and 1 x 4 sts in every 2nd row. In 58.5 cm = 158 rows from placket, bind off the rest 17 (29) 41 sts.
Assembly:
Make shoulder seams. Cast on 111 (119) 127 sts along neck-hole with circular knitting needles and make 0.5 cm = 2 rows of wrong-side pattern for placket and bind off all sts as knit sts. Fasten the short sides of plackets and edge of vent with 1 row of slip st, make 1 button loop of 6 chain sts. Sew up sleeves, make side and sleeves seams. Sew button.
Nice pullover and I like the color
I'm pleased to hear this