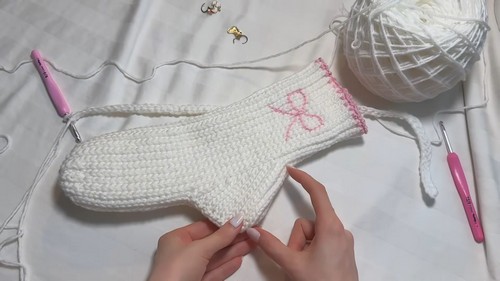
Crochet Beautiful Socks

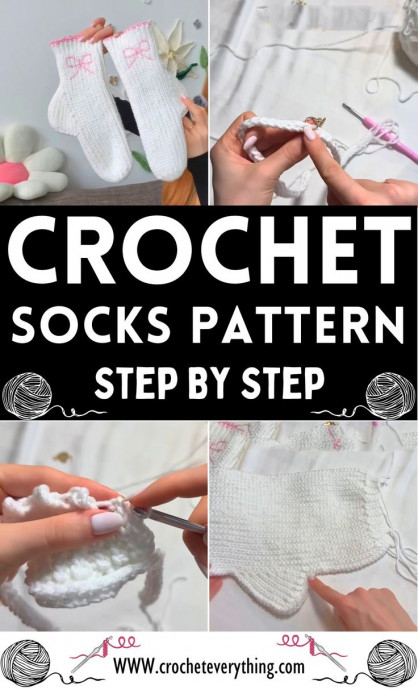
Crocheting beautiful socks is not only a fun and creative way to add a personal touch to your wardrobe but also a cozy and heartwarming experience. The rhythmic motions of crocheting combined with the soft yarn sliding through your fingers can bring a sense of calm and satisfaction. Whether you choose a simple pattern or intricate design, the joy of crafting something unique with your hands is truly special. Plus, who doesn't love the feeling of slipping on a pair of handmade socks that perfectly match your style and personality? Crochet away and watch as your feet dance with delight in your beautiful creations!
Materials
- 2 skeins of yarn (100g & 120m each; recommended DK yarn, acrylic)
- Extra yarn for the edging (leftover cotton yarn suggested)
- Crochet hooks: 5mm for the main part, 4.5mm for the top part to prevent it from being too wide
- Stitch markers
- Measuring tape
- Scissors
General Notes
- Choose soft, elastic yarn for comfort (milk cotton, acrylic/wool/cotton blend suggested).
- Use DK or thinner yarn for best comfort.
Size is customizable by adjusting the number of starting loops and height.
Experiment with yarn thickness; adjust stitches accordingly if using thinner yarn.
Perfect as a Christmas or birthday gift.
Pattern
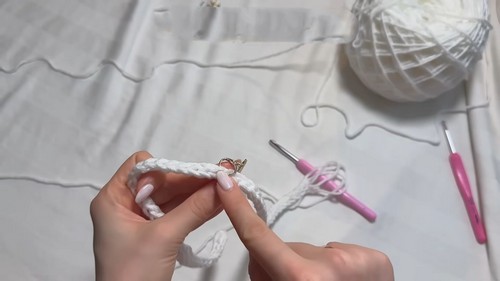
Start
Chain 70 loops. Leave a longer tail for the starter loop. Add one more loop to start the row.
Note: Adjust the chain length for size or height. For larger foot sizes, add more loops.
Row Creation
Crochet downwards with a smaller hook size at the beginning for 6 slip stitches, then switch to your regular hook size, continuing with slip stitches till the end.
The first row after the chain decreases in length due to slip stitches tightening the chain.
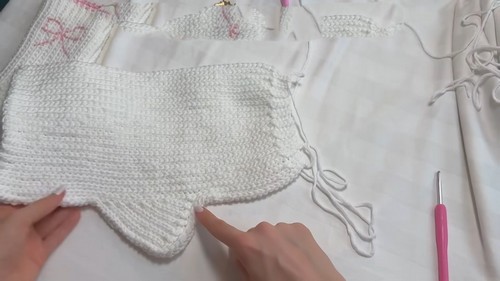
Foot Measurement
Mark the point on your crocheted piece corresponding to the length of the foot in centimeters. Count stitches from the bottom of the piece for precision.
Heel Section
Using the marker as a guide, create a heel with slip stitches by alternating between shorter and longer rows, creating a curve to fit the foot comfortably.
You'll crochet back and forth, decreasing the number of stitches to shape the heel.
Toe Shaping
Alternate between short and long rows to shape the toe after completing the heel section.
Ensure the total row count from the heel fits the width of the foot for a snug fit.
Final Rows
After toe shaping, crochet along the edge of the sock, including a final edging and embroidery (optional) for decorative purposes.
For edging, use a smaller hook and a contrasting yarn color if desired.
Finishing Touches
Close the sock by sewing the toe and performing any final weaving in of ends.
Apply any additional decorations such as bows or edging patterns as desired.
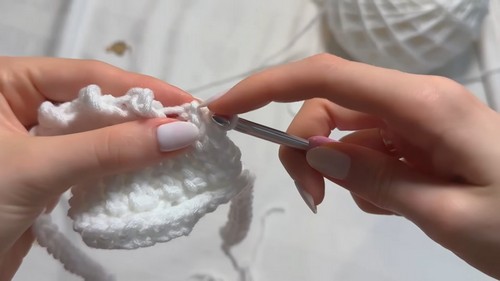
Edging
Start with a slip knot on your hook, insert into a stitch on the sock edge, and follow the pattern: single crochet, double crochet into the same stitch, and then a single crochet again into the next stitch. Repeat around the sock opening.
Embroidery (Optional Bow)
Use slip stitches to create a bow or other designs atop the sock for an extra touch.
- Funny Pictures
-
 Hilarious Memes for Those Bored to Tears
-
 Weekly Treat of Funniest Parenting Memes for Good Laugh out Loud Right Now
-
 Really Funny Pics to End These Weekend Perfectly
- Recipes
-
 Crispy Baked Avocado Fries
-
 Scrambled Chickpea and Spinach Pitas
-
 Cinnamon Pancakes
- Lifehacks
-
 Crochet Basics: Aligned Cobble Stitch
-
 Brick Stitch Crochet Tutorial
-
 Crochet Basics: Wattle Stitch
- Crochet Ideas
-
 Crochet Snorlax Plushie Doll
-
 Crochet Beautiful Penguin Toy
-
 Crochet Tiny Snowman
- DIY
-
 DIY Santa Craft For Kids
-
 Paper Plate Angel Craft
-
 Upcycled Mason Jar Chicken Vase
- Knitting Ideas
-
 Knitted Bridger Cowl
-
 Knitted Keepsake Bag
-
 Knitted Cutie Cupcake Dolls