Crochet Sandals with Rubber Flip-Flops: A Stylish DIY Guide

Crochet Sandals with Rubber Flip-Flops
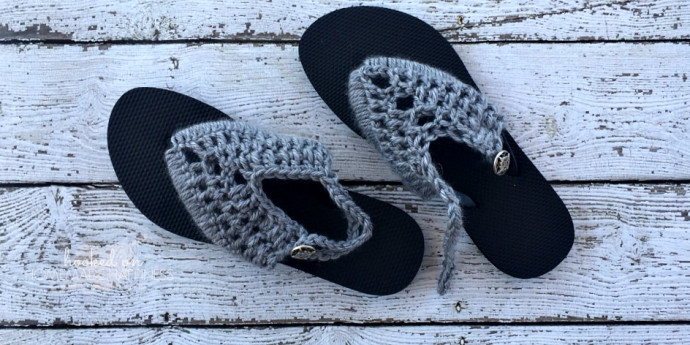
Crochet sandals with rubber flip-flops are the perfect combination of style and comfort for warm sunny days! These unique sandals not only keep your feet cool but also add a fun and playful touch to your outfits. The soft crochet fabric feels gentle against your skin while the sturdy rubber soles provide durability for all your summer adventures. Whether you're strolling along the beach or running errands in town, these sandals will surely be your go-to choice for a cute and practical footwear option. Give your feet a treat with these charming crochet sandals with rubber flip-flops!
Materials
- Rubber flip flops (I found mine at Target for $3.99)
- Cotton or acrylic worsted weight yarn (I used Red Heart Soft in Light Gray Heather)
- 5.0 mm hook
- 2 buttons
- Yarn needle
- Scissors
Level
Easy – Intermediate
Pattern Notes & Stitches to Know
- sl st – slip stitch
- ch – chain
- sc – single crochet
- dc – double crochet
The Sandals
I started with the right shoe, that is what’s pictured.
Row 1: Join yarn around the inside edge of the flip-flop by grabbing the yarn under the strap
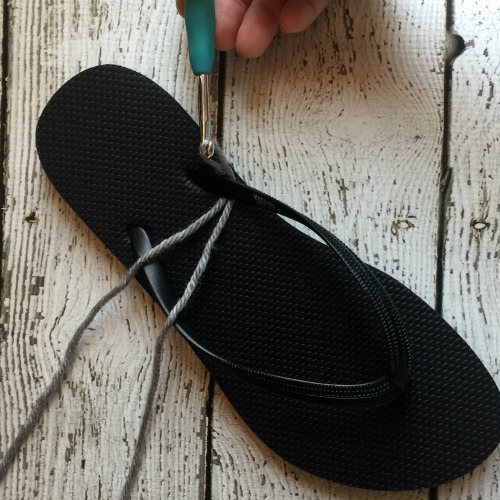
Yarn over and pull through the loop
Insert hook under the strap, yarn over, pull up a loop
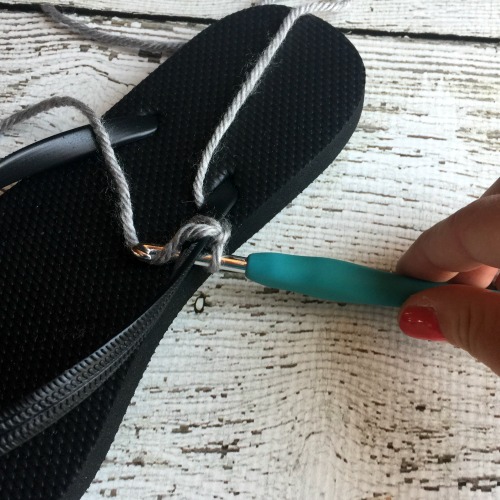
Yarn over, pull through both loops on hook
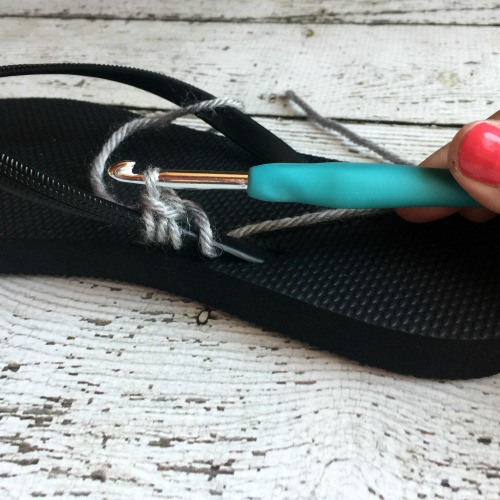
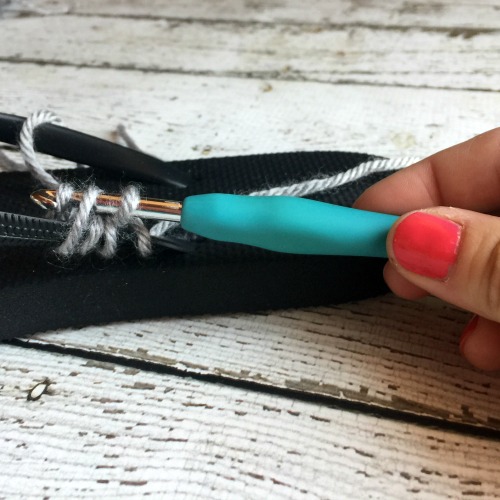
Continue around the strap. Make 44 stitches (if you have a different brand, adjust this number to fit your flip flop – making sure it’s an even number and that both straps have the same number of stitches).
Row 2: Ch 3 (counts as dc), turn, *skip one stitch, dc in next* repeat from * to * 9 times (if you have a different amount of stitches, repeat until you reach the center 5 stitches) skip 5 stitches, dc in next *skip one stitch, dc in next* repeat from * to * across.
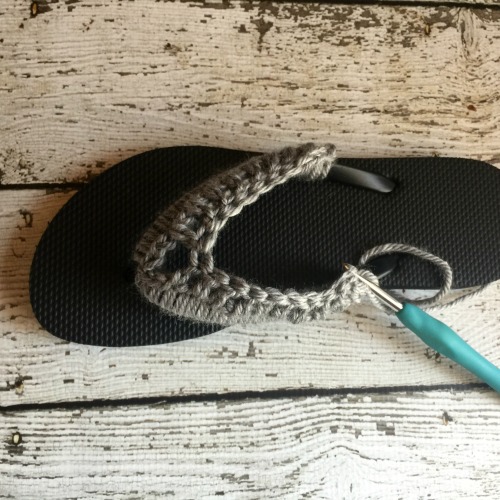
Row 3: Ch 3 (counts as dc), turn, dc in between stitches from the previous row, skip the middle 4 stitches, dc in between stitches from the previous row across.
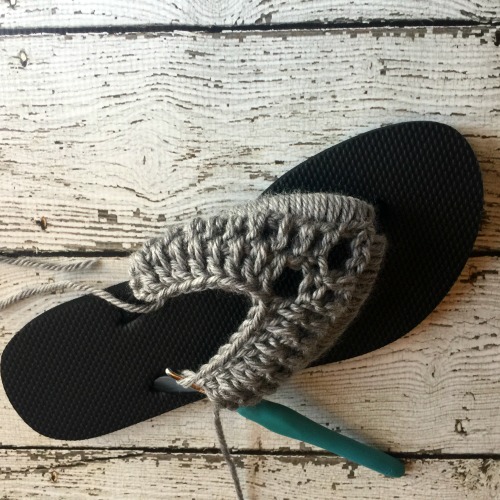
Row 4: Ch 3 (counts as dc), turn, dc in between stitches from the previous row, skip the middle 4 stitches, dc in between stitches from the previous row across, ch 30, slip stitch into the first ch of the ch 30 to make the back strap.
Attach a button to the corner opposite the strap.
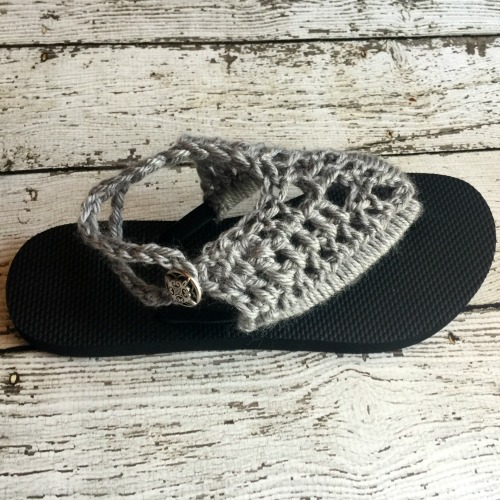
For the left shoe, make sure to still join yarn to the inside edge and repeat the pattern. It will be a little more awkward, but this will ensure that the strap is on the correct side.
- Funny Pictures
-
 Pics to Get the Excitement Today
-
 Funny Christmas Meme Dump
-
 Funniest Relatable Felines in the Form of Memes
- Crochet Ideas
-
 Crochet Watermelon Amigurumi
-
 Crochet Shark Applique
-
 Crochet Pineapple Amigurumi
- DIY
-
 Yarn Wrapped Christmas Wreath Ornaments
-
 Egg Carton Snowman Ornament
-
 Stick Peppermint Candy Ornament
- Knitting Ideas
-
 Knitted Star Square Dishcloth
-
 Knitted Free 2025 Year Dishcloth
-
 Knitted Ribbed Adult Hat
- Recipes
-
 Cappuccino Brownies
-
 Chicken Mushroom Tortellini Bake
-
 Spinach Pie
- Lifehacks
-
 8 Necessary Tips for Baking Bread
-
 Tips & Hacks for Clean Carpets
-
 10 Uses For Old TV Armoires