Crochet Easter Chicks: A Fun and Charming Decoration for Your Home

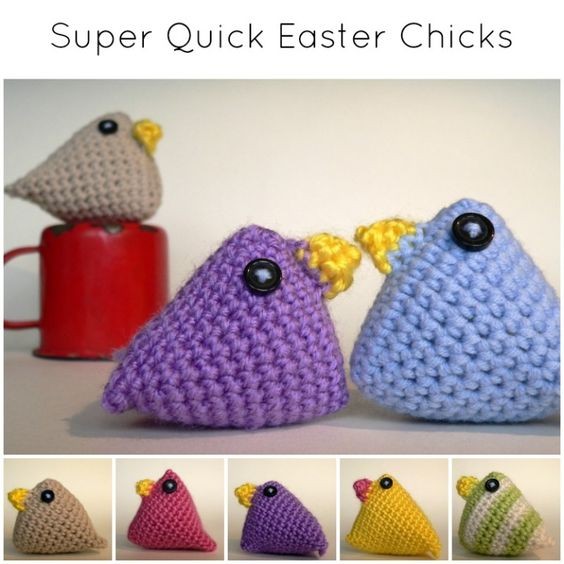
Crochet Easter Chicks are the cutest addition to any Easter decorations! These little handmade wonders bring a touch of charm and coziness to your home during the festive season. Crafting these adorable chicks can be a fun and creative project, perfect for experienced crocheters or beginners looking to try something new. They make wonderful gifts for friends and family, adding a personal touch to the holiday celebrations. Imagine these cute chicks sitting in an Easter basket or perched on a mantle, spreading joy and cheer wherever they go. With their soft yarn and sweet details, Crochet Easter Chicks are sure to bring a smile to everyone's face this Easter!
Materials
- 4 mm crochet hook
- Double knit yarn (light worsted weight/#3) in 2 colours (or more if you want stripes)
- A tiny amount of stuffing
- Yarn needle
- Buttons for the eyes (alternatively, you can embroider some eyes)
- Scrap yarn to use as stitch marker (optional)
Abbreviations
- BLO – Back Loop Only
- CC – Contrasting Colour
- Ch – Chain
- FLO – Front Loop Only
- MC – Main Colour
- Sc – Single Crochet
- St/st’s – Stitch/stitches
Special Instructions
Running Stitch Marker – Use a piece of scrap yarn as a running stitch marker. This will form a dotted line up your work, marking the first stitch of every round and giving you a visual confirmation that every round started where it was supposed to. This dotted line should creep slightly to the right (left, if you are left-handed).
Instructions
Beak
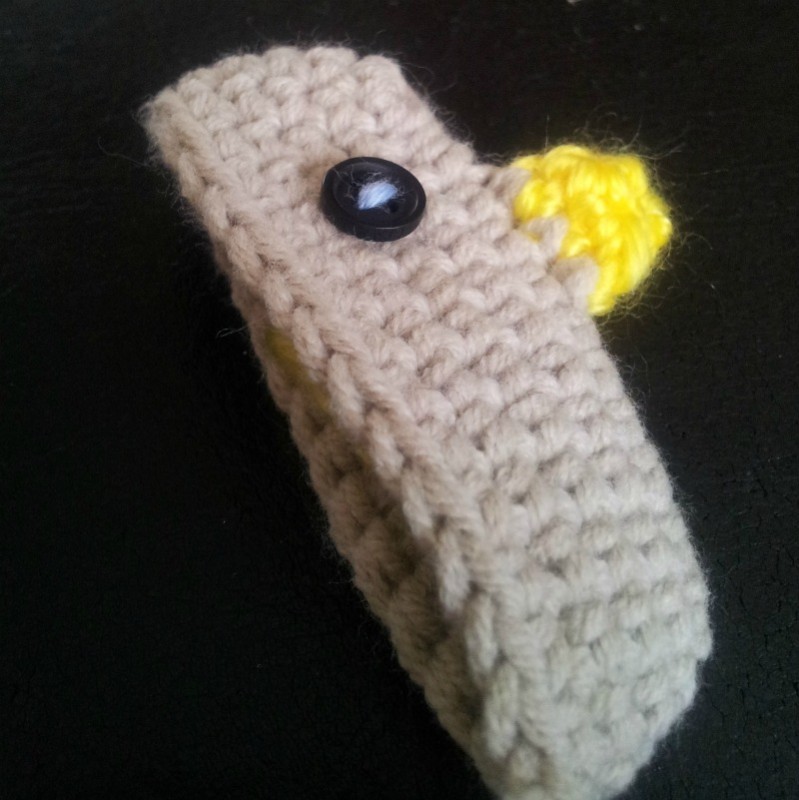
1. With CC: Ch 2. Make 3 sc’s in the second ch from the hook. Ch 1 and turn. {3}
2. Make 2 sc’s in each of the 3 st’s. Ch 1 and fasten off. {6}
Chick
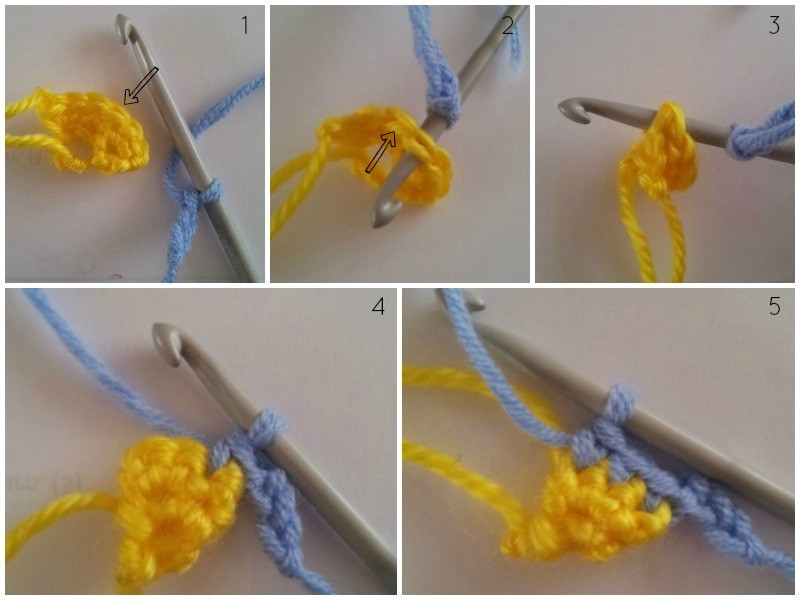
Foundation Chain
With MC: Ch 3. The next 3 st’s will be worked into the beak you made above. Insert your hook from back to front into the third st of the last row of the beak {indicated with an arrow in Photo 1 and illustrated in Photo 2}, and from front to back into the 4th st of the last row {indicated with an arrow in Photo 2 and illustrated in Photo 3}. This will naturally fold the beak in half. Make a sc through both layers {Photo 4}. Make 2 more sc’s through both layers of the folded beak {Photo 5}. Ch 7. Turn the chain so that the back of the chain is facing you! If you don’t do this, your beak will be on the inside of your chick!
Round 1
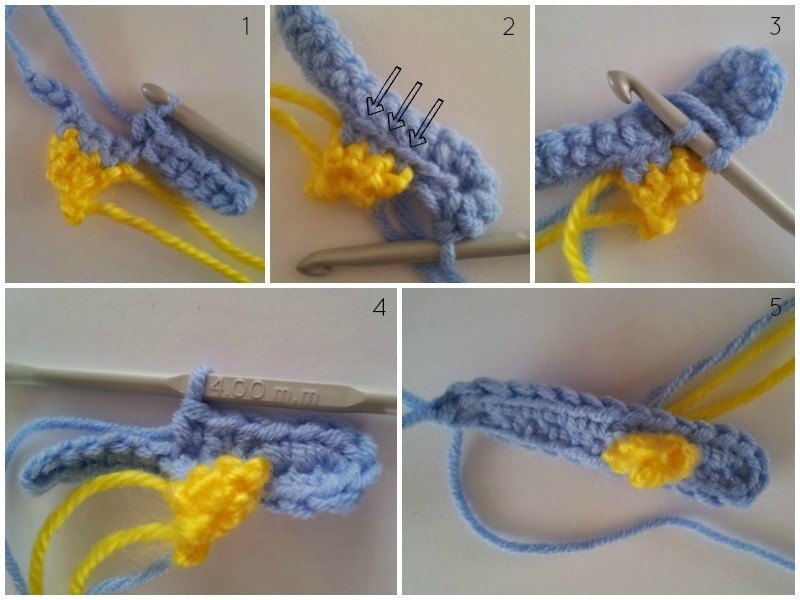
Sc in the top loop only of the second ch from the hook, making sure that the back of the chain is facing you. You can find out more about the front and the back of the foundation chain. Sc in the top loop only of the next 5 ch’s {Photo 1}. You should now have 6 sc’s. This will bring you to the 3 sc’s made into the beak. Sc in the FLO of the next 3 sc’s. Sc in the top loop only of the next 2 ch’s. Make 4 sc’s in the last ch {Photo 2 shows the back of your work at this point}. You will now continue working around the foundation chain, and into the remaining loops of each ch. Sc in the next 2 ch’s. Sc in the BLO of the 3 sc’s across the beak (so the loops remaining from when you worked into the FLO before). This is indicated with arrows in Photo 2 and illustrated in Photos 3 and 4. Sc in the next 5 ch’s. Make 3 sc’s in the last ch, which will already contain a sc {Photo 5}. {28}
Now you will continue working in a spiral, so you won’t turn and you won’t join. You will just make the first stitch of the next round in the first stitch of this round. See THIS TUTORIAL if you need help working in a spiral. I suggest using a piece of scrap yarn as a running stitch marker. Alternatively use a stitch marker to mark the first st of each round.
Rounds 2 – 12
Sc in each stitch around*. In Photo 1 below, you can see the running stitch marker (yellow). Photo 2 shows the end of Round 12 and the running stitch marker.
*See Adding The Eyes below before completing your crochet Easter chick.
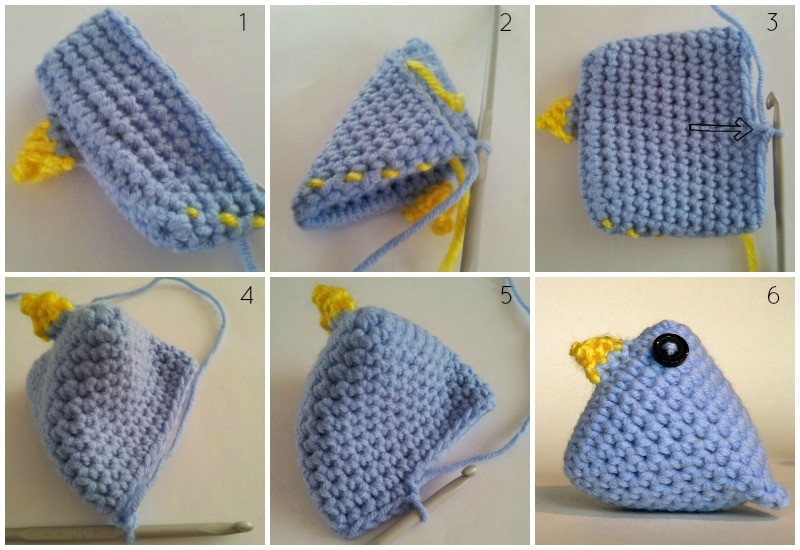
Round 13
Sc in the next 9 st’s. You should end up in the middle of one of the sides of your chick {Photo 3}. Fold the back of the chick flat (using the last st as an edge guide) – see Photo 4.
Sc into each st and through both layers, stuffing your chick as you go. When you get to the end, ch 1 and fasten off. Work away your ends of yarn.
Stripy Easter Chicks
To make thin stripes, change colours on the last st of every round.
To make thick stripes, change colours on the last st of rounds 2, 4, 6, 8 and 10.
There will be a little visible “step” at every colour change, but this isn’t such a big deal as it will run along the bottom of the chick, which is the least visible part.
Adding the Eyes
The easiest way to attach the eyes is to sew them on when you have completed 6 or 7 rounds. I sew my eyes on over one of the stitches in round 3 (in line with the top of the beak).
- Funny Pictures
-
 Relatable and Funny Memes to Distract You From the Routine
-
 Hilarious Cat Snapchats That Will Leave You With the Biggest Smile
-
 Today’s Top Funny Tweets to Scroll Before Bed
- Recipes
-
 Cappuccino Brownies
-
 Chicken Mushroom Tortellini Bake
-
 Spinach Pie
- Lifehacks
-
 8 Necessary Tips for Baking Bread
-
 Tips & Hacks for Clean Carpets
-
 10 Uses For Old TV Armoires
- Crochet Ideas
-
 Crochet Watermelon Amigurumi
-
 Crochet Flower Hat for your Pet
-
 Crochet Shark Applique
- DIY
-
 Crochet Titus the Barn Owl
-
 Crochet Rainbow Bunny
-
 DIY Washer Ornaments
- Knitting Ideas
-
 Knitted Star Square Dishcloth
-
 Knitted Free 2025 Year Dishcloth
-
 Knitted Ribbed Adult Hat