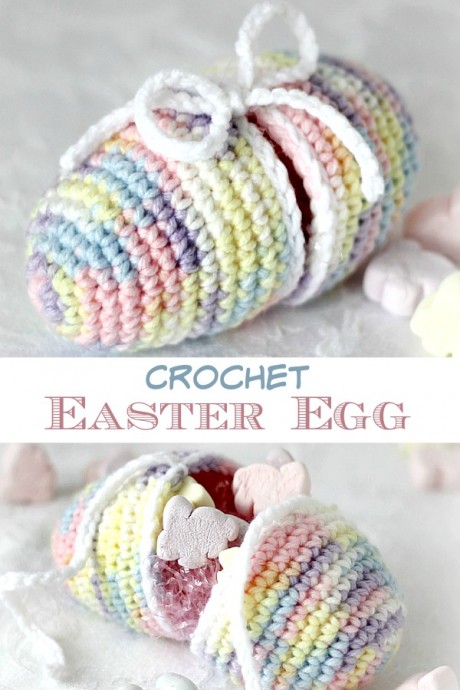
How to Make Crochet Easter Eggs to Celebrate Easter

Get ready to add a touch of handmade charm to your Easter celebrations with a delightful crochet Easter egg! With just a few simple materials and some basic crochet stitches, you can create a unique and beautiful decoration that will impress your family and friends. Start by selecting your favorite colors of yarn, whether you prefer pastel shades or vibrant hues. Then, grab your crochet hook and let your creativity flow! Looking for a fun and creative project to celebrate Easter? Look no further than crocheting your very own Easter egg! Whether you're a seasoned crochet enthusiast or just starting out, this project is perfect for all skill levels. It's a great way to relax, unwind, and let your imagination run wild as you create a one-of-a-kind decoration that will bring joy to your Easter festivities.
Important Note
When working in rounds, I mark the end of each round with a piece of contrasting yarn and move it as I complete each round.
Made with worsted weight yarn and size F crochet hook but you can use whatever yarn you prefer and a hook size recommended for the yarn chosen.
Bottom Half of Egg
ch 3. Join with sl st in 3rd ch from hook to form a ring.
RND 1: Work 8 sc in ring.
RND 2: *sc in next sc, inc in next sc. Repeat from *around (12 sc).
RND 3: Repeat rnd 2 (18 sc).
RND 4: sc in each sc around, increasing 1 sc in every 3rd sc. (24 sc).
RND 5: work even for one round (24 sc).
RND 6: sc in each sc around; increasing in every 4th sc. (30 sc).
RND 7-8: work even for two rounds (30 sc).
RND 9: sc in each sc around, increasing in every 10th sc. (33 sc).
RND 10-12: work even (33 sc).
At the end of the last round, sl st in the next sc and break off.
Edging for Bottom Half
With contrasting color yarn, make loop on hook. Working below both top loops of each stitch on the last round, sl st in each sc around (2 loops forming chain edge of sc will show above sl sts). Join with sl st in the 1st sl st; then ch 32 for tie. Break off.
Top Half of Egg
Work the same as for bottom half through 2nd round (12 sc).
RND 3: sc in each sc around, increasing in every 3rd sc (16 sc).
RND 4: sc in each sc around, increasing in every 4th sc. (20 sc).
RND 5: repeat last round. (25 sc).
RND 6-7: Work even (25 sc).
RND 8: sc in each sc around increasing in every 5th sc (30 sc).
RND 9: Work even (30 sc).
RND 10: sc in each sc around increasing in every 10th sc. (33 sc).
RND 11-12: Work even (33 sc). At the end of the last round, sl st in the next sc and break off.
Edging for Top Half
RND 1: Work one round sl st with the same contrasting color used for the bottom half; join with sl st in 1st sl st (do not chain for tie); ch 1.
RND 2: Working in the top loop only of the sl st, sc in each sl st around. Join with sl st in the 1st sc; then ch 32 for tie. Break off.

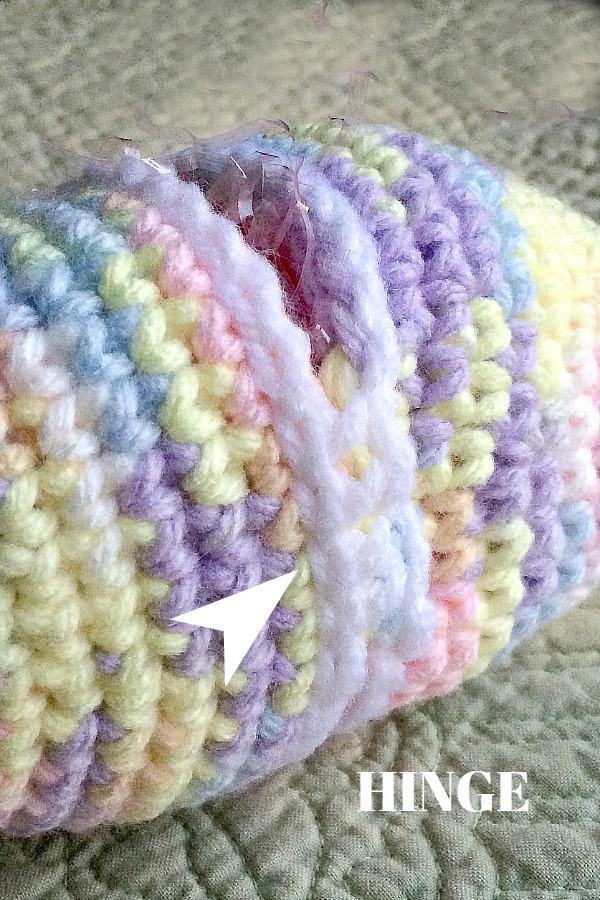
To hinge the two egg halves together, I threaded a large needle with matching yarn and made four (whip stitch) stitches and then went back in the opposite direction to form “x’s”. Knot and work in ends of yarn to complete.


