Crochet Beautiful Rose

Crocheting a beautiful rose is not only a fun and creative activity but also a wonderful way to add a touch of charm to your projects. With just a few simple crochet stitches and a bit of yarn, you can create a lovely rose that will add a pop of color and elegance to any project. Whether you're making a cozy scarf, a decorative pillow, or a cute headband, adding a crocheted rose is sure to make your creation extra special. So grab your hook and yarn, and let's crochet some gorgeous roses together!
Essential Crochet Stitches
First, let’s list the crochet stitches you’ll use to crochet a rose:
- Chain – CH
- Single crochet – SC
- Half double crochet – HDC
- Double crochet – DC
So, if you have already mastered these stitches, you can start crafting. Grab your leftover yarn (pink, red, or white) and the matching hook, and let’s go directly to the pattern.
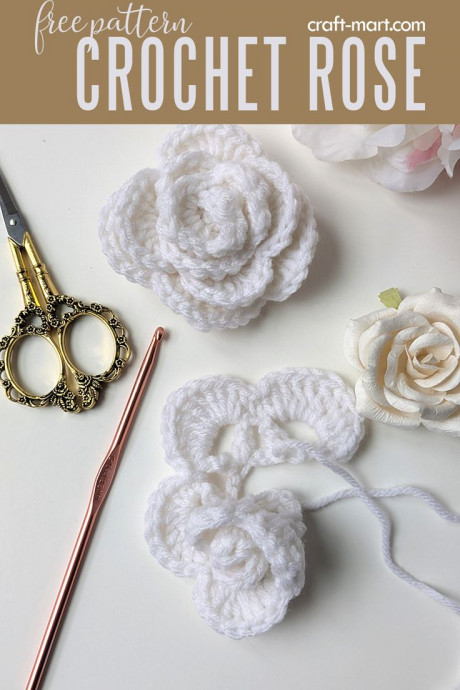
Free Crochet Rose Pattern Step-by-Step
Firstly, let’s discuss the structure of our crochet rose. We will start with a foundation chain that is any multiple of 3+1. For example, for a small rose: 7×3+1 = 22 chains. For a middle rose: 33+1=34 chains.
Second, we will create a row of V-stitches which will serve as the foundation for the petals. Third, we will work on the crochet rose petals. Lastly, we will assemble and secure the rose.
Crochet Rose Pattern
Chain 22.
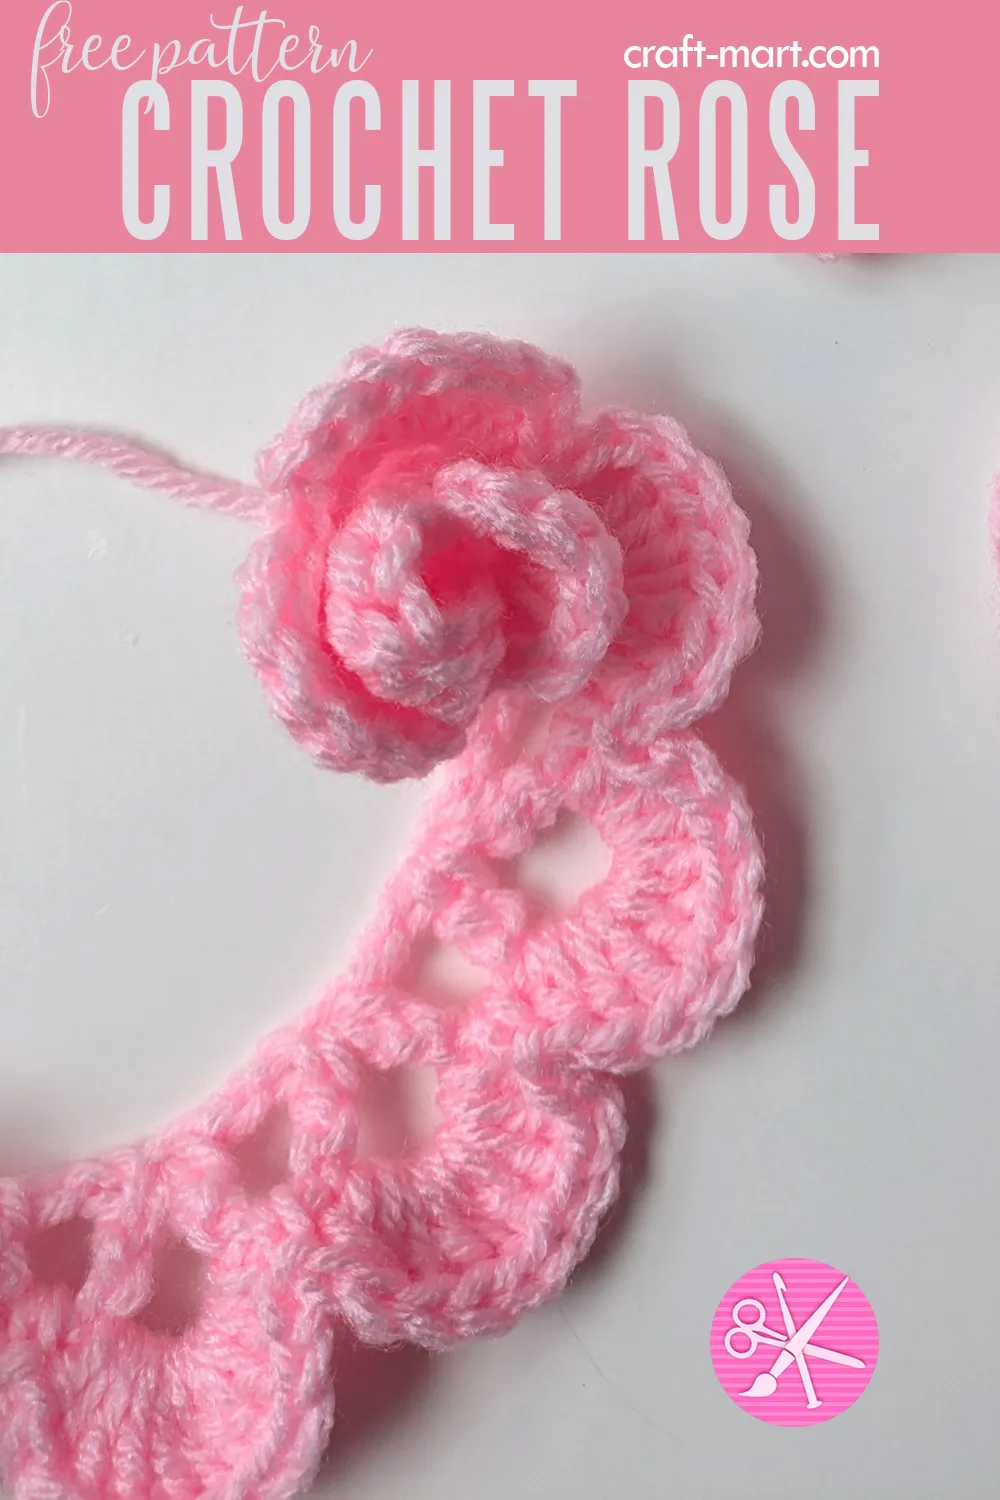
Row 1
CH 4 (represents first DC and CH2), DC into 5th CH from the hook (first V-stitch made). [Skip 2 chains, DC, CH2, DC into next CH] x 7. You have created a foundation for 8 rose petals.
Row 2
CH 1, turn. Into CH space: HDC, 8 DC, HDC (10 stitches for the first petal), SC between V-stitches. Repeat the same sequence into the next CH-SP (chain space).
HDC, 8 DC, HDC (2nd petal). SC between V-stitches.
Into next CH-SP: HDC, 7 DC, HDC (3rd rose petal). SC between V-stitches.
Into next CH-SP: HDC, 5 DC, HDC (4th rose petal). SC between V-stitches.
Into next CH-SP: HDC, 5 DC, HDC (5th rose petal). SC between V-stitches.
Into next CH-SP: HDC, 4 DC, HDC (6th rose petal). SC between V-stitches.
Into next CH-SP: HDC, 3 DC, HDC (7th rose petal). SC between V-stitches.
Into next CH-SP: HDC, 3 DC, HDC (8th rose petal).
Important Note
It is important to realize that your DC stitches for the petals should fit tightly in the chain space. For this reason, move the stitches slightly with both fingers if you are running out of space.
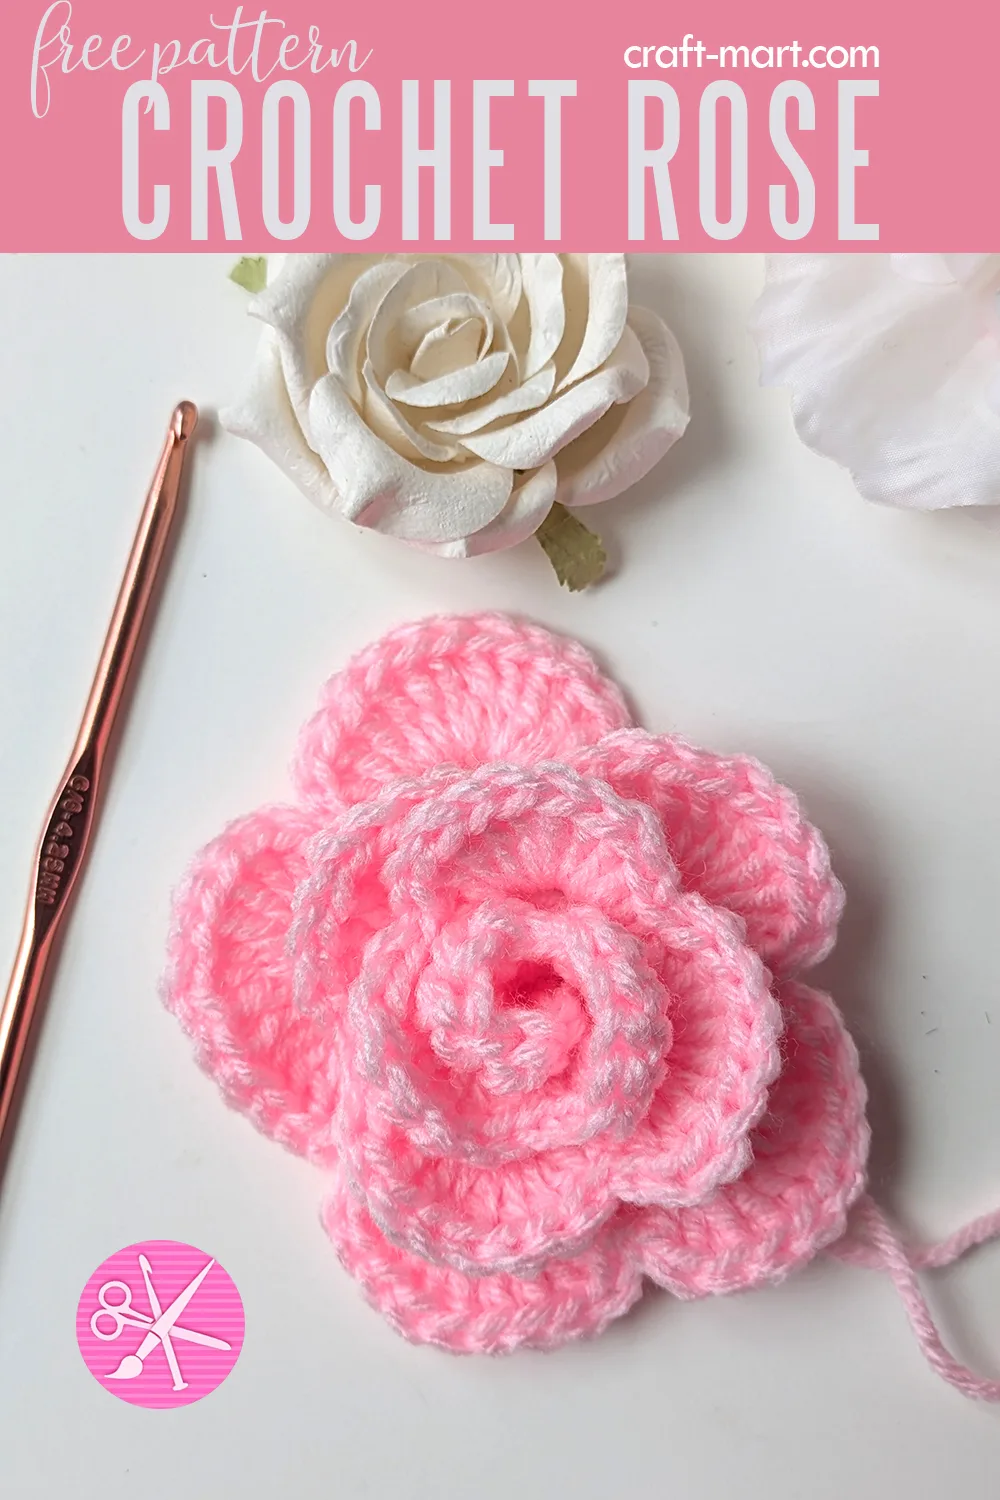
Fasten off leaving approximately 20 inches of yarn for sewing and securing the rose petals. Next, starting with the smallest 8th petal, start rolling your creation so it looks like a spiral on the bottom.
Lastly, using a tapestry needle secure your rose, hide the tail ends, and cut the excess yarn. Make sure not to flatten the rose too much so that the petals curl naturally.
Crocheting a Rose is Easier Than You Think
As illustrated, it is a quick 2-row pattern that should not take more than 30 minutes maximum. Also, you will be able to crochet this delicate flower even faster as you gain experience and skills.
What Makes Crochet Rose Look Realistic
As shown above, our rose petals are all slightly different, going from smallest (fewer stitches) to large (more stitches). As a result, it makes it look more realistic, as a rose created by nature.
How to Use Your Creation
As you finish a few crocheted roses, get ready to admire, use them, and display your hand-crafted beauty. Consequently, you can use them:
- Glued to canvas for a unique wall art
- As an applique for crochet baby blankets
- For home decor vignettes
- As bookmarks
- For bouquets (if you add stems and leaves).
- Funny Pictures
-
 Hilarious Memes for Those Bored to Tears
-
 Weekly Treat of Funniest Parenting Memes for Good Laugh out Loud Right Now
-
 Really Funny Pics to End These Weekend Perfectly
- Recipes
-
 Crispy Baked Avocado Fries
-
 Scrambled Chickpea and Spinach Pitas
-
 Cinnamon Pancakes
- Lifehacks
-
 Crochet Basics: Aligned Cobble Stitch
-
 Brick Stitch Crochet Tutorial
-
 Crochet Basics: Wattle Stitch
- Crochet Ideas
-
 Crochet Snorlax Plushie Doll
-
 Crochet Beautiful Penguin Toy
-
 Crochet Tiny Snowman
- DIY
-
 DIY Santa Craft For Kids
-
 Paper Plate Angel Craft
-
 Upcycled Mason Jar Chicken Vase
- Knitting Ideas
-
 Knitted Bridger Cowl
-
 Knitted Keepsake Bag
-
 Knitted Cutie Cupcake Dolls