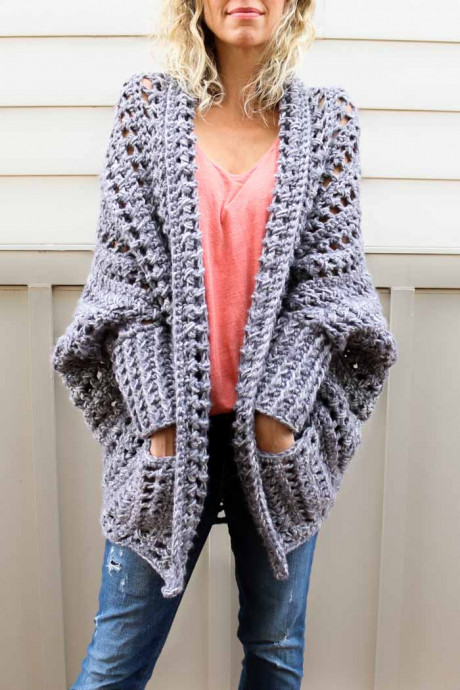
How to Crochet a Stylish Shrug with Pockets and Collar


You’ll need:
7 (9, 10) skeins of Lion Brand Wool-Ease Tonal (Weight: 5/ bulky – 124 yds, 4 oz) in color Smoke (149);
Crochet hook 10 mm;
Tapestry needle;
Stitch markers or safety pins.
Size:
Bust Size // Length of Sweater from collar to bottom edge:
S/M: 34-38.5” // 30.5”;
L/XL: 39-44.5” // 33”;
2XL/3XL: 45-50” // 35.5”.
Stitch Control:
10 stitches = 5”; 2 repeats in the stitch pattern (6 total rows) = 5”.
Instructions
Body
Foundation Row: Ch 98 (110, 122).
Row 1: 1 dc in the sixth ch from the hook (counts as 1 dc and 1 ch1sp), *ch 1, sk 1 ch, 1 dc in next ch; rep from * to end; turn. 95 (107, 119)
Row 2: Ch 3, sk next ch1sp work 2 crossed stitches as follows: 1 dc forward into next ch1sp, 1 dc back into just skipped ch1sp going behind forward dc so as not to catch it, *1 dc forward into next unoccupied ch1sp, 1 dc into back into previous ch1sp; rep from * to end when last forward dc occupies first tch, 1 dc into second tch; turn.
Row 3: Ch 1, 1 sc into first st, 1 sc into next and each st to end, working last sc into top of tch; turn.
Row 4: Ch 4 (counts as 1 dc and a ch1sp), sk 2 sts, 1 dc into next st, *1 ch, sk 1 st, 1 dc into next st; rep from * ending last rep in tch; turn.
Repeat Rows 2-4 ten (eleven, twelve) more times. At this point, you should have 12 (13, 14) rows of little ch1sp “windows” (Rows 1 and 4).
Seaming Rectangle
There is no right side (RS) or wrong side of this fabric, so just choose the one you like best to face out.
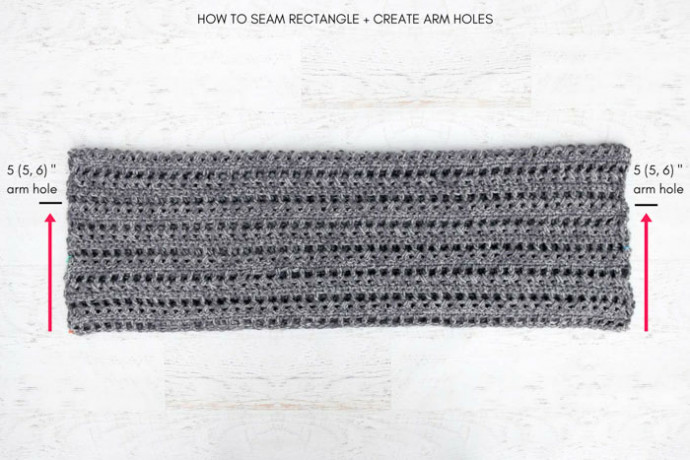
Fold rectangle in half with RS facing in so that the foundation row and the final row of the rectangle are touching. Pin in place along side seams using stitch markers or safety pins. Take care to line up stripes.
Place a stitch marker 5 (5, 6) inches from the folded side on either side of the rectangle. Using a tapestry needle and a doubled-over strand of MC yarn, begin seaming the rectangle, working from the open side to the folded side. Stop at the stitch marker. Repeat for the second seam.
Turn your new shrug-lette right side out and lay it flat as pictured in the photo below. Place a stitch marker in the double crochet stitch that falls at the intersection of the bottom of the shrug and the perpendicular collar edge. Repeat on the second side.
Collar
The collar is worked along the edge of the shrug back and forth in rows starting at the bottom-most front edge of the sweater, working around the back of the neck and returning to the bottom-most front edge on the other side.
The marked double crochet stitches will become where you work the first and last stitches of Row 1. All subsequent rows will be worked between these stitch markers.
Right-Handed Crocheters: Attach yarn in the left stitch marker, as seen when looking at the sweater laying flat.
Left-Handed Crocheters: Attach yarn in the right stitch marker, as seen when looking at the sweater laying flat.
Row 1: Ch 3, sk next ch1sp work 2 crossed stitches as follows: 1 dc forward into next ch1sp, 1 dc back into just skipped ch1sp going behind forward dc so as not to catch it, *1 dc forward into next unoccupied ch1sp, 1 dc into back into previous ch1sp; rep from * to end when the last forward dc occupies the ch1sp before the marked stitch, 1 dc into marked dc; turn.
Row 2: Ch 1, 1 sc into first st, 1 sc into next and each st to end, working last sc into top of tch; turn.
Row 3: Ch 4 (counts as 1 dc and a ch1sp), sk 2 sts, 1 dc into next st, *1 ch, sk 1 st, 1 dc into next st; rep from * ending last rep in tch; turn.
Repeat Rows 1-3 two more times.
Row 4: Repeat Row 1.
Round 5: Ch 1, 1 sc into first st, 1 sc into next and each st to end, working 2 sc into top of tch; do not turn; continue around the bottom edge of the sweater evenly spacing sc sts all the way to the bottom corner where the round began; sl st to the first sc of the round to join.
Fasten off.
Sleeves
Attach yarn in the armhole at the seam created from sewing the rectangle together. Be sure to work with the RS (outside) of the sweater facing you at all times.
Round 1: Ch 1, work 22 (22, 26) sc sts around armhole edge, sl st to first sc of round to join.
Round 2: Ch 1, 1 sc in each sc, sl st to first sc of round to join.
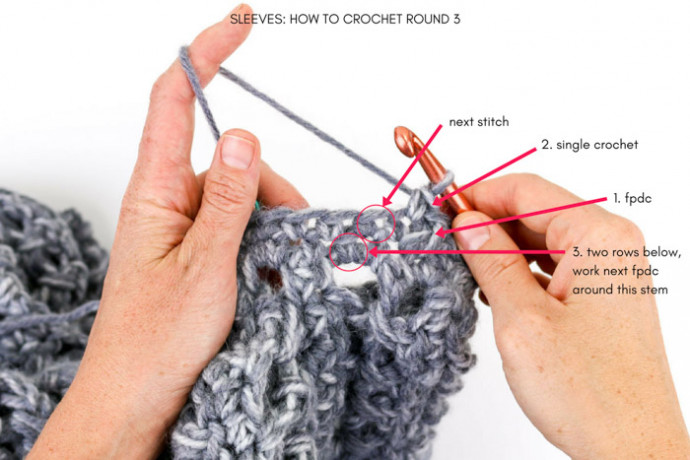
Round 3: Ch 1, *1 sc in next sc, 1 fpdc around next sc two rows below; rep from * to end of round, sl st to first sc of round to join.
Round 4: Ch 1, 1 sc in each sc, sl st to first sc of round to join.
Round 5: Ch 1, *1 sc in next sc, 1 fpdc around stem of next fpdc two rows below; rep from * to end of round, sl st to first sc of round to join.
Repeat Rounds 4 and 5 seven times. Add additional repeats if longer sleeves are desired. Fasten off.
Pockets
Make 2.
Foundation Row: Ch 18.
Row 1 (RS): 1 sc into the second ch, 1 sc into next and each ch to end; turn. (17)
Row 2 (WS): Ch 4 (counts as 1 dc and a ch1sp), sk 2 sts, 1 dc into next st, *1 ch, sk 1 st, 1 dc into next st; rep from * ending last rep in last sc; turn.
Row 3 (RS): Ch 3, sk next ch1sp work 2 crossed stitches as follows: 1 dc forward into next ch1sp, 1 dc back into just skipped ch1sp going behind forward dc so as not to catch it, *1 dc forward into next unoccupied ch1sp, 1 dc into back into previous ch1sp; rep from * to end when last forward dc occupies first tch, 1 dc into second tch; turn.
Row 4 (WS): Ch 1, 1 sc into first st, 1 sc into next and each st to end, working last sc into top of tch; turn.
Rep Rows 2-4 once more.
Row 5 (WS): Rep Row 2.
Row 6 (RS): Ch 1, 1 sc into first st, 1 sc into next and each st to end, working sc into top of tch; do not turn; continue around the corner working 2 additional sc in the same tch, continue evenly spacing sc along the top edge of the pocket, stop when corner is reached (chain tail should be at the same corner).
Fasten off, leaving a 24” tail.
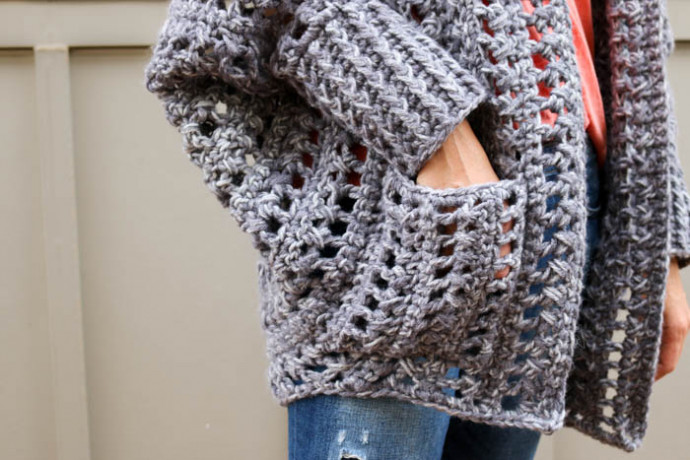
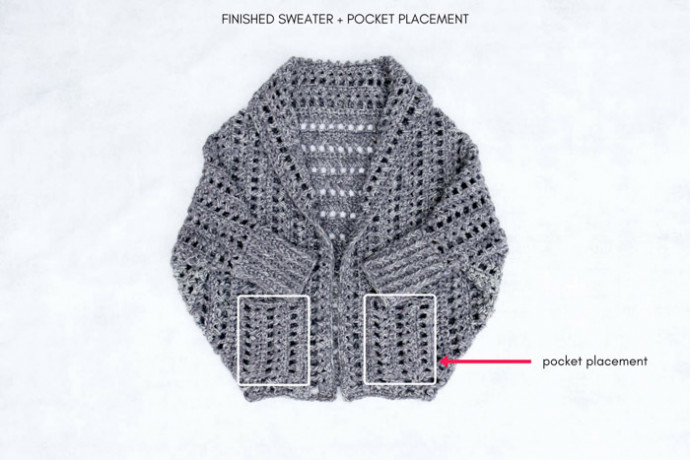
Pin pockets to the front of the sweater using stitch markers or safety pins. Take care to line up rows on pockets and sweater so that the pockets visually recede into the sweater.
Use leftover tail and a tapestry needle to sew pockets onto the sweater using a whip stitch.
Weave in any remaining ends.