How to Create a Simple Crochet Placemat

Learn the fundamentals of crocheting with this beginner-friendly project - a simple yet stylish placemat! This DIY project is perfect for those who are new to crocheting and want to practice their basic stitches. By following a step-by-step tutorial, you can create a beautiful and functional placemat that will add a personal touch to your dining table. Choose your favorite yarn colors to customize the placemat to match your home decor. Whether you're a seasoned crocheter looking for a quick project or a beginner eager to learn a new skill, making a crochet placemat is a rewarding experience. So grab your crochet hook and yarn, and get ready to create a lovely addition to your home!
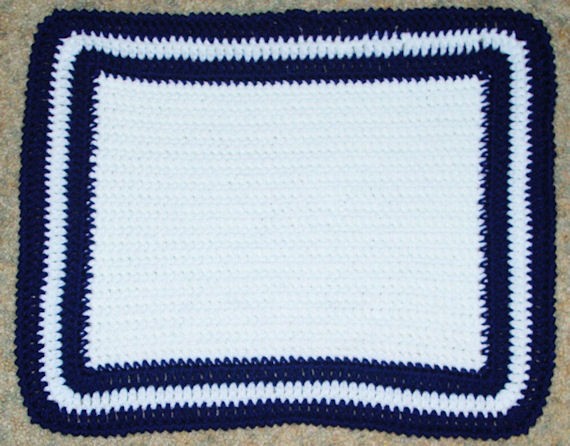
Measurements
14" x 16"
Materials
- Red Heart Super Saver (White - 3 ounces)
- Red Heart Super Saver (Navy - 2 ounces)
- Hook Size H
Stitches
ch, dc, rev sc, sc, sl st.
Difficulty Level
Medium
Instructions
Row Instructions
RND 1: With White, Ch45, sc in the hump of the 2nd ch from the hook.
Sc in the hump of each remaining ch. (44 dc)
ROWS 2-36: Ch1, turn.
Sc in each st. (44 sc)
Border
RND 1: Change to navy, Ch1, turn. Sc in each st and row end around, placing 3 sc in each corner.
Join with a sl st in the first sc.
RND 2: Ch3, do not turn.
Dc in each st around, placing 3 dc in each corner st. Join with a sl st.
Fasten off.
RND 3: Join white with a dc in any st.
Dc in each st around, placing 3 dc in each corner st.
Join with a sl st in the first st. Fasten off.
RND 4: Repeat RND 3 with Blue except do not fasten off.
RND 5: Ch1, do not turn. Rev sc in each st around, placing 2 rev sc in each corner space.
Join with a sl st & Fasten off.