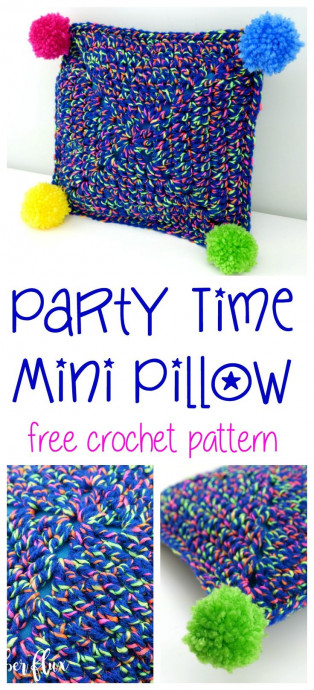
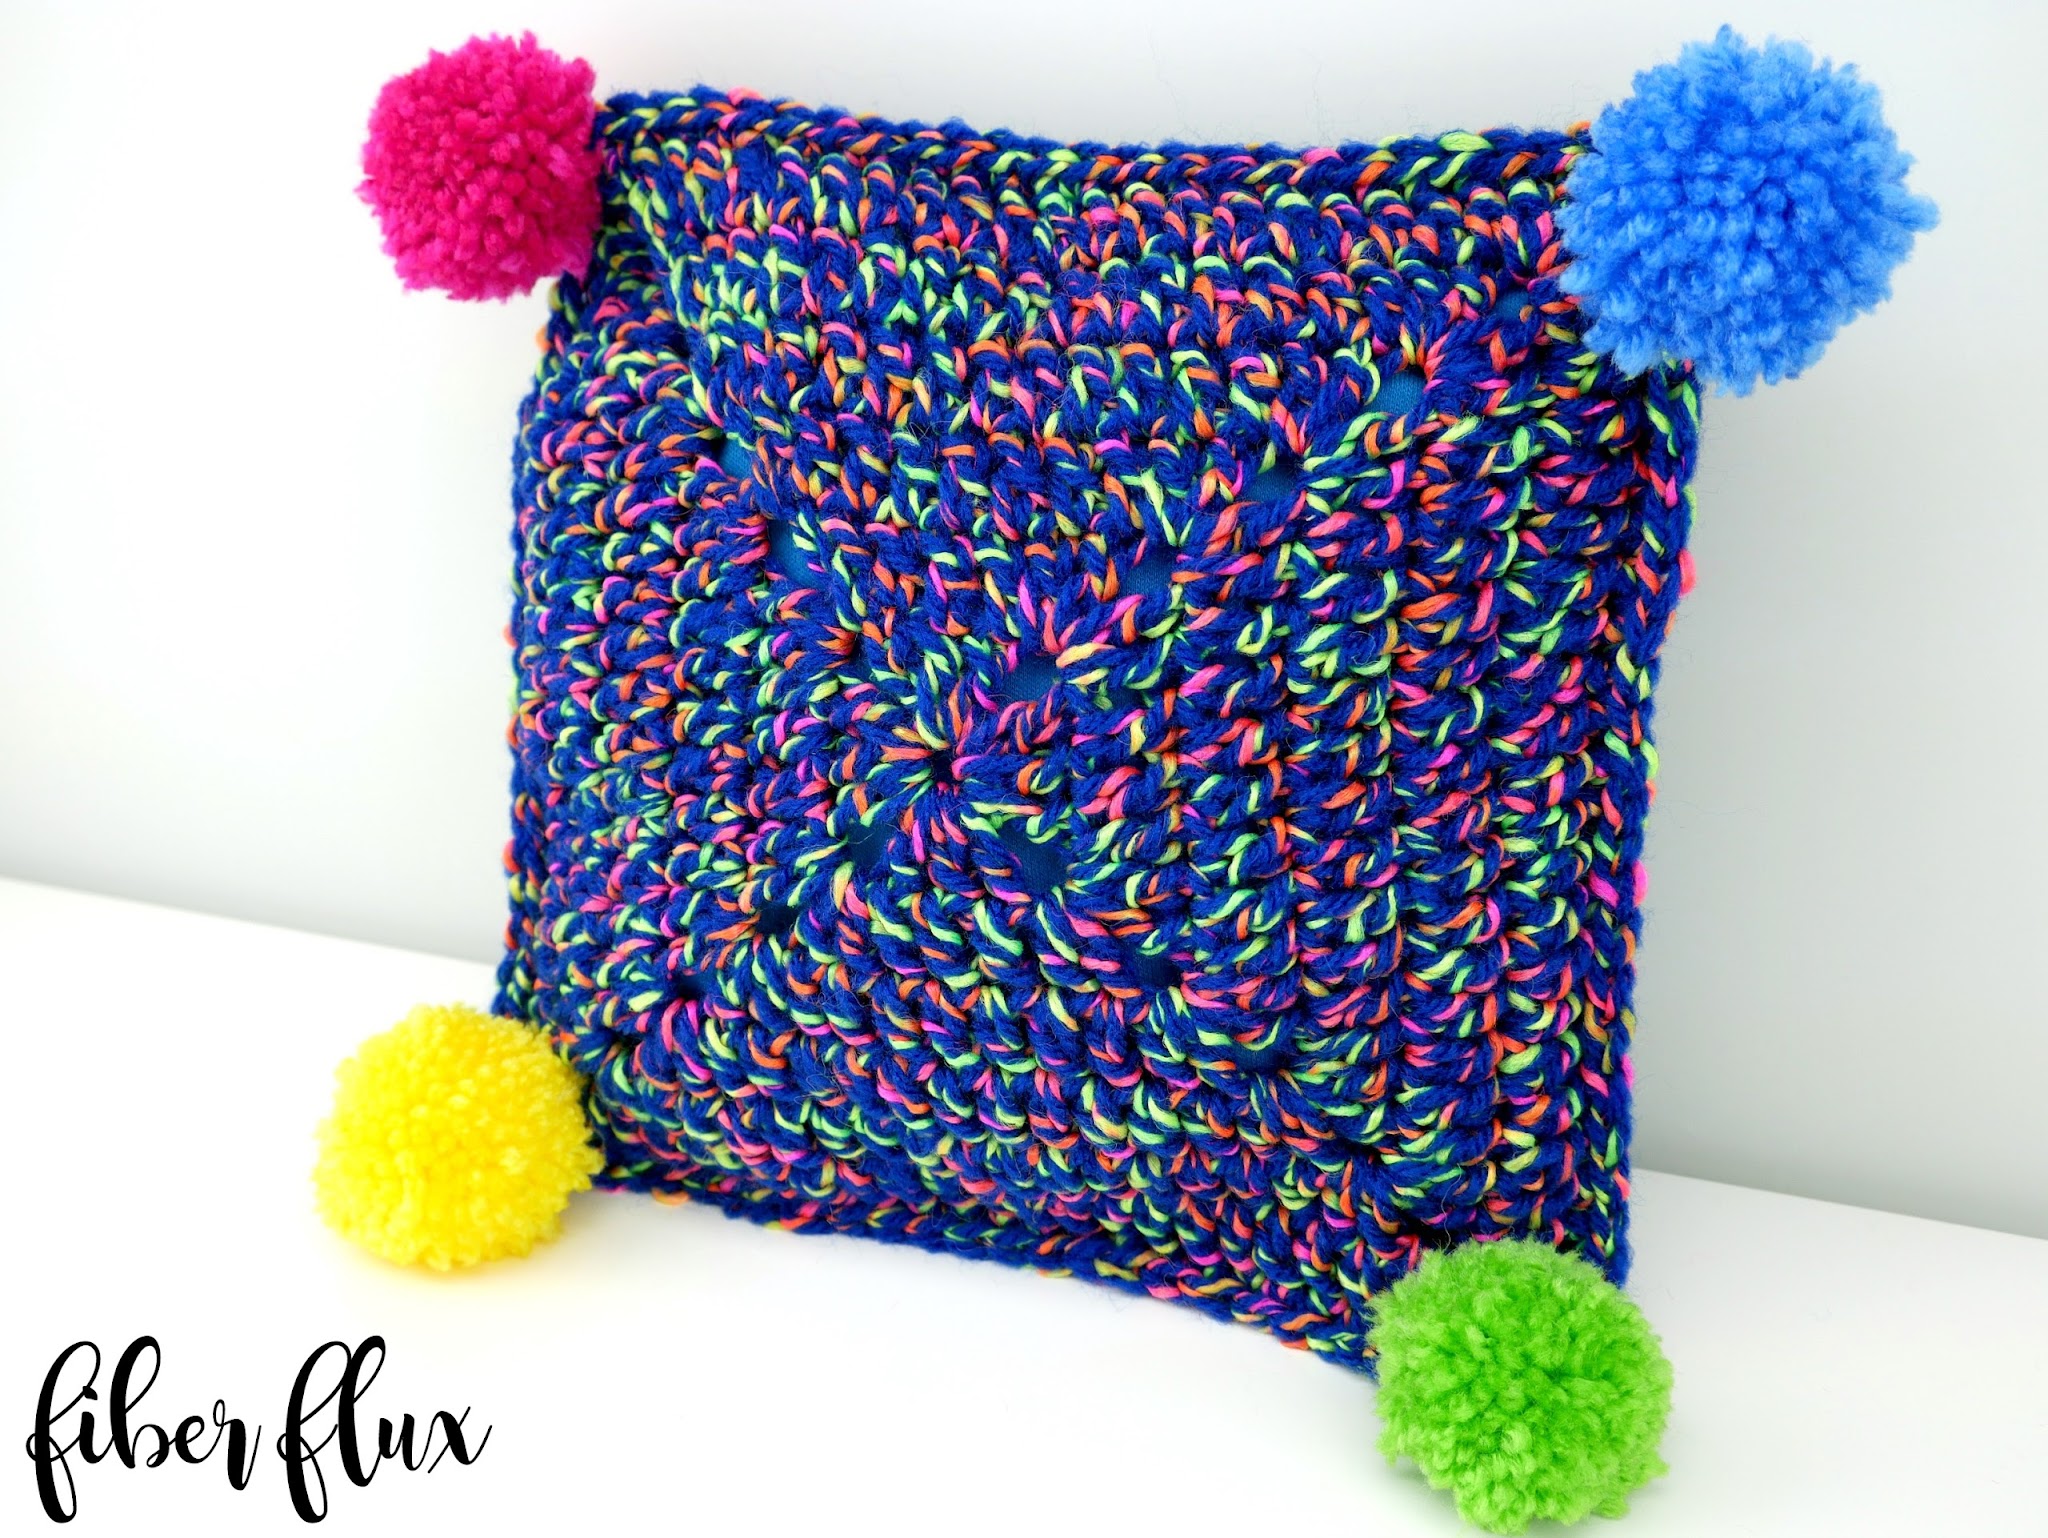
Crochet Mini Pillow

Introduction to Crochet Mini Pillows
Crochet mini pillows are the epitome of charm and coziness! These adorable creations add a touch of warmth to any space, whether tossed on a bed or placed on a cozy armchair. With endless possibilities for colors, textures, and patterns, you can let your creativity run wild and personalize each mini pillow to suit your style.
They also make perfect DIY gifts for your loved ones, bringing a smile to their faces with their handmade charm. So grab your yarn and crochet hook, and get ready to craft some irresistible little pillows that will brighten up any room!
Materials for Crocheted Pillow Cover
- 6.0 mm J crochet hook
- 1 ball of Tweed Twist by Red Heart in “Neon Royal”
- Small amounts of brightly colored worsted weight yarn for pom poms (I used Red Heart Super Saver in “Shocking Pink”, “Spring Green”, “Delft Blue”, and “Bright Yellow”)
- Tapestry Needle
- Scissors
Materials for DIY Pillow Form
- Hot Glue Gun
- Scissors
- Fiberfill or stuffing of your choice
- 2 pieces of scrap fabric cut into 8-inch squares
Sizing
- 8 inches tall
- 8 inches wide
Abbreviations
- Chain (ch)
- Slip Stitch (sl st)
- Single Crochet (sc)
- Double Crochet (dc)
Instructions
Creating the Pillow
Ch 4 and join with a slip stitch to form a ring.
Round 1
Chain 5, then work 3 dc into the center of the ring, then ch 2. Work the (3 dc, ch 2) two more times into the center of the ring. Work 2 more dc into the center of the ring, and join with a sl st to close.
Round 2
In any corner, tie on a new color then ch 5. Work two dc into the center of the ring. Work a dc in each of the next three stitches. To work the corner, work two dc, ch two, then two more dc in the ch 2 space from the previous round. Work the next side the same way, working a dc in the next three stitches, then work the next corner by working 2 dc, ch 2, 2 dc all in the same space. Keep working in this manner all the way around the square. At the corner where the round began, work one more dc in the corner space. Join with a sl st to close round.
Round 3
In any corner, tie on a new color then ch 5. Work 2 dc in the same space. Work a dc in each stitch across the top (there will be seven this time). Work the corner the same way as the previous round (2 dc, ch 2, 2 dc). Keep going in this manner all the way around, working the corners and the sides as before. When reaching the last corner, work one more dc, and join with a slip stitch to close.
Repeat round 3 for a total of 6 rounds (or desired dimensions). Each side will grow in stitch count as the square gets larger, but corners are always worked the same way.
Finishing & Assembly
Sandwich the squares together (right sides facing outward on both sides) and seam the left side, bottom, and left side with a single crochet stitch (work a sc in each stitch, 3 sc at each of the corners), leaving the top open. Place the pillow form inside and continue seaming across the top. Fasten off and weave in all ends.
Make 4 pom poms with colors of your choice. I made each one of mine about 2 inches wide. Tie each one into each of the corner spaces and trim tails flush to the pom pom.
- Funny Pictures
-
 These are the Pics That Simply Describe Your Life
-
 Hilariously Accurate Parenting Memes That Show the Other Side of Parenthood
-
 Great Pics That Just Depict Our Lives
- Recipes
-
 Crispy Baked Avocado Fries
-
 Baked Beans and Hot Dogs with Biscuit Topping
-
 Roasted Rosemary Lemon Chicken Breasts
- Lifehacks
-
 Crochet Basics: Twisted Fringe
-
 7 Crochet Tips And Tricks
-
 How To Work Crochet Into Denim
- Crochet Ideas
-
 Crochet Snorlax Plushie Doll
-
 Crochet Cat in 1 Row
-
 Crochet Beautiful Penguin Toy
- DIY
-
 Popsicle Stick and Jingle Bell Christmas Tree Ornament
-
 Upcycled Mason Jar Chicken Vase
-
 Crochet Namaste Stephanie Doll
- Knitting Ideas
-
 Knitted Keepsake Bag
-
 Knitted Textured Heart Dishcloth
-
 Knitted Snowfall Dishcloth