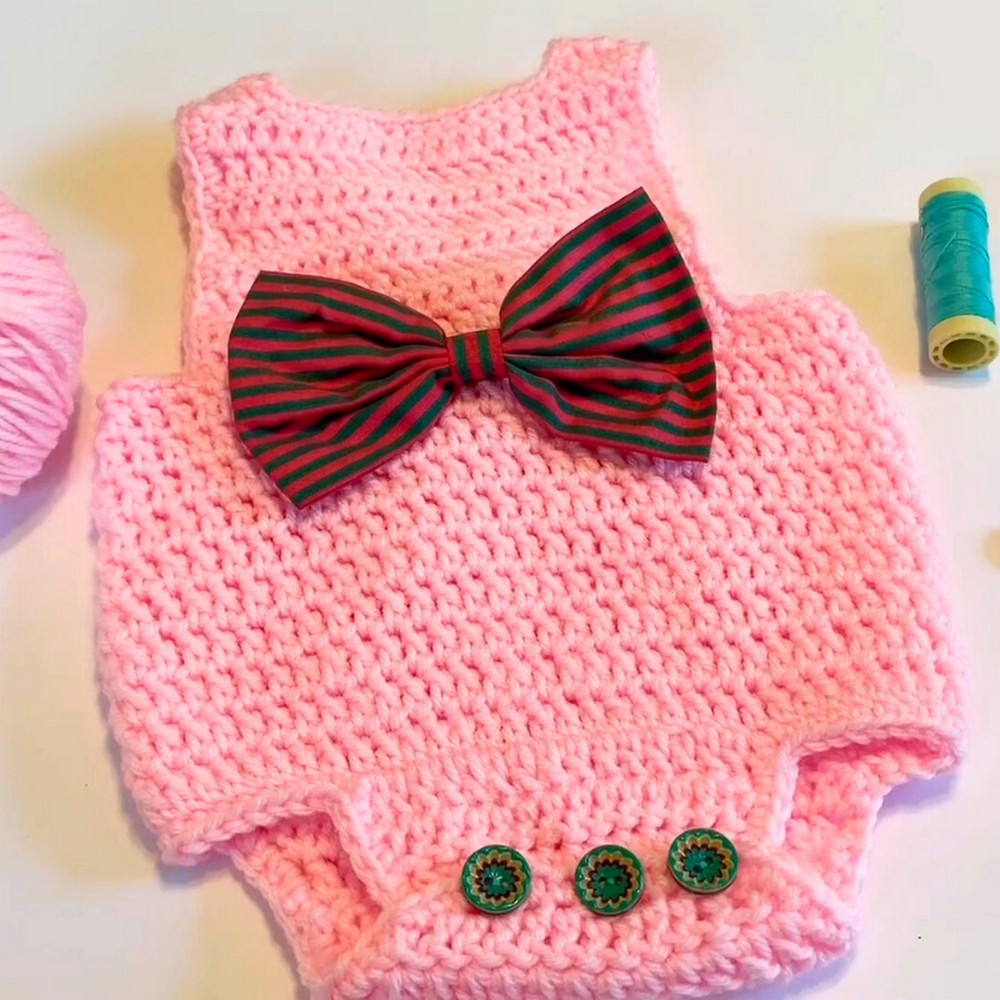
Crochet Baby Romper: A Charming Outfit for Your Little One

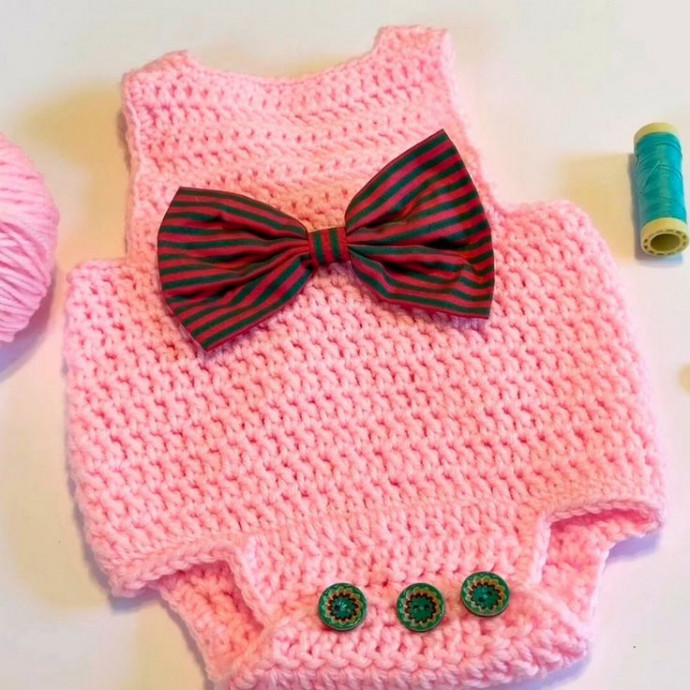
Crochet baby rompers are not just adorable but also incredibly charming for your little one! Whether you're looking for a sweet outfit for a special occasion or simply want to add a touch of cuteness to your baby's wardrobe, a crochet romper is a perfect choice. With delicate designs and soft yarn, these rompers are gentle on baby's skin and oh-so-comfortable to wear. The intricate patterns and lovely colors make each romper a unique and precious piece that will surely be cherished. Get ready to capture some heart-melting moments with your baby in a lovely crochet romper!
Materials and Preparation
Here’s a list of what you’ll need to create this crochet baby romper:
- Yarn: Lightweight (Category 3/Baby Yarn)
- Hook: 3.5mm crochet hook
- Tools: Stitch markers, measuring tape, scissors, and a yarn needle
- Optional: Buttons (2–4 for closures)
Abbreviations and Notes
Familiarize yourself with these crochet abbreviations for the pattern:
- CH: Chain
- SC: Single Crochet
- DC: Double Crochet
- HDC: Half Double Crochet
- SL ST: Slip Stitch
Important Notes:
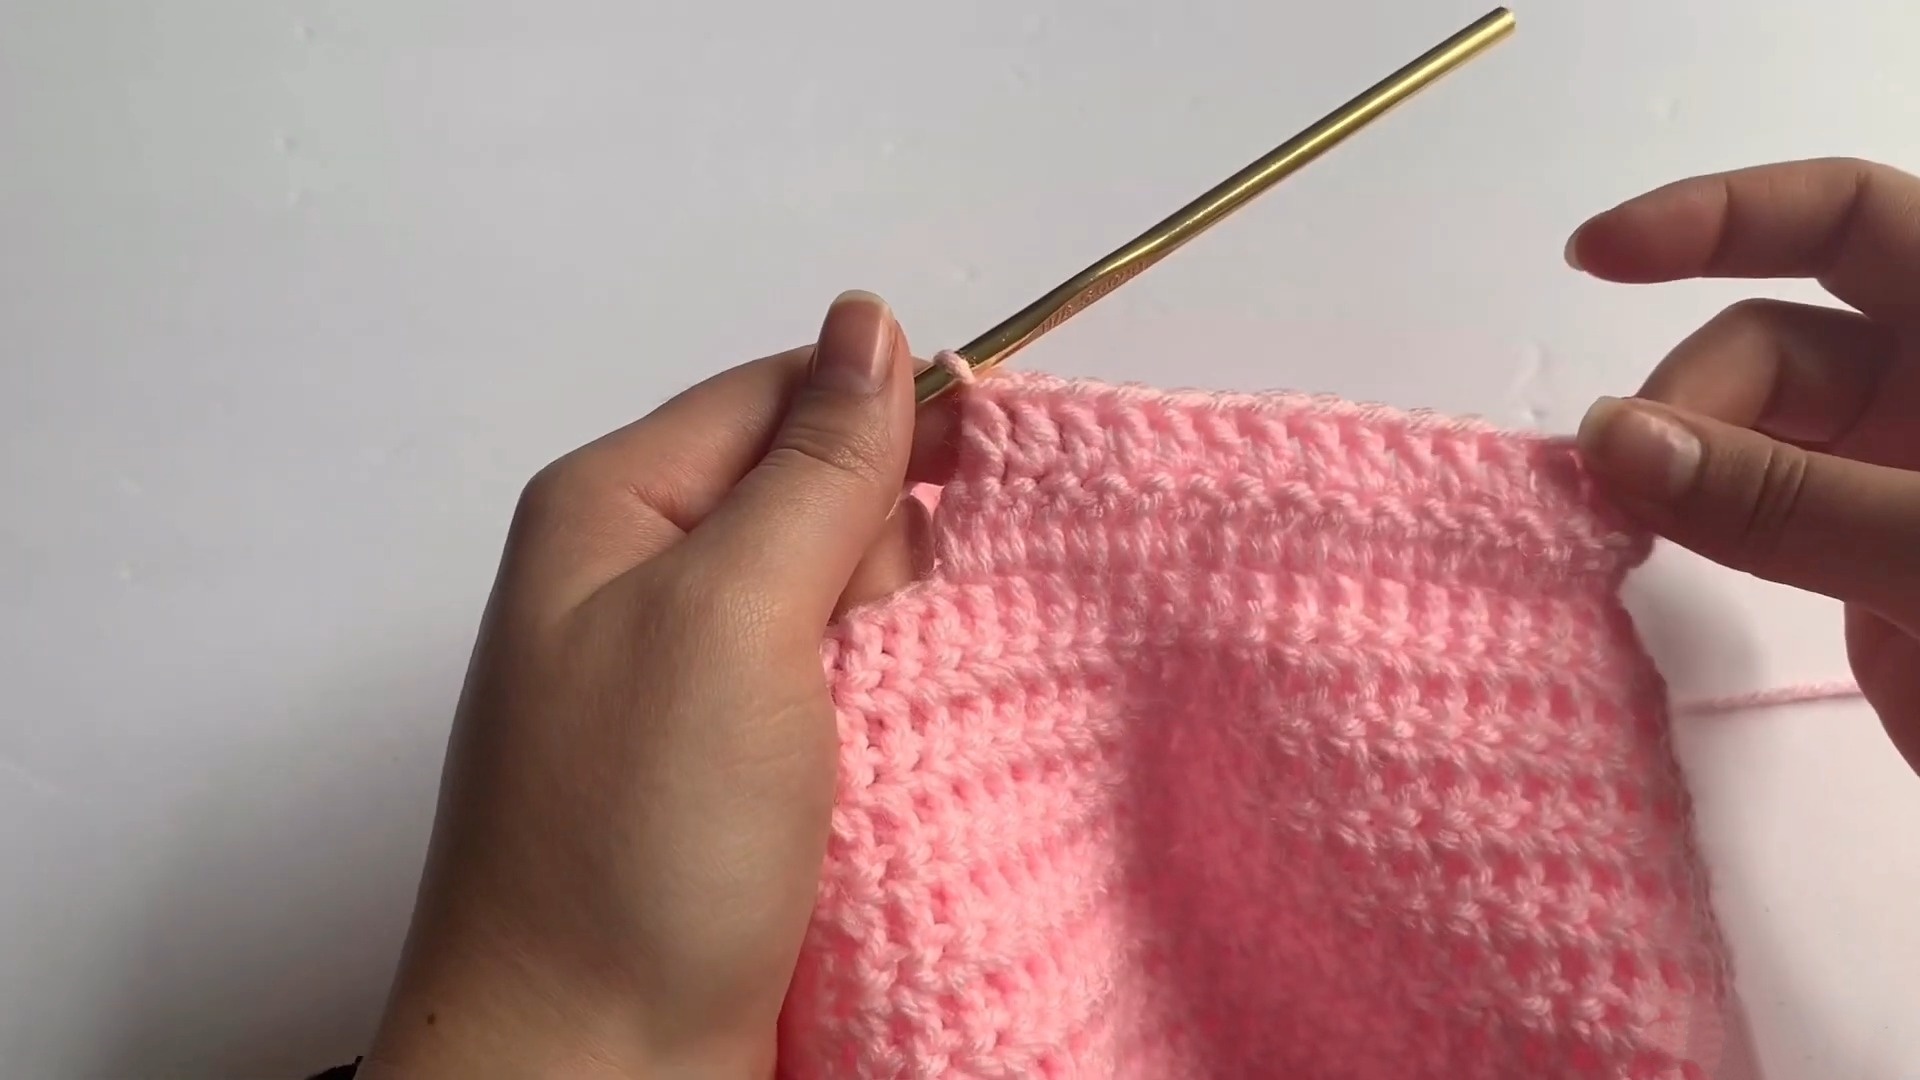
- Maintain consistent tension while working.
- Mark the beginning of rounds with a stitch marker for accuracy.
- Create a gauge swatch beforehand to ensure proper sizing.
Gauge, Approximate Size, and Pattern Notes
- Gauge: 22 stitches x 24 rows = 4” in Single Crochet (SC).
- Finished Dimensions: Designed to fit newborns up to 6 months (approximately 16” chest circumference); adjust row counts for larger sizes.
Special Techniques: Focus on seamless joins for a professional look. Gauge swatch is recommended to match pattern sizing.
Step-by-Step Pattern
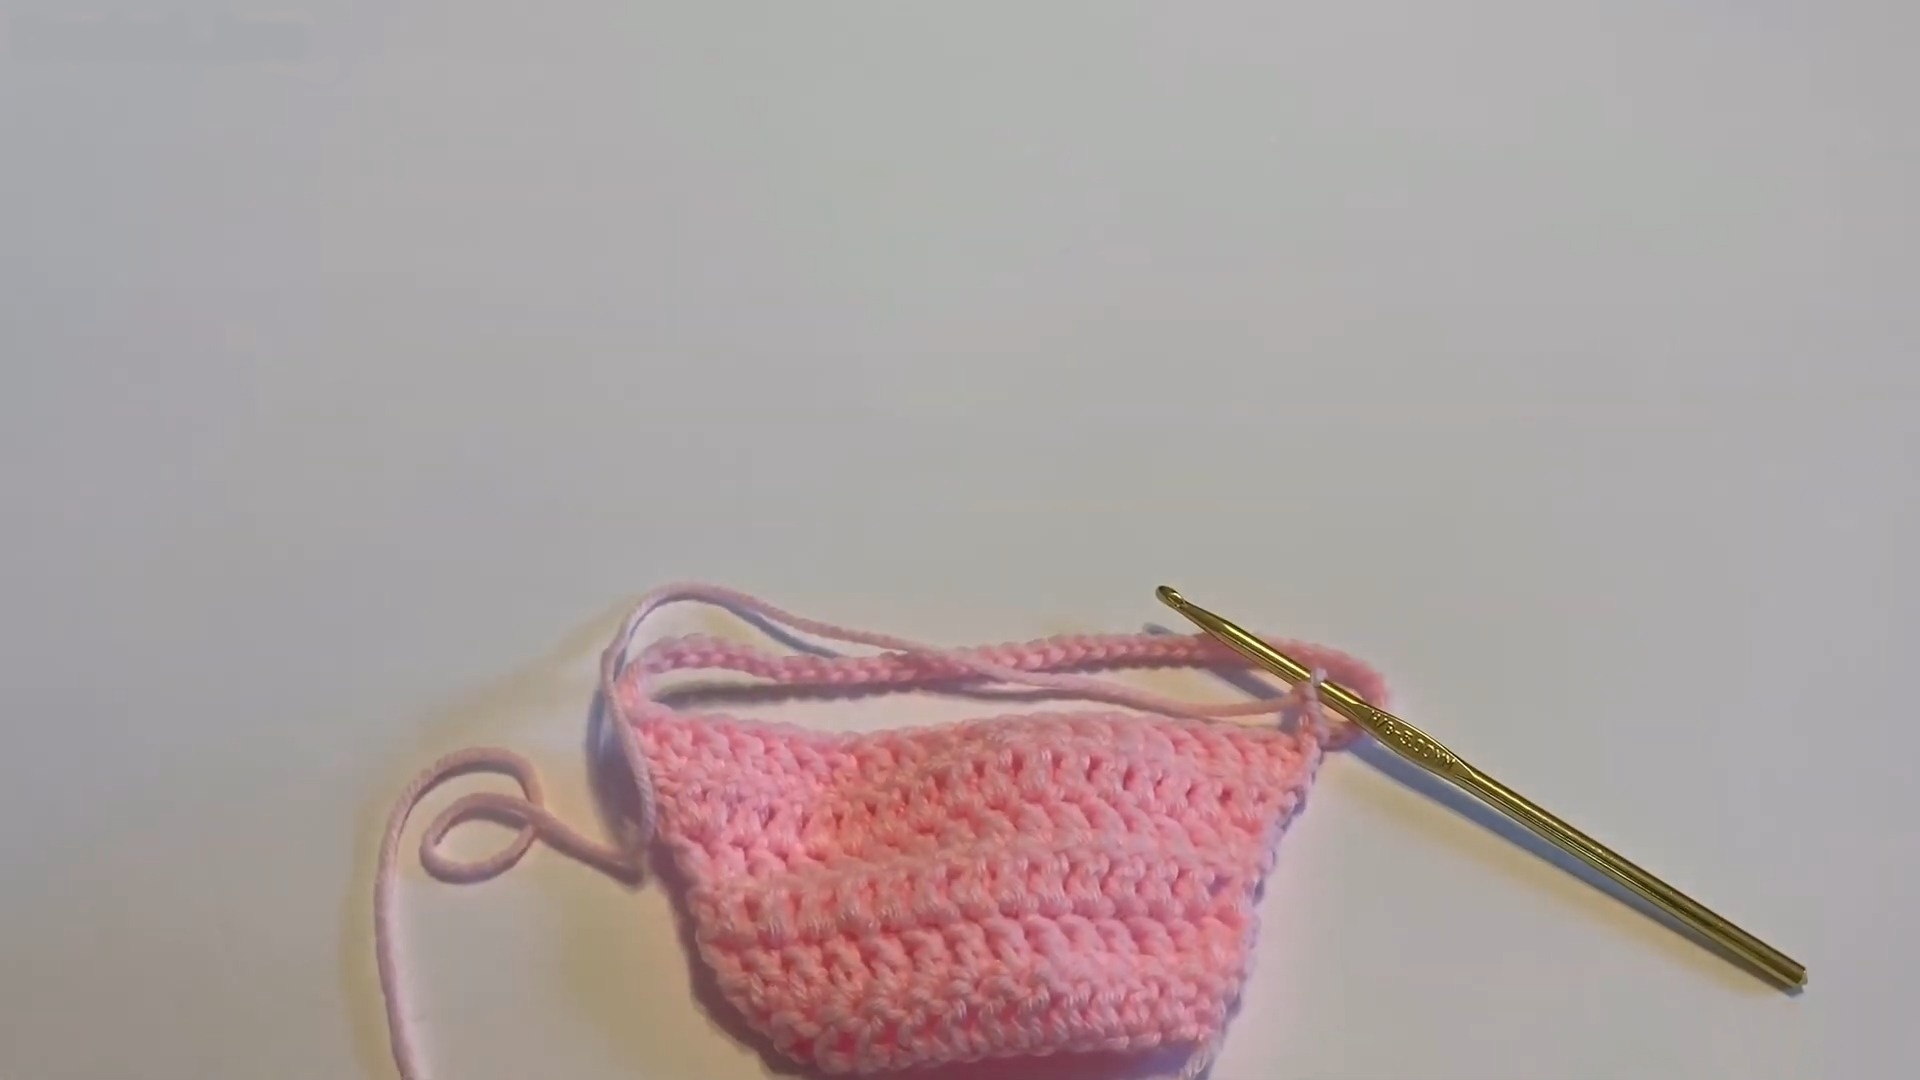
Part 1: Romper Base
Foundation Row:
CH 50 (adjust to fit chest circumference). Work SC across foundation chain.
Body Section:
Rows 2–16: Work SC across with turning after each row. For texture, alternate rows of HDC and SC starting from Row 17.
Leg Openings:
Divide your work in half and mark each side. For each leg, SC around the opening to create a clean edge.
Part 2: Top Sleeveless Section
Front Panel:
Attach yarn to top edge, CH 1. Row 1: Work SC evenly across. Continue for 6 rows, shaping neck by decreasing 1 stitch at the start of every row.
Back Panel:
Repeat same steps as front panel without neck shaping.

Part 3: Straps and Finishing Touches
Shoulder Straps:
CH 30 for each strap. Attach to back panel with SL ST.
Button Closure:
Sew buttons to front panel straps; adjust button positions for tightness.
Edging:
Work SL ST around all edges for a polished look.
Final Touches:
- Weave in loose ends using a yarn needle.
- Steam block the romper for perfect structure and neatness.
- Funny Pictures
-
 Hilarious Memes for Those Bored to Tears
-
 Weekly Treat of Funniest Parenting Memes for Good Laugh out Loud Right Now
-
 Really Funny Pics to End These Weekend Perfectly
- Recipes
-
 Crispy Baked Avocado Fries
-
 Scrambled Chickpea and Spinach Pitas
-
 Cinnamon Pancakes
- Lifehacks
-
 Crochet Basics: Aligned Cobble Stitch
-
 Brick Stitch Crochet Tutorial
-
 Crochet Basics: Wattle Stitch
- Crochet Ideas
-
 Crochet Snorlax Plushie Doll
-
 Crochet Beautiful Penguin Toy
-
 Crochet Tiny Snowman
- DIY
-
 DIY Santa Craft For Kids
-
 Paper Plate Angel Craft
-
 Upcycled Mason Jar Chicken Vase
- Knitting Ideas
-
 Knitted Bridger Cowl
-
 Knitted Keepsake Bag
-
 Knitted Cutie Cupcake Dolls