How to Crochet an Adorable Baby Platypus

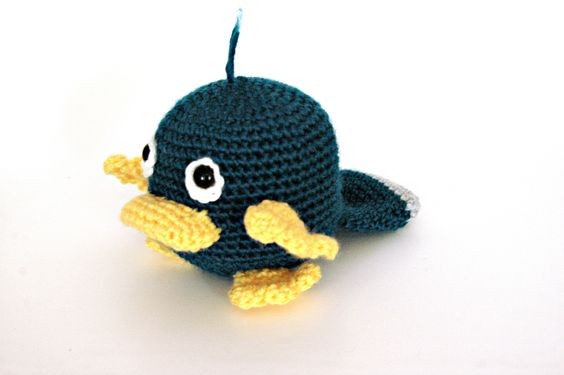
Crochet baby platypuses are absolutely adorable and a joy to create. With their unique beak, webbed feet, and fluffy bodies, they make a delightful addition to any collection of crochet animals. The intricate details like their bill and tail add a fun challenge to the crafting process, but the end result is always rewarding. Imagine the smiles these little critters would bring on someone's face as a handmade gift or a cute addition to a nursery! Whether you're a seasoned crocheter looking for a new project or a beginner excited to try your hand at something different, crafting a crochet baby platypus is sure to be a delightful and heartwarming experience.
Materials
Worsted Weight Yarn
- I love this yarn – Yellow [A] 30 yds
- I love this yarn – White [B] 3 yds
- I love this yarn – Greymist [C] 10 yds
- Sheepish – Teal(ish) [D] 102 yds
- Size E crochet hook
- Polyfiberfill
- Large Eye Needle
- Size 12 mm safety eyes
Abbreviations
- SC – Single Crochet
- HDC – Half Double Crochet
- CH – Chain
- FO – Fasten Off
- SL ST – Slip Stitch
- INC – Make two Single Crochet in Same Stitch
- DEC – Single Crochet two stitches together
- BLO – Back Loops Only
- FLO – Front Loops Only
Project Note
Almost the entire project is worked in the round. Use a stitch marker or a scrap piece of yarn to mark the beginning of each row. Then you don’t have to count every row. Do not join unless instructed to. Parentheses indicate a repeat. Repeat the stitches in the parentheses for the number of times indicated. The bracketed number [] is the number of stitches at the end of each row. I spread my increases out so there isn’t a seam on the finished piece. If you do not like this method, you can do regular increases.
Instructions
EYES (make 2)
In B, Ch 2
8 SC in 2nd CH from hook [8].
Join with a slip stitch, fasten off and set aside to attach to the body.
BODY
In D, CH 2
Round 1: 6 SC in 2nd CH from hook [6].
Round 2: (INC) 6 times [12].
Round 3: (SC, INC) 6 times [18].
Round 4: (SC, INC, SC) 6 times [24].
Round 5: (3 SC, INC) 6 times [30].
Round 6: (2 SC, INC, 2 SC) 6 times [36].
Round 7: (5 SC, INC) 6 times [42].
Round 8: (3 SC, INC, 3 SC) 6 times [48].
Rounds 9 – 20: SC in each stitch for 12 rows [48 stitches per row].
Round 21: (DEC, 6 SC) 6 times [42]
Round 22: (DEC, 5 SC) 6 times [36]
Round 23: (DEC, 4 SC) 6 times [30]
Place safety eyes in the center of the white eye patches. Pull the eye patches in a slight oval shape. Attach the eyes between rows 11-12. Use the pictures for guidance. The posts are approximately 8 stitches apart. I recommend placing the eyes, but not securing them until you figure out exactly where you like them.
Start stuffing here. Stuff firmly.
Round 24: (DEC, 3 SC) 6 times [24]
Round 25: (DEC, 2 SC) 6 times [18]
Round 26: (DEC, 1 SC) 6 times [12]
Round 27: (DEC) 6 times [6]
FO leaving a long tail. Thread tail through last 6 stitches and pull up tight to close hole.
BILL
Note: Bill and Tail are worked in an oval increase. Ovals are worked in the round. Just note that the first row is worked on both sides of the starting chain. See pictures for help.
In A, Ch 8
Round 1: SC in 2nd Ch, SC in next 5 stitches. 3 SC in last stitch. Working in the unused loops from the chain, SC 6, 3 SC in last chain. [18]
Round 2: [6 SC, (INC) 3 times] repeat bracket one more time [24]
Rounds 3-4: SC in each stitch for two rows. [24 stitches in each row].
Fasten off. Fold in half and sew to body under eyes, curving slightly. The top of the bill is one row under the bottom of the eye patches.
FLIPPERS (make 4)
In A, Ch 2
Round 1: 6 SC in 2nd CH from hook [6].
Round 2: (INC) 6 times [12].
Rounds 3-4: SC in each stitch for two rows. [12 stitches in each row].
Round 5: Fold in half and SC the open end together. Ch 1, turn [6]
Round 6: (3 DC in next stitch, Sl stitch in next stitch) repeat 2 more times for 3 toes.
Fasten off and leave a long tail for sewing. Sew two flippers to the bottom of the body at an angle between rows 24-26. Flippers are approximately 5 stitches apart. Sew the other two flippers to the side of the body also at an angle. You want them to stick out. Mine are sewn on between rows 14-16. They are about 5 stitches from the bill.
TAIL
Note: Bill and Tail are worked in an oval increase. Ovals are worked in the round. Just note that the first row is worked on both sides of the starting chain. See pictures for help.
In C, Ch 8
Round 1: SC in 2nd Ch, SC in next 5 stitches. 3 SC in last stitch. Working in the unused loops from the chain, SC 6, 3 SC in last chain. [18]
Round 2: [6 SC, (INC) 3 times] repeat bracket one more time [24]
Rounds 3-4: SC in each stitch for two rows. Change color to D in last stitch [24 stitches in each row].
Rounds 5-12: SC in each stitch for eight rows [24 stitches in each row].
Fasten off. Fold flat and sew to back of body across row 20.
FINISHING
Cut a piece of D approximately 5 inches long. Fold in half and join it to the top of the head with a slip stitch. Pull tight. Trim to the height you like.
- Funny Pictures
-
 Memes for Doggos Having a Ruff Day
-
 Fluffy Memes to Make Fun of Your Furry Friends
-
 Too Relatable to be True
- Recipes
-
 Cappuccino Brownies
-
 Chicken Mushroom Tortellini Bake
-
 Spinach Pie
- Lifehacks
-
 8 Necessary Tips for Baking Bread
-
 Tips & Hacks for Clean Carpets
-
 10 Uses For Old TV Armoires
- Crochet Ideas
-
 Crochet Flower Hat for your Pet
-
 Crochet Sophia and Bennet Love Birds
-
 Crochet Reversible Ghost
- DIY
-
 DIY Beaded Christmas Tree
-
 Dolls from Party Cups
-
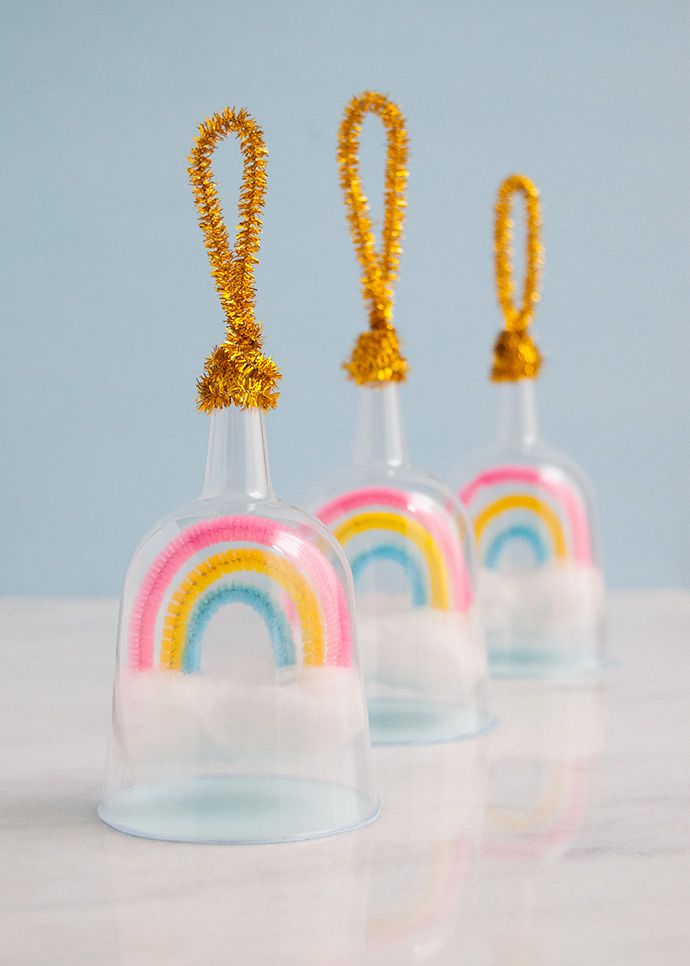 Rainbow Snow Globe Charms
- Knitting Ideas
-
 Knitted Star Square Dishcloth
-
 Knitted Free 2025 Year Dishcloth
-
 Knitted Ribbed Adult Hat