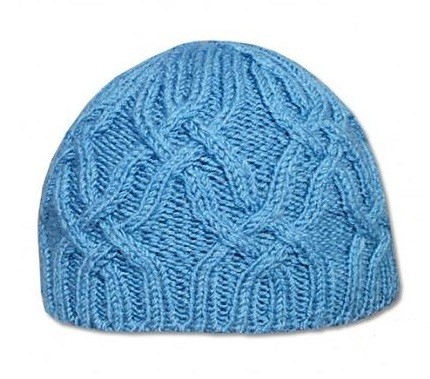
How to Knit a Stylish Hat


You'll Need:
100g of Nako bambino yarn of denim color (25% wool, 75% acryl; 130m/50g);
Double-pointed knitting needles 3.0 mm;
Circle knitting needles 2.5 mm;
Auxiliary needle;
Scissors;
Measuring tape;
Needle with a big eye.
Instructions
Knit in 2 yarn threads.
There are 2 sts in 1 cm in the sample of the ornament. For head circumference 58 cm: 58 x 2 = 116 cm.
As the hat will stretch, you should decrease the quantity of sts in 2 cm = 4 sts, so: 116 - 4 = 112 sts.
So, you'll need 112 sts for the head circumference of 58 cm.
Pattern repeat is 16 sts, so the initial quantity of sts should be multiplied by 16.
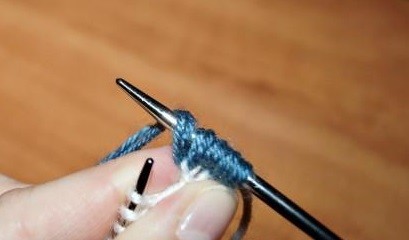
Cast on 56 sts with knitting needles 2.5 mm with contrast yarn.
Attach the main yarn, start knitting 4 rows with hollow rib around.
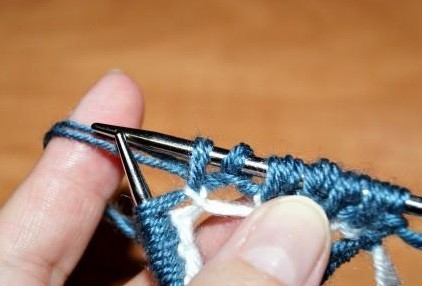
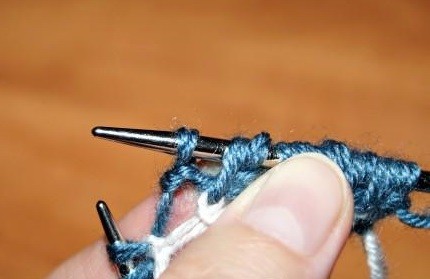
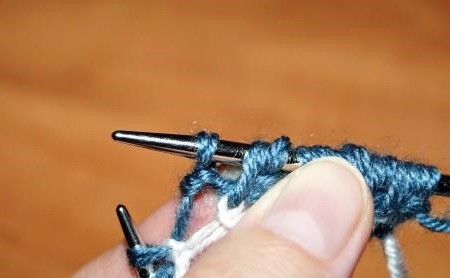
Knitting the Hollow Rib
1st row: * yarn over, 1 knit st*. You should get 112 sts in the end of the row;
2nd row: slip knit sts, leave the yarn behind work, make yarn overs on the wrong side;
3rd row: slip purls, leave the yarn in front of work, make knit st on the right side;
4th row: slip knit sts, leave the yarn behind work, make purls on the wrong side;
5th st: by means of replacing sts method, turn to 2 x 2 rib and knit to the needed height.
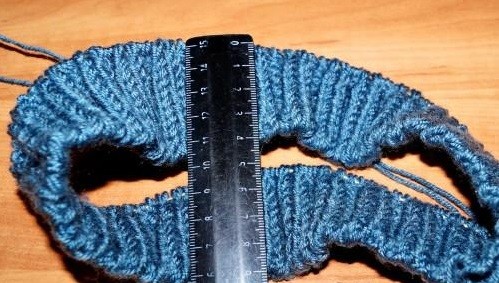
Height Measurement
You should get the total height of 4 cm.
Transition to Pattern
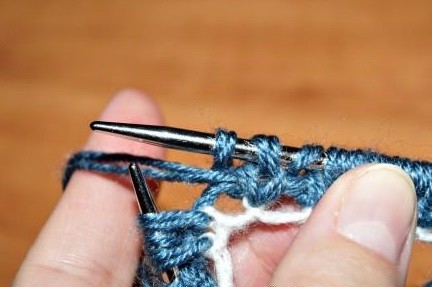
Turn to double pointed needles 3 mm, knit the main pattern relief arans (relief aran stitch tutorial: relief arans stitch tutorial) in circle rows.
The quantity of sts in pattern repeat is 16 sts, so the total quantity of sts should be multiplied by 16: 112/16 = 7.
Make 7 pattern repeats for your hat.
Knit with the ornament from 1st to 14th rows.
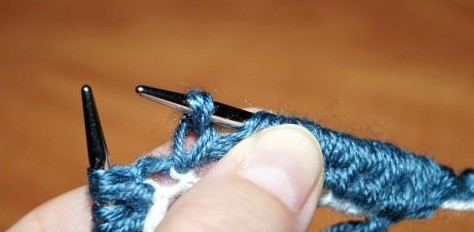
Pattern Adjustment
15th-16th row: in analogy with the 14th rows, don't knit 8 sts in the last 16th row. These sts will turn to the beginning of the next row.
The pattern shifts on 8 sts and becomes in chessboard order.
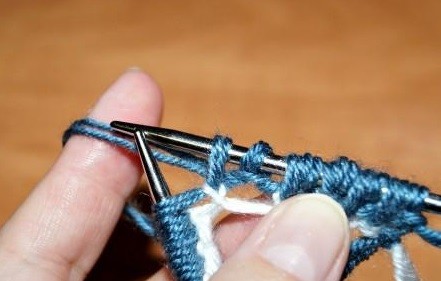
Repeat from 1st to 14th rows.
15th-16th row: in analogy to the 14th row, don't knit 7 sts of the last 16th row. You'll start making the crown from these sts.
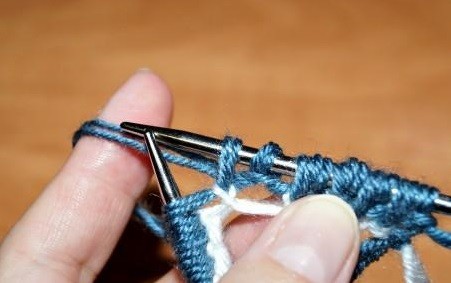
Crown
1st row: * 1 knit, knit2tog with left decline, 1 purl, (2 knit sts, 2 purls) 3 times*;
2nd row: * 1 knit st, knit2tog with left decline, (2 knit sts, 2 purls) 3 times*.
Then, rows are similar; they start the same way and then knit according to the ornament.
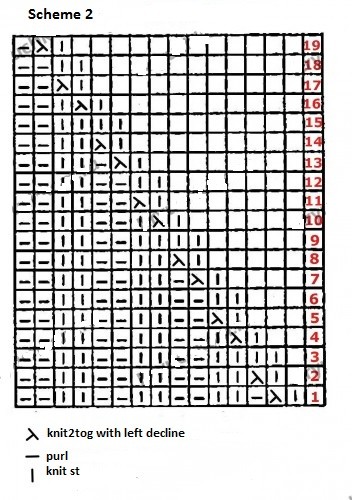
Knit the rest rows according to scheme 2.
In the end of work, collect the sts on the needle. Cut the yarn and fasten it.
- Funny Pictures
-
 Hilarious Memes for Those Bored to Tears
-
 Weekly Treat of Funniest Parenting Memes for Good Laugh out Loud Right Now
-
 Really Funny Pics to End These Weekend Perfectly
- Recipes
-
 Crispy Baked Avocado Fries
-
 Scrambled Chickpea and Spinach Pitas
-
 Cinnamon Pancakes
- Lifehacks
-
 Crochet Basics: Aligned Cobble Stitch
-
 Brick Stitch Crochet Tutorial
-
 Crochet Basics: Wattle Stitch
- Crochet Ideas
-
 Crochet Snorlax Plushie Doll
-
 Crochet Beautiful Penguin Toy
-
 Crochet Tiny Snowman
- DIY
-
 DIY Santa Craft For Kids
-
 Paper Plate Angel Craft
-
 Upcycled Mason Jar Chicken Vase
- Knitting Ideas
-
 Knitted Bridger Cowl
-
 Knitted Keepsake Bag
-
 Knitted Cutie Cupcake Dolls