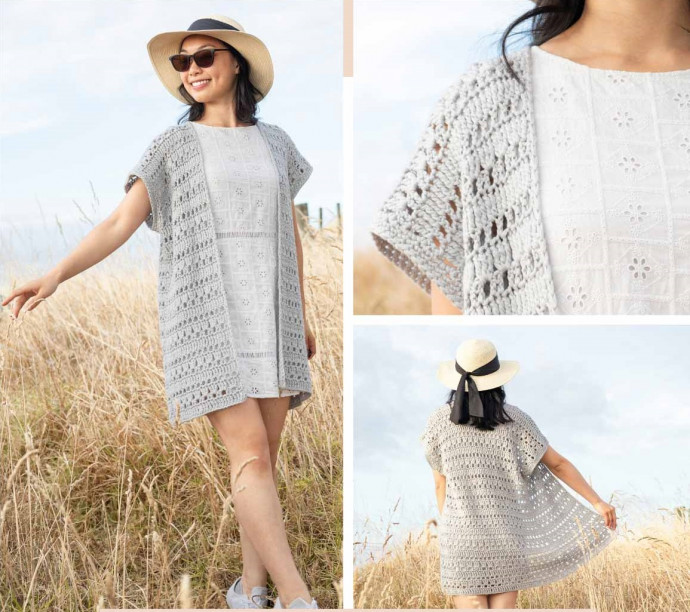
How to Crochet a Stylish Cardigan with Lion Brand Mako Cotton


You’ll Need:
7 (9,11) balls of Lion Brand LB Collection Mako Cotton (Weight: 4/medium – 125yds, 1.75 oz) in Light Grey (#462-149);
Crochet hook 6.5 mm;
Yarn needle;
Stitch markers.
Size:
XS/S (M/L, XL/2XL).
To fit Bust: 76-86 (96-106, 116-126) cm
Back Panel Width: 55 (70, 85) cm
Front Panel Width: 24 (34, 40) cm
Length: 74 (81, 88) cm
Stitches Control:
12 sts x 4 rows = 10 x 10 cm /
Notes:
“DC 10” means DC into the next 10 stitches.
“2DC” means place 2 DC into the same stitch.
Turning chain of Ch 1, Ch 2, and Ch 3 do NOT count as a stitch.
Otherwise, Ch 1 does count as a stitch.
Instructions
Back
Ch 68(86, 104).
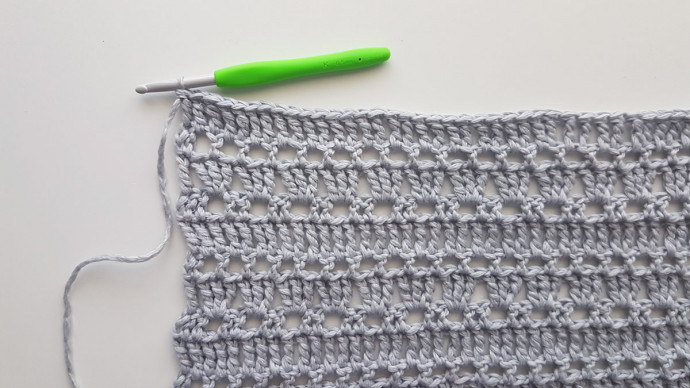
Row 1: TR into the 4th ch from the hook, TR in each ch until end, turn. <65(83, 101)>
Row 2: Ch 2, DC 2, *ch 1, sk 1 st, DC 2; rep from * until end, turn. <65(83, 101)>
Row 3: Ch 3, TR in 1st st, *3TR into ch-sp; rep from st until last ch-sp, TR in last st, turn. <65(83, 101)>
Row 4: Ch 2, DC, *ch 1, sk 1 st, DC; rep from * until end, turn. <65(83, 101)>
Row 5: Ch 3, TR in each st until end, turn. <65(83, 101)>
Repeat rows 2 – 5 until row 37(41, 45).
*You can add/remove rows to make your cardigan longer/shorter. Just make sure your last row is a repeat of row 5.
Fasten off.
Front
Make 2.
Ch 32(44, 50).
Row 1: TR into the 4th ch from the hook, TR in each ch until end, turn. <29(41, 47)>
Row 2: Ch 2, DC 2, *ch 1, sk 1 st, DC 2; rep from * until end, turn. <29(41, 47)>
Row 3: Ch 3, TR in 1st st, *3TR into ch-sp; rep from st until last ch-sp, TR in last st, turn. <29(41, 47)>
Row 4: Ch 2, DC, *ch 1, DC; rep from * until end, turn. <29(41, 47)>
Row 5: Ch 3, TR in each st until end, turn. <29(41, 47)>
Repeat rows 2 – 5 until row 37(41, 45).
*If you altered the number of rows for your back panel, make sure you have the same number of rows for your front panels as the back panel.
Fasten off.
Repeat for 2nd front panel.
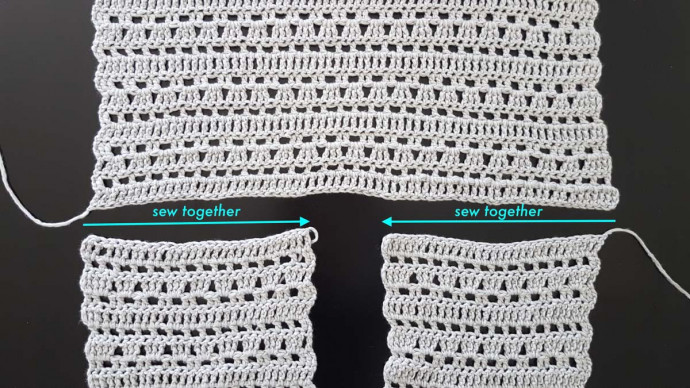
Assembly
With the wrong side facing you, sew the shoulder seam of front panels to the back panel. Make sure that the 3TR clusters are pointing towards the shoulder seam.
Lay the front panels on top of the back panel and sew down the sides of the cardigan, leaving a 24cm gap at the top of the cardigan to create your armholes.
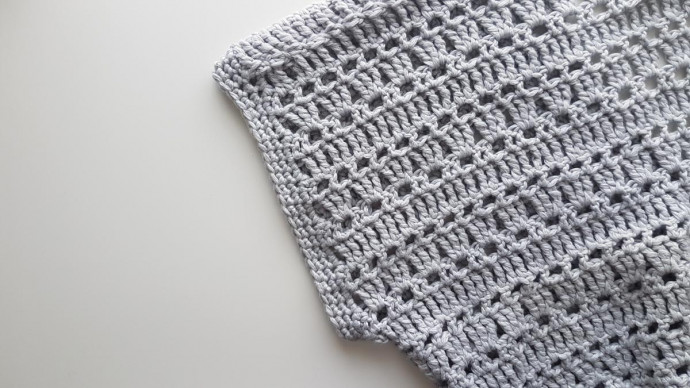
Sleeves
With the right side facing you, insert your hook along the edge of the armhole, secure your yarn and pull up a loop.
Rnd 1: Ch 1, SC evenly along the edge of the armhole.
*Exact number of stitches depends on your tension. Too many stitches will cause the armhole to ruffle, too few stitches will cause the armhole to pucker.
Sl st into the 1st st to join.
Repeat rnd 1 until rnd 3. Fasten off.
Repeat steps for 2nd armhole.
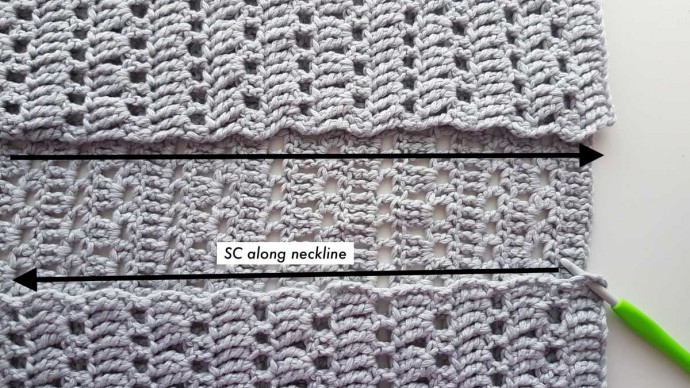
Finishing
With the right side facing you, insert hook into the corner of the right front panel if you’re a right-handed crocheter or the corner of the left front panel if you’re a left-handed crocheter.
SC crochet evenly along the neckline. When you reach the 2nd corner, fasten off.
Weave in all of your ends! Steam and block your cardigan.
Pinned and also shared in Facebook group
Thank you!