Adeline Amigurumi: The Perfect Crochet Bunny

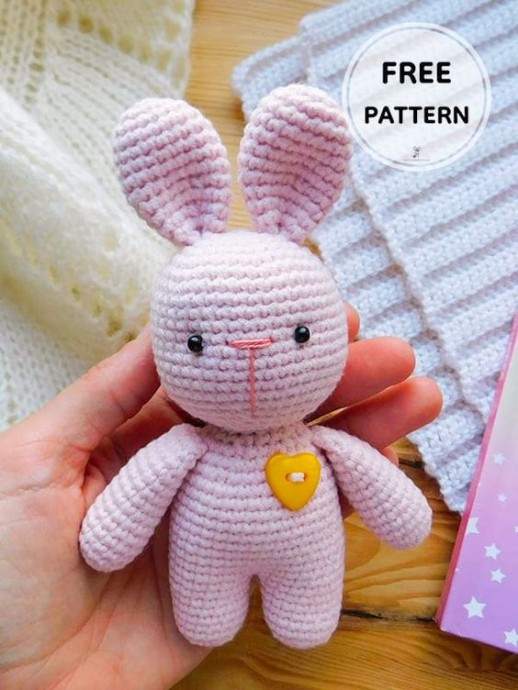
Adeline Amigurumi, the adorable crochet bunny, is a charming handmade toy that is perfect for children and adults alike. This cute bunny is carefully crafted using the art of crochet, with attention to detail in every stitch. Adeline Amigurumi is not just a toy, but a work of art that brings joy and whimsy to anyone who sees her.
The process of creating Adeline Amigurumi involves using soft yarn in various colors to bring this bunny to life. Each part of the bunny, from her floppy ears to her fluffy tail, is meticulously crocheted with love and care. Adeline Amigurumi is a unique and special gift that is sure to be treasured for years to come, making her a wonderful addition to any toy collection.
Materials Needed
Necessary Materials
- Filler for toys (synthetic winterizer, synthetic winterizer, or holofiber).
- Semi-cotton yarn (or any of your choice).
- Cotton yarn (thin) for embroidering the spout of a toy.
- Beads for the eyes (or eyes on a secure mount, 4 mm).
- Hook number 1.5.
Abbreviations
MR - magic ring
sc - single crochet
inc - increase
dec - decrease
Dimensions
Dimensions: about 15 cm including the length of the ears.
The size of the toy depends on the thickness of the yarn used, the density of knitting, and the size of the hook.
Pattern Instructions
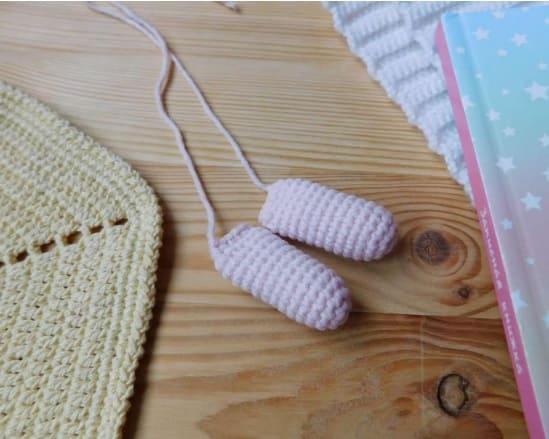
Arms (Make 2)
Rnd 1: 6 sc in MR
Rnd 2: (inc)*6 = 12 sc
Rnd 3: (3 sc, inc)*3 = 15 sc
Rnd 4-13: (10 rnds) 15 sc
Rnd 14: (3 sc, dec)*3 = 12 sc
Rnd 15: Fold the part in half at the top, crochet 5 sc, inserting the hook into both halves of the part.
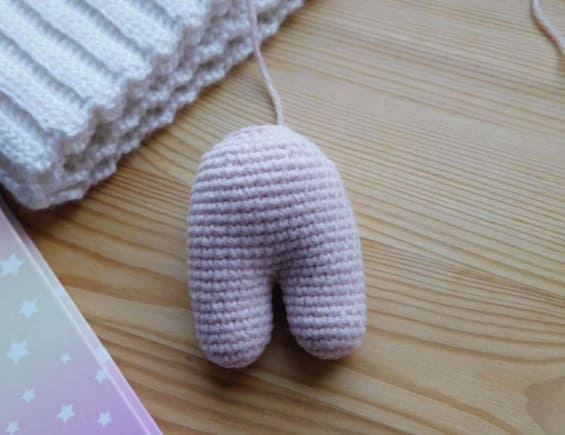
Legs
Left Leg
Rnd 1: 6 sc in MR
Rnd 2: (inc)*6 = 12 sc
Rnd 3: (sc, inc) x 6 = 18 sc
Rnd 4-9: (6 rnds) 18 sc
At the end of the 9th row, crochet ch, pull the thread through ch, cut.
Right Leg
Rnd 1: 6 sc in MR
Rnd 2: (inc)*6 = 12 sc
Rnd 3: (sc, inc) x 6 = 18 sc
Rnd 4-9: (6 rnds) 18 sc
Next, we connect the legs, applying tightly one leg to the other.
Rnd 10: 18 sc on the left leg, 18 sc on the right leg = 36 sc
We put a marker.
Please note that further rows begin along the back of the toy.
Body Continued
Rnd 11-20: (10 rnds) 36 sc
Rnd 21: (4 sc, dec)*6 = 30 sc
Rnd 22: 30 sc
Rnd 23: (3 sc, dec)*6 = 24 sc
Rnd 24: (2 sc, dec)*6 = 18 sc
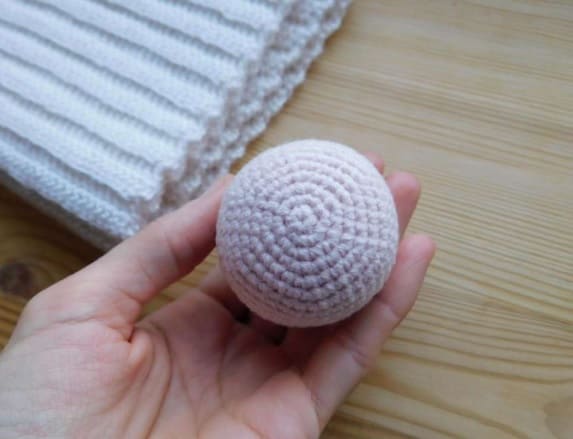
Head
We crochet with a separate detail, starting from the crown.
Rnd 1: 6 sc in MR
Rnd 2: (inc)*6 = 12 sc
Rnd 3: (1 sc, inc)*6 = 18 sc
Rnd 4: (2 sc, inc)*6 = 24 sc
Rnd 5: (3 sc, inc)*6 = 30 sc
Rnd 6: (4 sc, inc)*6 = 36 sc
Rnd 7: (5 sc, inc)*6 = 42 sc
Rnd 8-18: (11 rnds) 42 sc
Rnd 19: (5 sc, dec)*6 = 36 sc
Rnd 20: (4 sc, dec)*6 = 30 sc
Rnd 21: (3 sc, dec)*6 = 24 sc
Rnd 22: (2 sc, dec)*6 = 18 sc
Insert the eyes (if you chose the eyes on a secure mount) between the 12th and 13th rows.
The distance between the eyes is 5 loops.
Eye size 4 mm.
If desired, the eyes can be inserted (or sewn) a row higher, i.e. between the 11th and 12th rows.
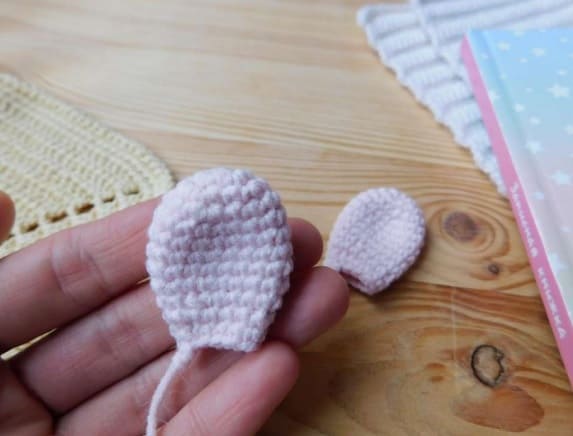
Ears (Make 2)
Rnd 1: 6 sc in MR
Rnd 2: (inc)*6 = 12 sc
Rnd 3: (sc, inc)*6 = 18 sc
Rnd 4-8: (5 rnds) 18 sc
Rnd 9: (4 sc, dec)*3 = 15 sc
Rnd 10: 15 sc
Rnd 11: (3 sc, dec)*3
Assembly
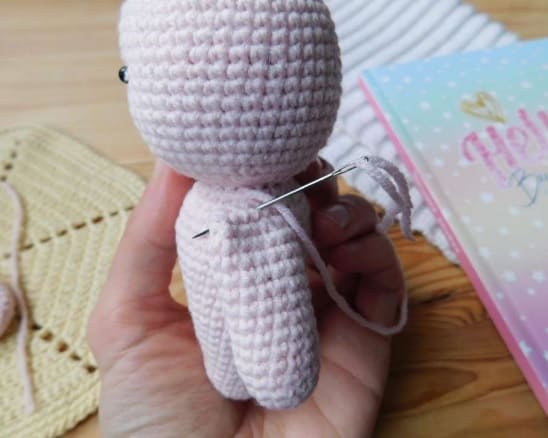
- Sew the head to the body.
- We sew handles between the 22nd and 23rd rows.
- Sew on the eyes, embroider the nose with a thin thread.
- Sew on the ears.
- We decorate the bunny with a button or ribbon.