Crochet Bunny Amigurumi: A Fun DIY Project

Creating a Crochet Bunny Amigurumi is not only a fun and relaxing activity but also a delightful way to add a touch of cuteness to your space. With its soft yarn and charming details, this adorable bunny can quickly become a beloved companion or a thoughtful handmade gift for someone special. The best part is that you can customize it with different colors and accessories to make each bunny unique and full of personality. So, grab your hook and yarn, and let's crochet some charming bunnies that are sure to bring smiles to everyone's face!
Materials
- Yarn (baby snuggle-hobbii)
- Crochet hook (5mm)
- Tapestry needle
- Stuffing
- Scissors
- Embroidery thread
- Stitch marker
Definitions
- MR - magic ring
- ch - chain
- slst - slip stitch
- hdc - half double crochet
- sc - single crochet
- dc - double crochet
- BLO - back loop only
Head
Instructions
- Rd 1. 6 in the magic ring (6)
- Rd 2. 6 inc (12)
- Rd 3. (1 inc,sc)*6 (18)
- Rd 4. (1 inc,2sc)*6 (24)
- Rd 5. (1 inc,3sc)*6 (30)
- Rd 6. 30 sc (30)
- Rd 7. (1 inc,4sc)*4, 10 sc (34)
- Rd 8-10. 34 sc (34)
- Rd 11. 1 dec, 6 sc, 1 dec, 7 sc, 1 dec, 6 sc, 1 dec, sc (30)
Insert safety eyes between the 5th and 6th row, 12 mm, 11 stitches in between.
- Rd 12. (1 dec,3sc)*6 (24)
- Stuff the head by your preference, but not too firmly.
- Rd 13. (1 dec,2sc)*6 (18)
- Rd 14. (1 dec,sc)*6 (12)
- Rd 15. 6 dec
Finish and tie end.
Model the head by indenting eyes using cotton thread. Add eyebrows and details around eyes.
Ears – Make 2
Instructions
- Rd 1. 6 in the magic ring (6)
- Rd 2. (1 inc,1sc)*3 (9)
- Rd 3. (1 inc,2sc)*3 (12)
- Rd 4. (1 inc,3sc)*3 (15)
- Rd 5-9. 15 sc (15)
- Close sides with one row of sc.
Connect with the head on the top or on the side.
Body
Instructions
- Rd 1. 6 in the magic ring (6)
- Rd 2. 6 inc (12)
- Rd 3. (1 inc,1sc)*6 (18)
- Rd 4. (1 inc,2sc)*6 (24)
- Rd 5. (1 inc,3sc)*6 (30)
- Rd 6-8. 30 sc (30)
- Rd 9. (1 dec,1sc)*6, 12 sc (24)
- Rd 10. 24 sc (24)
- Rd 11. (1 dec,2sc)*6 (18)
- Rd 12. 18 sc (18)
- Rd 13. (1 dec,4sc)*3 (15)
- Rd 14. 15 sc (15)
Stuff the body and connect with the head. Take care of the front side of the body (belly).
The bulk of the work is done. Now we move on to the arms.
Arms – Make 2
Instructions
- Rd 1. 6 in the magic ring (6)
- Rd 2. 6 inc (12)
- Rd 3-4. 12 sc (12)
- Rd 5. (1 dc, 2sc)*3 (9)
- Rd 6-9. 9 sc (9)
Stuff, not too much. Close sides with one row of sc.
Connect with the body right under the head.
Legs – Make 2
Instructions
- Rd 1. 6 in the MR (6)
- Rd 2. 6 inc (12)
- Rd 3. (1 inc,1sc)*6 (18)
- Rd 4-5. 18 sc (18)
- Rd 6. 4 dec, 10 sc (14)
- Rd 7. 2 dec, 10 sc (12)
- Rd 8-10. 12 sc (12)
Stuff, not too much. Close sides with one row of sc. Connect with the body between the 5th and 6th rows.
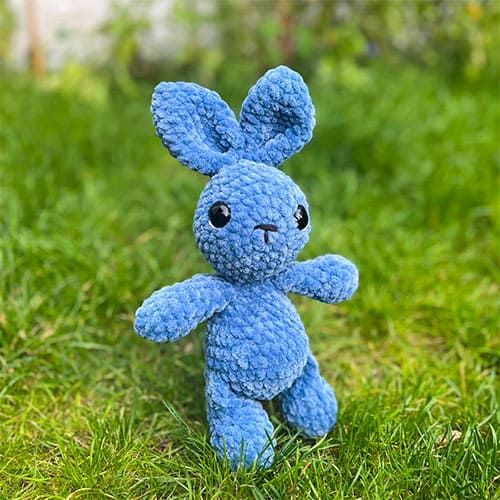
That’s it, your crochet bunny is ready.