

Adorable Crochet Chick Glasses Holder — Free Pattern & Step‑by‑Step Instructions

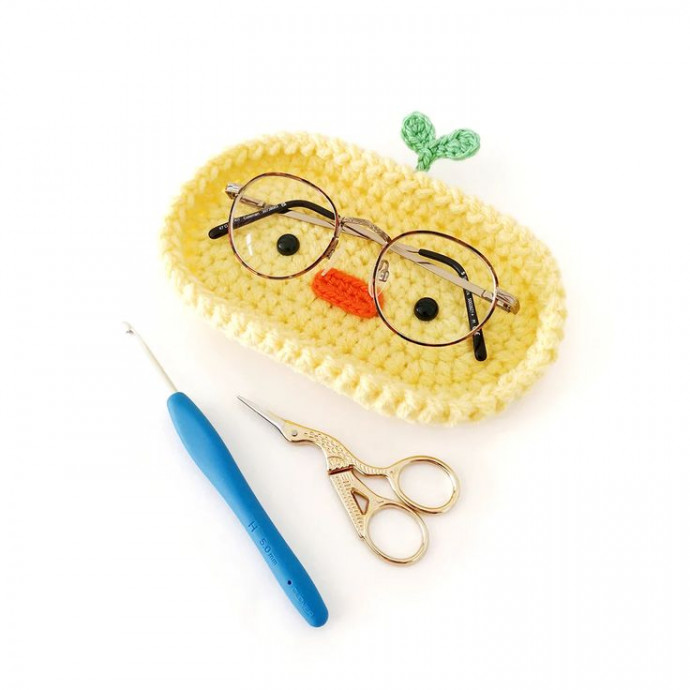
Keep your glasses safe and add a bit of whimsy to your desk or bedside with this Crochet Chick Glasses Holder. This cheerful little crocheted chick securely holds your spectacles and makes a fun, handmade gift for friends and family. The pattern is worked mostly in joined rounds for a neat finish and includes simple details for the beak and sprout.
Materials
Worsted weight yarn in light yellow (approximately 28g), orange and green (I used 4 Seasons Spot Saver USA Style in yellow and Paintbox Yarns Simply Aran in Blood Orange and Spearmint Green).
5mm crochet hook
3.5mm crochet hook
10mm safety eyes
Hot glue
Yarn needle, scissors
Abbreviations (US Terms)
ch – chain
sc – single crochet
inc – increase
hdc – half double crochet
hdc-inc – half double crochet increase
dc – double crochet
FLO – front loop only
sl st – slip stitch
st/s – stitch/es
[…] – repeat the instructions in brackets
(…) – indicates stitch count at end of round
Finished Size
The finished glasses holder measures approximately 6.5″ x 3.75″ (16.5cm x 9.5cm). Size may vary depending on tension and materials used.
Gauge
Gauge = 6.25″ (16cm) long after R4.
Notes
The glasses holder base is worked in joined rounds with 2 strands of yarn held together and a 5mm hook. The ch 1 at the beginning of each round does not count as a stitch. Join with a slip stitch to the first half double crochet and start the next round in the same stitch.
The beak and sprout are worked with a single strand and a 3.5mm hook.
The first round of the base is worked around a foundation chain to create an oval.
Pattern Instructions
Glasses Holder Base (5mm hook, yellow, 2 strands held together)
R1: Ch 13, hdc-inc in second ch from hook, 10 hdc, 4 hdc in last ch. Working on other side of ch – 10 hdc, hdc-inc in last ch, sl st to first hdc to join (28)
R2: Ch 1, [hdc-inc] x2, 10 hdc, [hdc-inc] x4, 10 hdc, [hdc-inc] x2, sl st to first hdc to join (36)
R3: Ch 1, [hdc, hdc-inc] x2, 11 hdc, hdc-inc, [hdc, hdc-inc] x3, 11 hdc, hdc-inc, hdc, hdc-inc, sl st to first hdc to join (44)
R4: Ch 1, [2 hdc, hdc-inc] x2, 12 hdc, hdc-inc, [2 hdc, hdc-inc] x3, 12 hdc, hdc-inc, 2 hdc, hdc-inc, sl st to first hdc to join (52)
R5: Ch 1, [FLO hdc] x52, sl st to first hdc to join (52)
R6: [Ch 1, sl st] x52 (52)
Ch 1, sl st to joining sl st from R5. Fasten off invisibly and weave in ends.
Use your hands to gently stretch and shape the holder so it sits flat and has a uniform shape.
Beak (3.5mm hook, orange)
R1: Ch 6, sc in second ch from hook, 3 sc, 4 sc in last ch. Working on other side of ch – 3 sc, inc in last ch (14)
Fasten off invisibly and weave in ends.
Sprout (green)
Note: The slip stitches are worked through the front loop and back bump of the chain.
Ch 9, dc in third ch from hook, hdc in next ch, sc in next, sl st in next. Ch 5, dc in third ch from hook, hdc in next ch, sc in next, sl st in same ch as previous sl st. Sl st in remaining 3 chs.
Fasten off leaving a long tail for sewing.
Finishing
Use finished photos to help with placement.
Trim the shafts off the safety eyes making them as flush with the back of the eye as possible. Using hot glue, attach to the base on the centre line approximately 1 st in from either end.
Using hot glue, attach the beak centred between the eyes. The top edge of the beak should sit on the centre line.
Sew the sprout to the centre top of the glasses holder on R5, centred with the beak. Make sure to only sew through the backside, alternatively use yellow yarn for sewing.
Tips
- If your holder is slightly lopsided after assembling, gently steam or block with a damp cloth and reshape by hand.
- For a neater attachment of safety eyes on a non-child item, trimming the shafts and using hot glue as instructed gives a clean finish. If making for a child, consider embroidering eyes instead of safety eyes for safety.
Care
Spot clean with a damp cloth and mild soap. Avoid soaking or machine washing to preserve shape; if necessary, hand wash gently and reshape while damp.
- Funny Pictures
-
 Fresh Animal Memes to Mix in Your Morning Coffee
-
 The Funniest Tweets of the Day
-
 Hilarious Tweets to Get Your Thoughts Clear
- Recipes
-
 Crispy Bean Tostadas with Smashed Avocado and Jicama-Cilantro Slaw
-
 Mango “Burrito” Bowls with Crispy Tofu and Peanut Sauce
-
 Baklava Granola
- Lifehacks
-
 Crochet Tutorial: Textured Bobble Stitch
-
 Crochet Tutorial: Brick Stitch
-
 Crochet Wheat Stitch Tutorial
- Crochet Ideas
-
 Crochet Pumpkin Bear
-
 Crochet Santa Placemat
-
 Crochet Mini Boo Bucket for Treats and Decor
- DIY
-
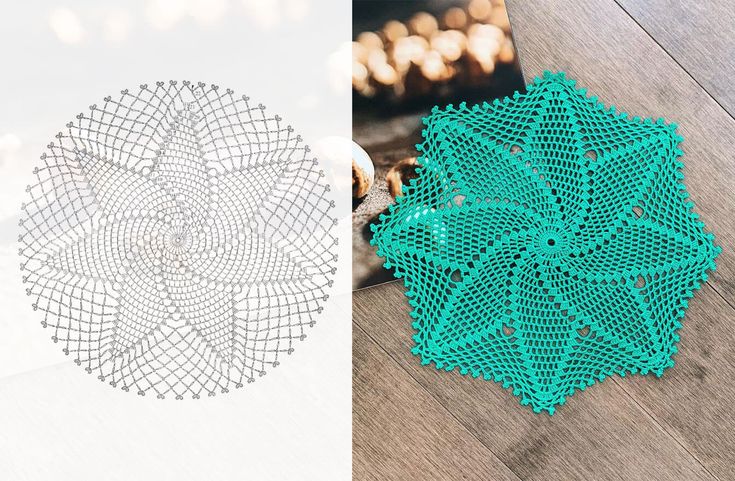 Make a Crochet Spiral Star Doily — Free US-Term Pattern & Tips
-
 Easy DIY Easter Basket from Craft Sticks and a Cardboard Tube — Step-by-Step
-
 DIY Yarn-Wrapped Letter Bookmarks — Cute Personalized Bookmarks in Minutes
- Knitting Ideas
-
 DIY Knitted Waffle Kitchen Towel — Easy Pattern for a Textured, Absorbent Cotton Towel
-
 Make an Adorable Knitted Scrappy Bandana Bib — Easy Garter-Stitch Baby Pattern
-
 Quick & Cozy Knitted Wrist Pincushion — Easy Pattern and Step‑by‑Step Instructions