


Crochet a Lovable Scottie Dog — Step-by-Step Pattern, Materials & Tips

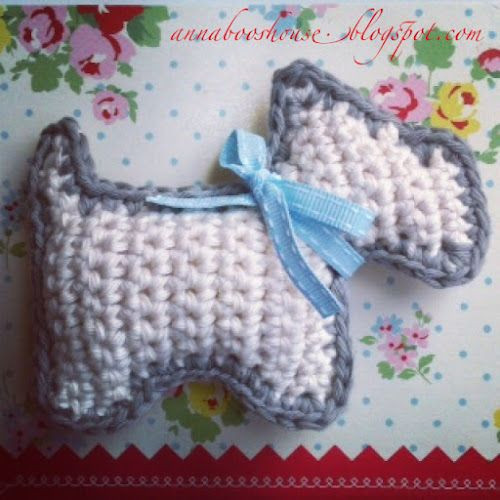
Ready to level up your crochet skills with a charming, cuddly project? This Scottie Dog pattern is a satisfying make that works back and forth in rows and joins together to form a plush, slightly larger-than-mini companion. Follow the pattern below, gather your materials, and take your time stuffing and finishing for the best result.
Materials Needed
You'll need:
- Yarn and hook to match (the original used Rico Creative Cotton and a 4mm hook)
- Polyester toy filling
- Essential oil if you fancy making yours smell nice
- A pretty ribbon for the neck (example used: 6mm wide)
Stitches and Abbreviations
This pattern uses US terms:
- Single crochet = same as UK double crochet
- Chain (ch)
- Single crochet (sc)
- Stitches (sts)
- Single Crochet 2 Together (sc2tog)
How to Single Crochet 2 Together
To single crochet 2 together:
- Insert hook into next stitch.
- Yarn over, pull up a loop. (2 loops on hook)
- Insert hook into next stitch.
- Yarn over, pull up a loop (3 loops on hook).
- Yarn over and pull through all 3 loops.
Pattern (Make 2)
Note: This pattern works back and forwards in rows. Do not count the slip stitches — they are blanks.
- Ch 14 (=chain 13 + turning ch)
- Turn, sl st, sl st, sc 10, 2sc in next st (12)
- Ch 1, turn, sc 10 (10)
- Ch 1, turn, sl st, sl st, sc 8 (8)
- Ch 1, turn, sc 8 (8)
- Ch 1, turn, sc 8 (8)
- Ch 1, turn, 2sc in next st, sc 6, 2sc in next st (10)
- Ch 1, turn, 2sc in next st, sc 8, 2sc in next st (12)
- Ch 1, turn, sc 11, 2sc in next st (13)
- Ch 4, turn, sc 16 (starting in second chain from hook) (16)
- Ch 1, turn, sc 2
Fasten off (2nd leg made)
Head
(Make slip knot and put on hook)
- Make sure your work is facing you with the beginning tail at the bottom left (starting in the 9th stitch from top, and working from right to left), sc 8.
- Ch 1, turn, sc2tog, sc 4, sc2tog (6)
- Ch 2, turn, sc 6 (starting in second chain from hook) (6)
- Ch 1, turn, sl st, sc 4, 2sc in next st (6)
- Ch 2, turn, sc 6 (starting in second chain from hook) (6)
- Ch 1, turn, sc 6.
Fasten off ends.
Joining the Pieces
Using your third color, single crochet around both pieces to join together. Work in an anti-clockwise direction so your stitches face forwards. Before you completely close the seam, stuff the Scottie with polyester filling to your desired firmness. Sew in remaining ends, complete the stitching, and fasten off.
Attach a ribbon around the neck. If you like, add a drop of essential oil to the stuffing (placed inside a small cloth or sachet) to give your toy a subtle scent.
Finishing and Care
- Ensure all seams are secure and yarn tails are sewn in neatly.
- Hand-wash gently if necessary and reshape while damp; lay flat to dry.
- Keep away from small children if you have used any small attachments.
Enjoy your handmade Scottie Dog — a lovely little project for gifting, display, or adding to your amigurumi collection.
- Funny Pictures
-
 Weekly Treat of Funniest Parenting Memes for Good Laugh out Loud Right Now
-
 Really Funny Pics to End These Weekend Perfectly
-
 Incredibly Relatable Pics for Your Amusement
- Recipes
-
 Chewy Oatmeal Cookies
-
 Tomato Tuna Melt
-
 Instant Pot Broccoli Cheddar and Zucchini Soup
- Lifehacks
-
 Wide Half Double Crochet Stitch Photo Tutorial
-
 How to Crochet a Sunflower Stitch Photo Tutorial
-
 Lemon Peel Crochet Stitch Photo Tutorial
- Crochet Ideas
-
 DIY Crochet Mushroom Keychain — Easy Step-by-Step Pattern with Photos
-
 Make a Leafy Texture: Easy Crochet Sprig Stitch (Free UK Pattern)
-
 Free Crochet Sleep Mask Pattern — Cute DK Cotton Eye Mask (UK Terms, Advanced Beginner)
- DIY
-
 Cozy Crochet: Free Up-and-Down Stripe Cotton Washcloth Pattern (Quick & Easy)
-
 How to Make Realistic Crepe Paper Daffodils — Easy Step-by-Step DIY
-
 Make Adorable Easter Egg Bird Feeders — Easy DIY Seed Ornaments for Your Backyard
- Knitting Ideas
-
 Knit the Fish Scale Stitch: Easy 4-Row Pattern for a Textured, Scaly Look
-
 Knitted Camisole Party Frock — Vintage Pattern with Step-by-Step Instructions
-
 DIY Knitted Cuddly Cat Toy — Free Pattern & Step-by-Step Instructions