Crochet Butterfly Pendant Necklace

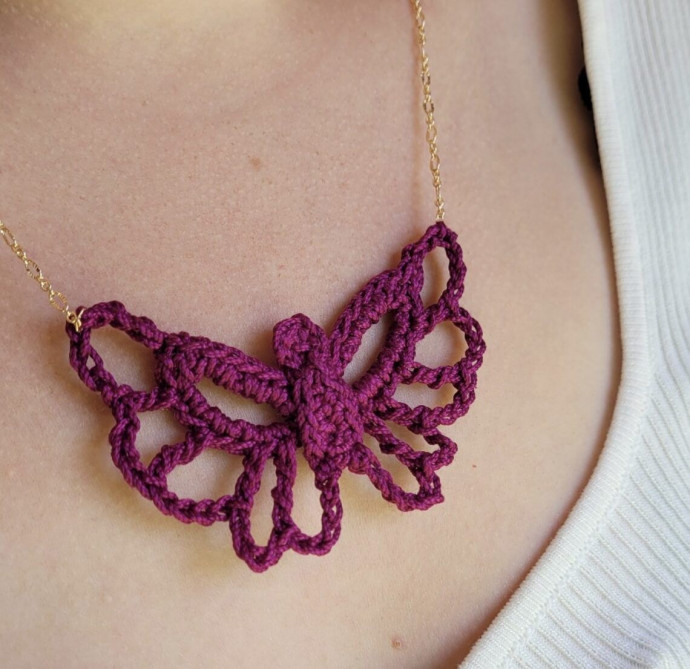
The crochet butterfly pendant necklace is a delightful piece of jewelry that effortlessly combines elegance and charm. Handcrafted with intricate detail, this necklace is a whimsical accessory that adds a touch of whimsy to any outfit. The delicate crochet work gives the pendant a unique and artistic flair, making it a standout piece in your jewelry collection. With its dainty butterfly charm, this necklace is perfect for adding a pop of color and a touch of nature-inspired beauty to your look. Whether you wear it casually with a simple tee or dress it up for a special occasion, this necklace is sure to bring a smile to your face and capture the attention of others with its enchanting design.
Supplies:
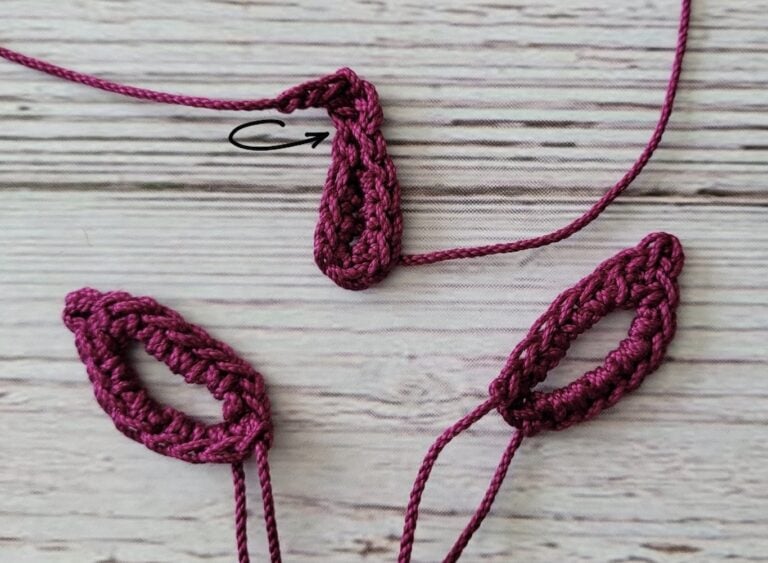
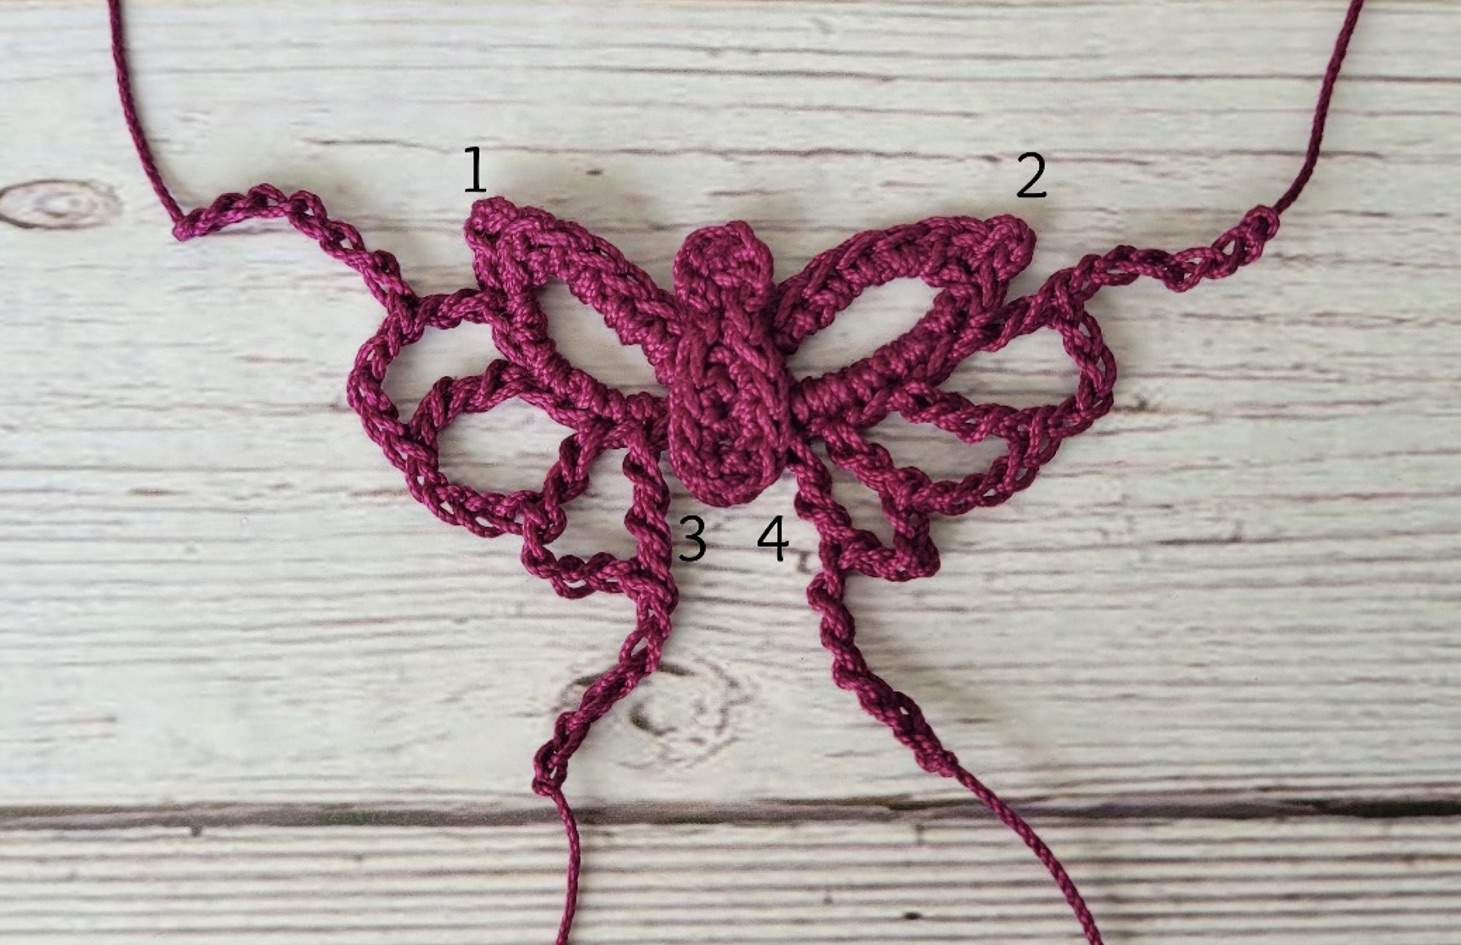
Notes: Butterfly is made in 3 sections – the first 2 sections (the body and upper wing) are crocheted and then sewn together. Lastly, stitches are added along outer edges to complete the wings.
This photo also shows the Right Wing Top and the Left Wing Top
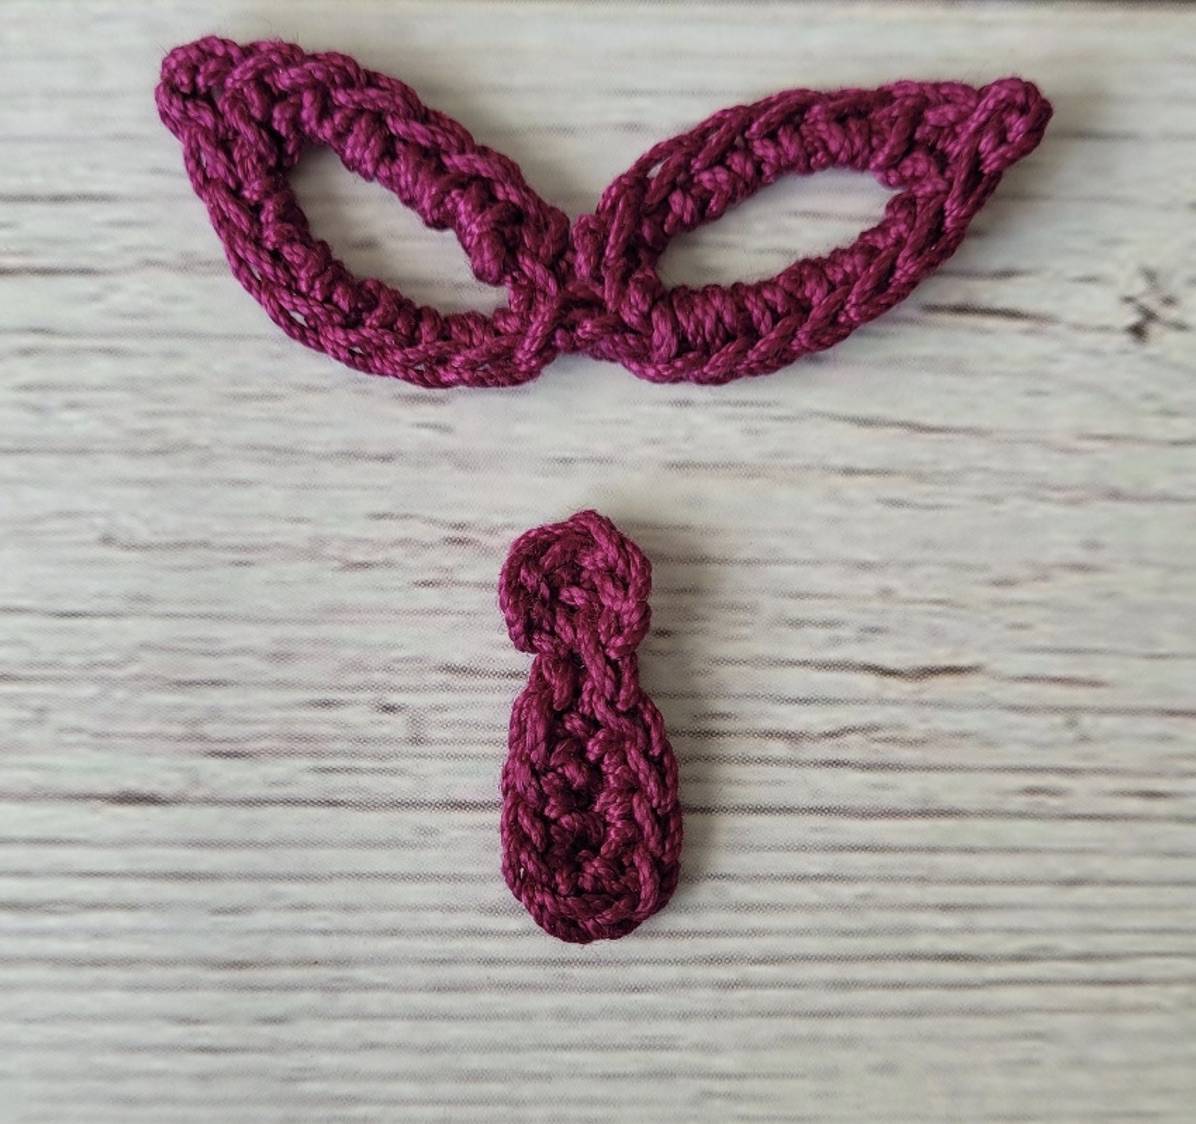
Sew wing tops together and weave in all ends. Then sew body to top of wing tops.
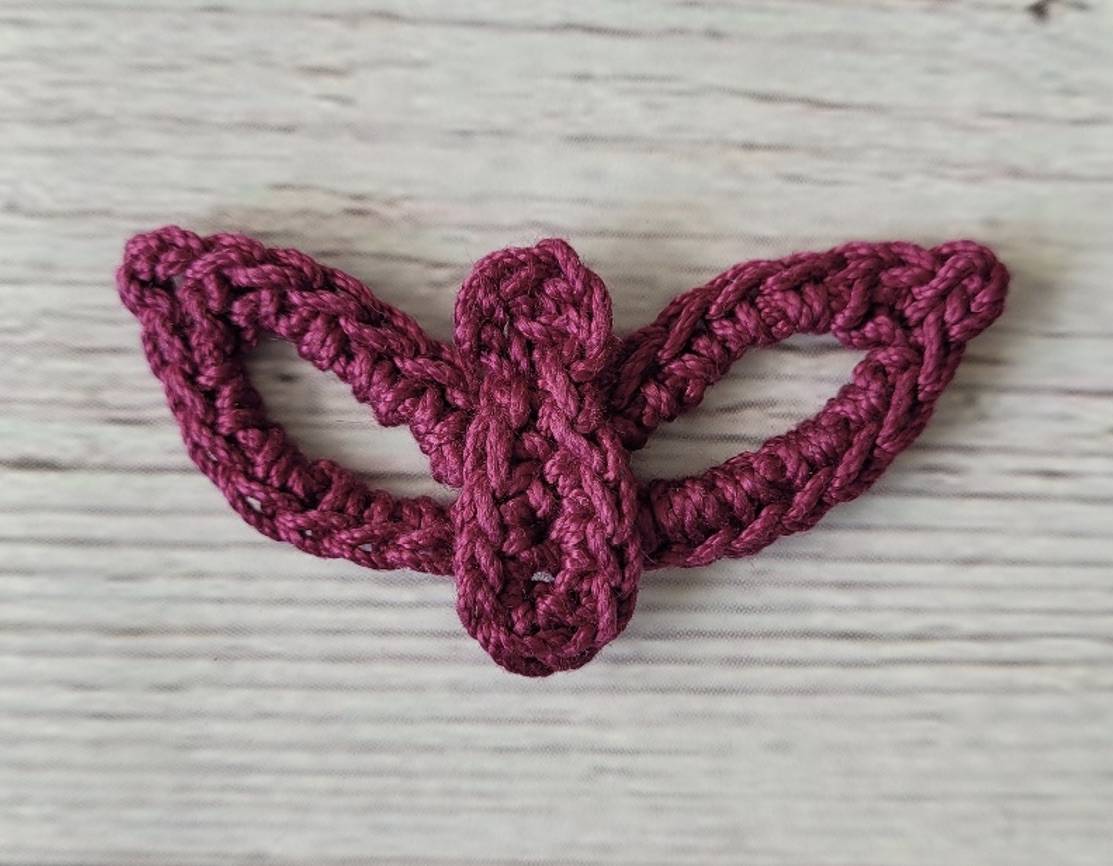
RIGHT WING – outer stitches:
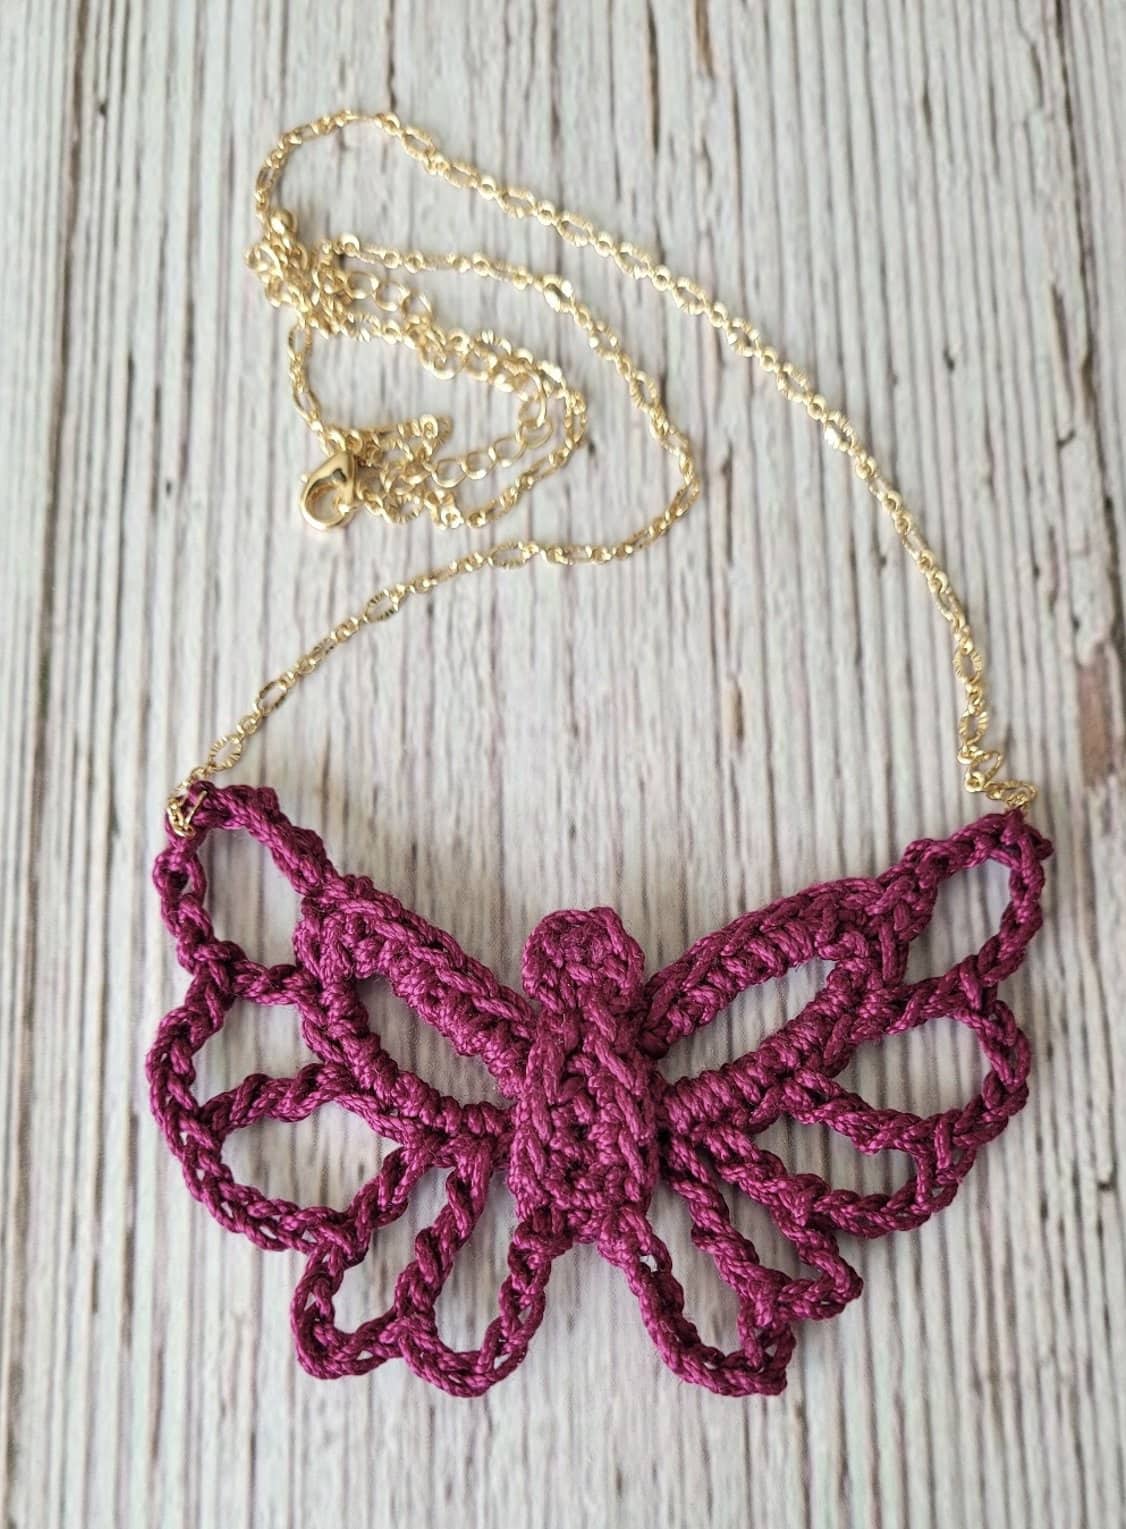
Wet block butterfly and pin stitches in place to be even on both sides. Let dry completely.
Cut necklace chain in half and sew each end to one side of each wing.
(Alternative chain joining option explained below)
Lay butterfly Right Side down on aluminum foil and being careful to not get any stiffener on necklace chain, paint Wrong Side with several coats of fabric stiffener. Let dry completely.
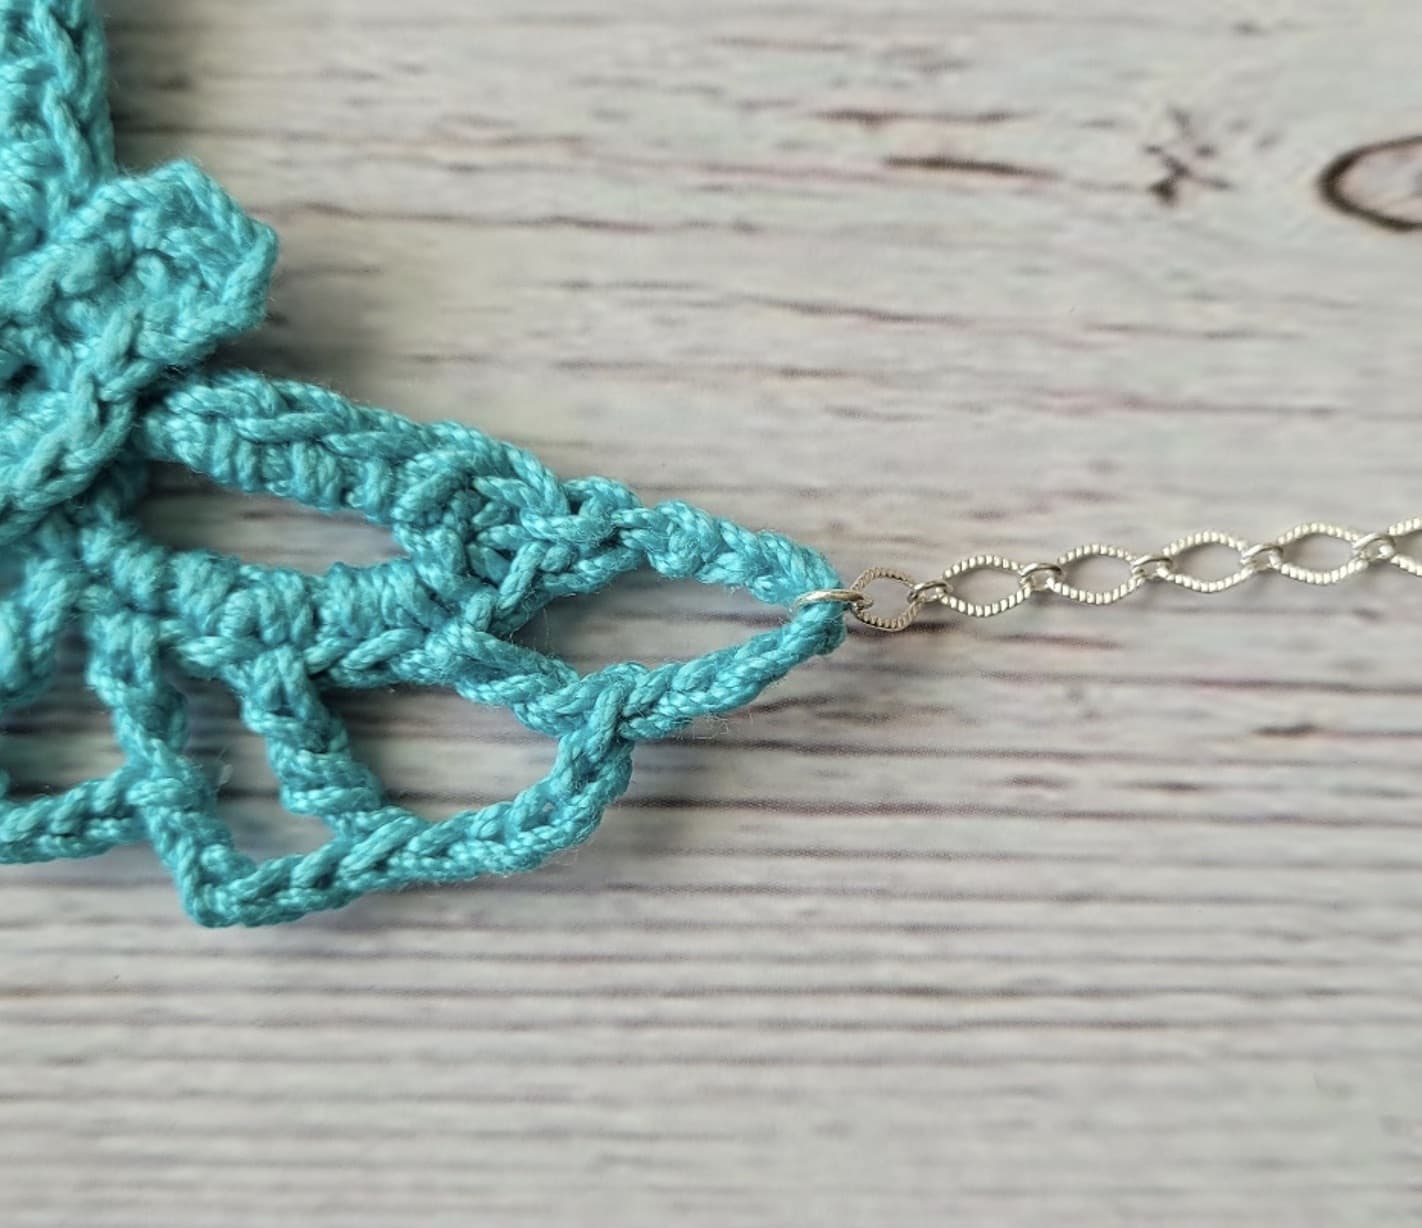
Optional Joining: Using jewelry pliers attach jump rings to wings and to necklace chain
- Funny Pictures
-
 Cute Cat Memes That Will Make Your Day Brighter
-
 Spot-on and Funny Memes About Introverts Struggles
-
 Top Wonderful Cat Memes on Their Way to Better Your Day
- Recipes
-
 Creamy Old Fashioned Rice Pudding
-
 Russian Tea Cakes (Snowball Cookies)
-
 Rigatoni with Sausage, Tomatoes, and Zucchini
- Lifehacks
-
 How to Crochet a Harlequin Stitch
-
 Removing The Toughest Stains
-
 Crochet Basics: Crumpled Griddle Stitch
- Crochet Ideas
-
 Crochet Christmas Tree
-
 Crochet Goblet of Fire
-
 Crochet Adorable Ammonite
- DIY
-
 DIY Snowman Wreath
-
 Mini Santa Sleigh Ornament
-
 Crochet Gingerbread House Blanket
- Knitting Ideas
-
 Knitted Easter Bunny
-
 Knitted Mobile Phone/Glasses Case
-
 Knitted Cabled Wallet