Crochet Buttonbraid Bracelet


If you're looking for a fun and stylish accessory to add to your wrist, consider trying out a Crochet Buttonbraid Bracelet! These charming bracelets combine the art of crocheting with the practicality of a button closure, making for a versatile and fashionable piece. With a wide array of colors and yarn textures to choose from, you can mix and match to suit your personal style. The intricate braided design adds a touch of whimsy to any outfit, making it a perfect statement piece for both casual and dressy occasions. Plus, the handmade quality gives each bracelet a unique charm that sets it apart from store-bought accessories. So, why not add a pop of color and creativity to your wardrobe with a Crochet Buttonbraid Bracelet today?
Materials Needed
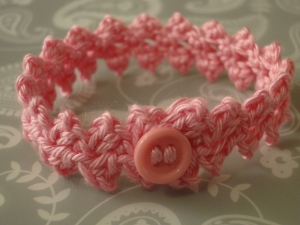
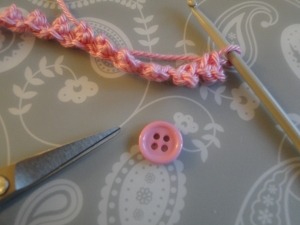
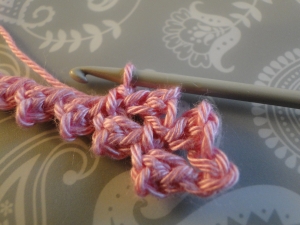
The bracelets in the top two pictures are worked with sport weight yarn and a 3 mm hook.
You can use a simple button like this:

Work a couple and wear them both!
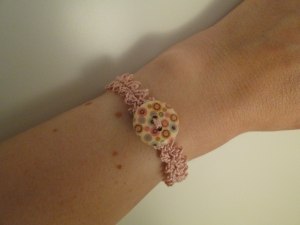
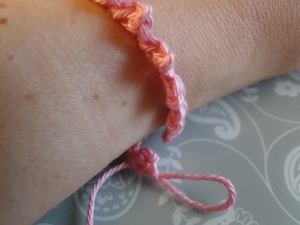
Or feature a favorite button on a thread weight yarn as I have done here:
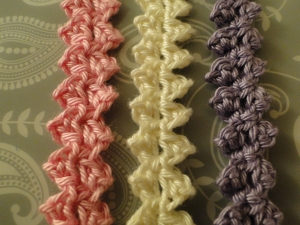
For those of you wanting to work this pattern only as a braid, you can omit the button and the button loop and simply work this up as a braided edging or bookmark.
Step-by-Step Instructions
Step 1
Work Step 1, then turn to work down the other side of your braid - here's how:
Steps 6 - 8
Then work Steps 6 - 8 and weave in ends:
Pattern Instructions
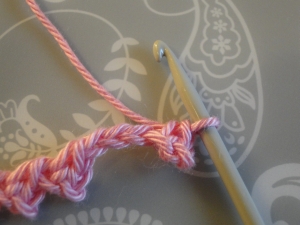
In this pattern, when working your sc (UK dc) into the chain, insert your hook under the top two loops of the chain stitch. This makes for much better defined triangles and avoids spaces within the pattern.
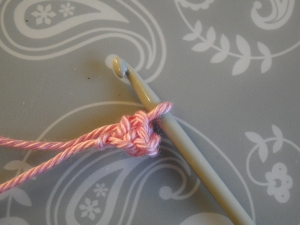
Step 1: first little triangle made.
Step 2
Check the fit around your wrist.
Work until you have a braid long enough to go around your wrist, plus a little overlap.
If your yarn is quite stretchy, you don't need much overlap:
Step 2: at the end, check the fit.
Step 3
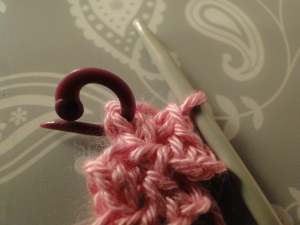
Now we will make the loop for the button. My button is quite small, so I'm going to chain 3 - I think that will allow the button through comfortably.
You might have to chain 4 or 5 or more depending on the size of your button:
Step 3: checking the size of the button to decide how many chains to work!
Step 4
Now make 2 ch more.
Work 2 sc (UK dc) into the 2nd chain from hook.
You can see my three chain for the button loop between the last two little triangles:
Step 4: the last little "triangle" before the turn.
Step 5
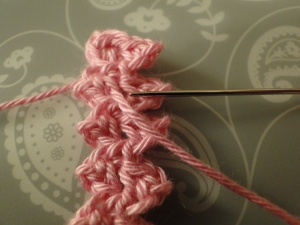
Now we crochet down the other side of our braid. Skip the triangle you just made and your button loop chain. Work 1 sc (UK dc) into the little gap on the left of the next triangle. I have put a stitch marker in the correct spot!
It's actually the stitch you worked two sc (UK dc) into.
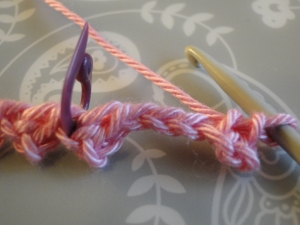
Step 5: stitch marker shows the "little gap" where we work the stitch.
Final Steps
This is how things should look:

Now we have made the loop end of the bracelet. And now we're on the final run! Off we go.
Repeat from * to * until you reach the last triangle to be worked.
Step 6: working up the other side.
Step 7
ch 2, 2 sc (UK dc) into 2nd chain from hook. Now ss to join into your very first stitch at the beginning of your braid next to the slip knot. I've put a stitch marker into that stitch to show you where to ss.
Step 7: stitch marker showing you where to join with ss.
Step 8
To make things more secure, slip stitch again into the next stitches, as shown by the stitch marker - or wherever you think is tidiest.
Step 8: where I ss to fully secure the join.
Step 9
Cut your yarn leaving a tail long enough to sew your button onto this end of your braid. Weave the yarn tail down to where you aim to sew your button.
Step 9: weave yarn to the spot where you want your button.
Step 10
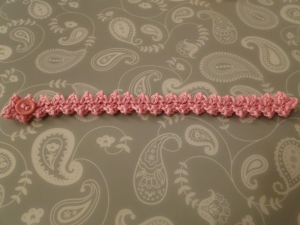
Sew on your button and weave both ends of the yarn into the back of your braid.
Step 10: the button is attached. And here's your completed Buttonbraid Bracelet! Button on one end, button loop on the other!
- Funny Pictures
-
 Cute Cat Memes That Will Make Your Day Brighter
-
 Spot-on and Funny Memes About Introverts Struggles
-
 Top Wonderful Cat Memes on Their Way to Better Your Day
- Recipes
-
 Creamy Old Fashioned Rice Pudding
-
 Russian Tea Cakes (Snowball Cookies)
-
 Rigatoni with Sausage, Tomatoes, and Zucchini
- Lifehacks
-
 How to Crochet a Harlequin Stitch
-
 Removing The Toughest Stains
-
 Crochet Basics: Crumpled Griddle Stitch
- Crochet Ideas
-
 Crochet Christmas Tree
-
 Crochet Goblet of Fire
-
 Crochet Adorable Ammonite
- DIY
-
 DIY Snowman Wreath
-
 Mini Santa Sleigh Ornament
-
 Crochet Gingerbread House Blanket
- Knitting Ideas
-
 Knitted Easter Bunny
-
 Knitted Mobile Phone/Glasses Case
-
 Knitted Cabled Wallet