Step-by-Step Guide to Making a Crochet Baseball Cap

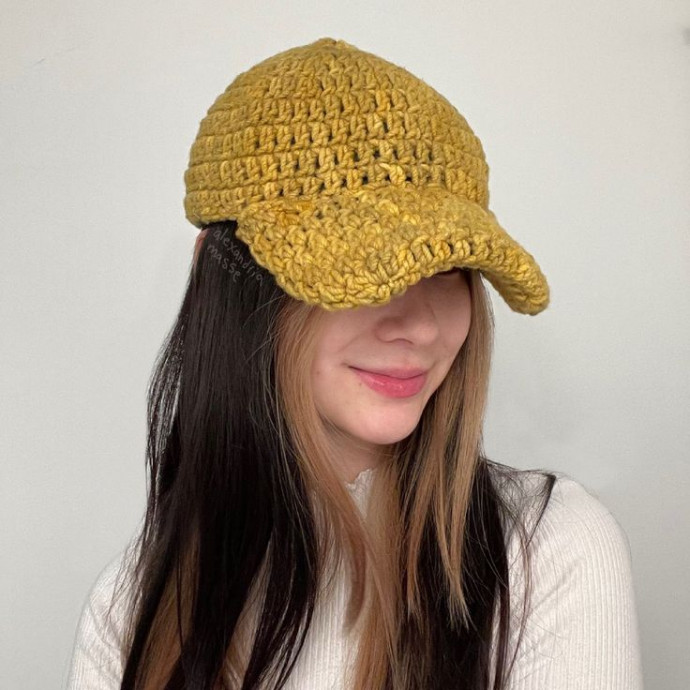
Crochet baseball caps are a fantastic accessory that adds a touch of whimsy and handmade charm to any outfit! The intricate weaving of yarn creates a unique and cozy hat that is perfect for both sunny days and chilly evenings. Whether you're strolling through the park or enjoying a casual day out, a crochet baseball cap adds a fun and playful element to your look. With a variety of colors and patterns to choose from, you can find one that perfectly matches your style and personality. So why not add a crochet baseball cap to your wardrobe and step out in style with a touch of handmade flair!
Materials
To create your crochet baseball cap, you will need the following materials:
- Yarn: I use Wonder Woolen by Fleece Artist; it is about 1/8 of an inch, medium weight. You can use whatever yarn you want.
- Crochet Hook: I used a 4mm but you can use whatever hook you want.
- Needle, Scissors, and Thread: In a matching color.
- Baseball Cap: That fits you.
Gauge Swatch
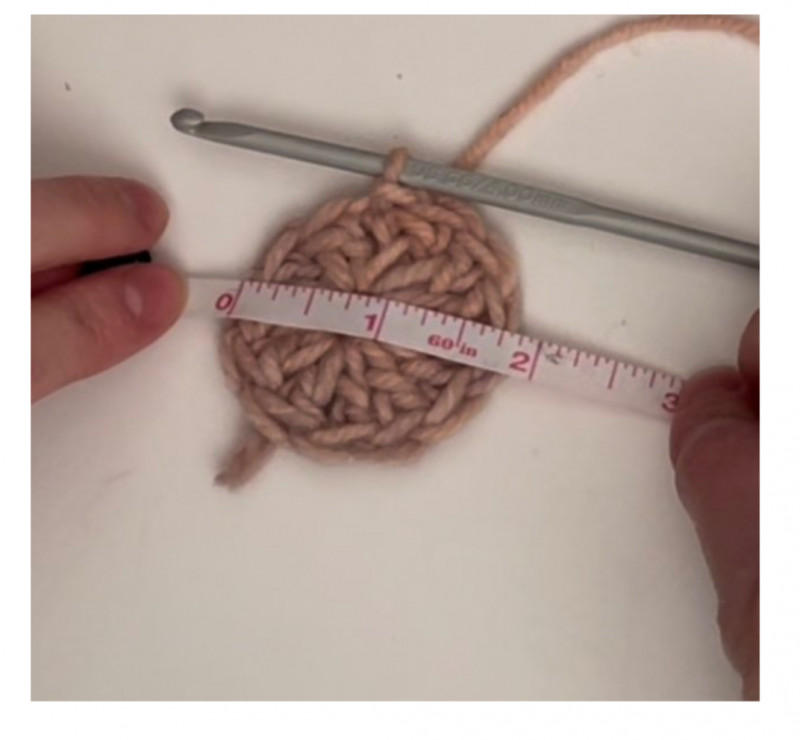
If you want to copy exactly what I did, here is the gauge swatch:
Measurement: 2 inches across the circle (unstretched and unwashed)
American Crochet Terms
I am using American terms:
- ch: chain
- dc: double crochet
- slst: slip stitch
- inc: double crochet increase
- dec: double crochet decrease
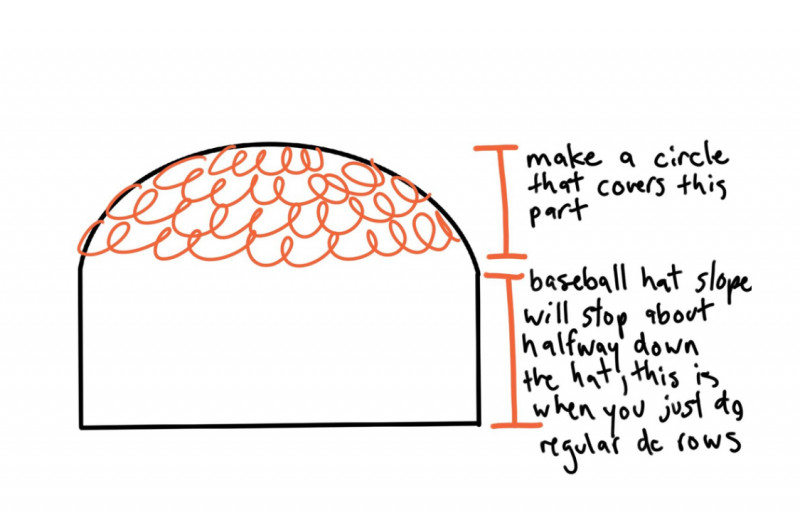
Head Dome (Make 1)
Essentially, you are making a circle large enough to cover the curved part of the hat. I ended up making my circle 5 rows of increases before I did regular dc (double crochet) rows, but I suggest following the diagram.
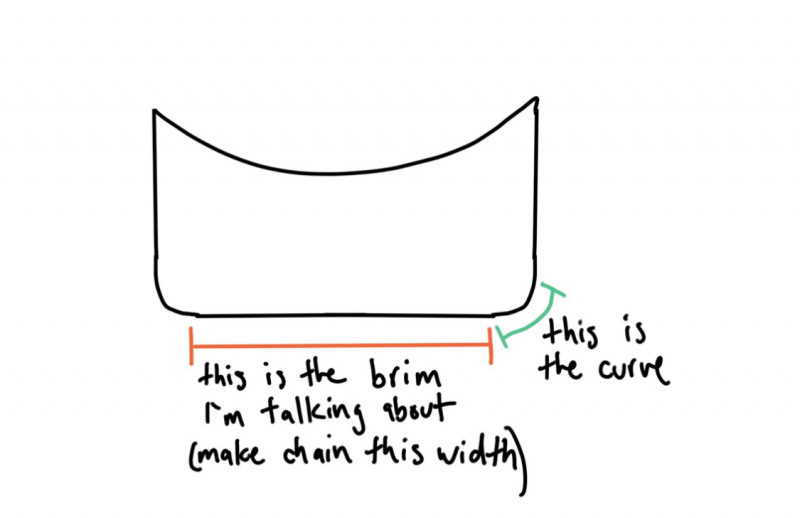
Brim (Make 1)
Ch (chain) the length of width of your baseball brim (before it starts curving). It was 12 chains for me. (I would recommend working smaller; it can always stretch.)
Follow these steps to crochet the brim:
- Ch 3, slst in first ch to create a loop (you will be crocheting into this loop).
- Row 1: Ch 3, dc 12 into the loop you just created, slst into the top of the ch 3.
- Row 2: Ch 3, inc in every stitch around the circle, slst into the top of the ch 3.
- Row 3: Ch 3, (dc 1, inc) repeat all around the circle, slst into the top of the ch 3.
- Row 4: Ch 3, (dc 2, inc) repeat all around the circle, slst into the top of the ch 3.
- Row 5: Ch 3, (dc 3, inc) repeat all around the circle, slst into the top of the ch 3.
- Rows 6-9: Ch 3, dc around circle, slst into the top of the ch 3.
Finalizing the Brim
For the next part of the brim:
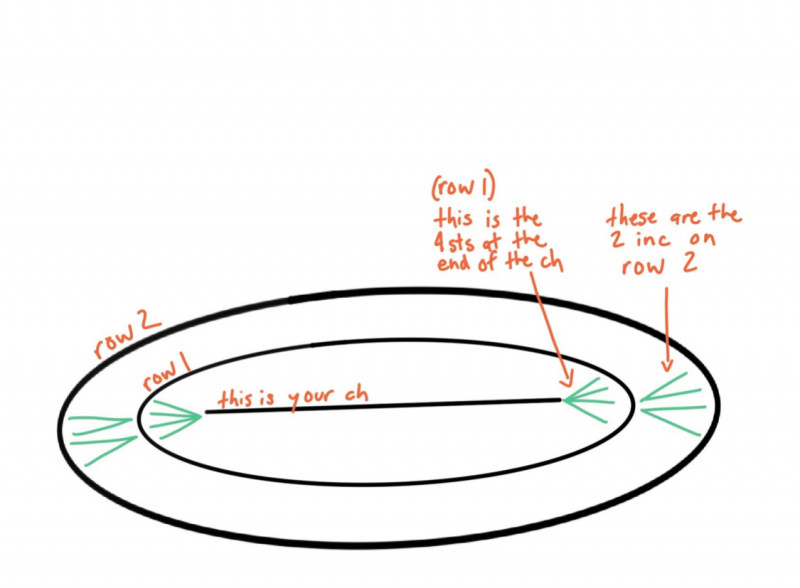
- Row 1: Ch 2, dc to the end of the ch (12 dc for me), add 3 dc into the last st (so there's a total of 4 in the end ch), dc on the other side of the ch until you reach the other end, add 3 dc into the last st, slst into the 1st st.
- Row 2: Ch 2, dc to the other end (14 dc for me), dc inc in 2 sts, continue to dc to the other end (14 dc for me), dc inc in 2 sts, dc 1 then slst into the 1st st.
Shaping the Cap
Continue shaping the brim:
- Rows 3-5: Ch 2, dc around, slst into 1st st.
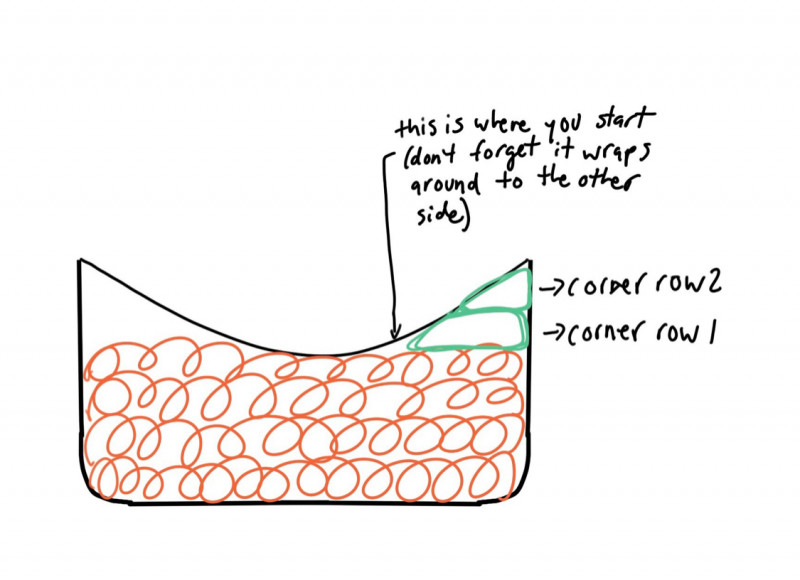
- The corners (Row 1): Ch 2, dc until you fill that gap (9 for me), turn.
- The corners (Row 2): Ch 2, dec, dc (5 for me), dec.
Completion
After you make the Head Dome and Brim, I highly recommend washing the piece. You can always wash it after you attach it, but I find it easier to do beforehand.
After all that, you can sew both pieces to your baseball cap. I suggest just sewing it to the top layer of fabric because shoving a needle through a baseball cap is difficult.