Crochet Dragon Glasses Holder Pattern

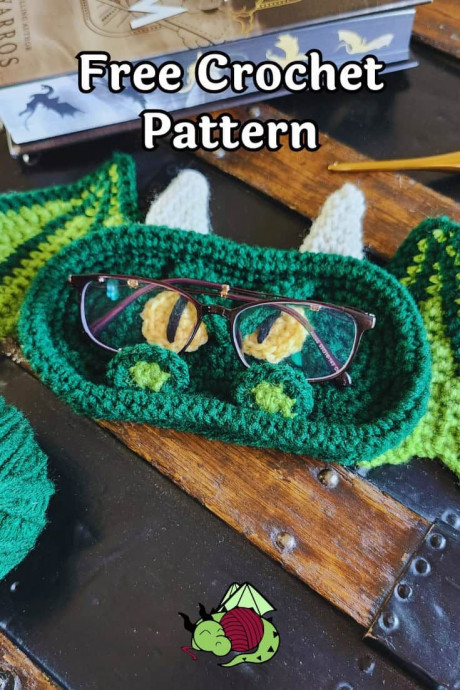
The Crochet Dragon Glasses Holder is not only a cute and whimsical way to keep your glasses safe but also a fabulous accessory that adds character to your daily routine! This charming creation not only showcases your playful side but also ensures your glasses are always within reach when you need them. Imagine having your dragon buddy perched on your desk or bedside table, ready to hold your glasses with a touch of style and personality. With its intricate crochet design and adorable dragon features, this glasses holder is sure to make you smile every time you reach for your eyewear. Get ready to add a touch of enchantment to your everyday life with this delightful and practical accessory!
You Need to Know
Chains (ch), slip stitch (sl st), single crochet (sc), double crochet (dc), back loops only (BLO), front loops only (FLO), Right side (RS), Wrong side (WS), increases (inc), decreases (dec), mattress stitch sewing. Be eager to learn and ready to have fun!
You Will Practice Intermediate Techniques
- How to shape crochet using short rounds
- How to use pins to perfectly place and attach amigurumi parts
- How to shape using increases and decreases
- How to create a rolled edge with crochet
Supplies
- Red Heart Super Saver yarn, 100% acrylic, worsted weight, 364 yds/7 oz/198 g, Hunter Green (GRN), < 1 ball; Spring Green (SPG), < 1 ball; Aran (ARAN), < 1 ball; Cornmeal (YEL), < 10 yds; Black (BLK), scraps.
- G (4.00 mm) Furls hook
- Tapestry needle
- Straight pins
- Stitch markers
Measurements
8″ wide x 6″ deep x 1″ tall
Gauge
8 sts x 8 rows in sc = 2” x 2”
Pattern Notes
Work in continuous rounds. Do not slip stitch unless otherwise specified by the pattern.
Ch-2 at the beginning of the row counts as dc.
For best results, assemble parts in order as directed.
Weave in attachment ends at the very end of the project in case pieces require repositioning.
Instructions
Face (Main Bowl)
With GRN, ch 17.
Foundation Row: Sc in the second ch from the hook, 15 sc, turn. (16)
Rnd 1: Inc, 14 sc, inc, rotate piece and work into the underside of the starting ch, inc, 14 sc, inc. (36)
Rnd 2: 2 inc, 14 sc, 4 inc, 14 sc, 2 inc. (44)
Rnd 3: [Sc, inc] twice, 14 sc, [sc, inc] 4 times, 14 sc, [sc, inc] twice. (52)
Rnd 4: [2 sc, inc] twice, 14 sc, [2 sc, inc] 4 times, 14 sc, [2 sc, inc] twice. (60)
Rnd 5: [3 sc, inc] twice, 14 sc, [3 sc, inc] 4 times, 14 sc, [3 sc, inc] twice. (68)
Rnd 6: Working in FLO, sc evenly around. (68)
Rnd 7-9: Working in both loops, sc evenly around.
Rnd 10: Fold last round toward WS of work, working through both loops of the next st and corresponding exposed Back Loop of Rnd 5, Sc evenly around. (68)
Bind off and weave in ends.
Horns
(Make 2)
With ARAN, ch 2.
Rnd 1: Sc 4 in the second ch from hook. (4)
Rnd 2: [Sc, inc] twice. (6)
Rnd 3: Sc evenly around.
Rnd 4: [2 sc, inc] twice. (8)
Rnd 5: Sc evenly around.
Rnd 6: [3 sc, inc] twice. (10)
Rnd 7-8: Sc evenly around. (10)
Bind off leaving a long tail for sewing. Press flat.
Eyes
(Make 2)
With YEL, ch 2.
Rnd 1: 8 sc in the second ch from hook. (8)
Rnd 2: Inc in each st around. (16)
Sl st in the next st, pull the loop backwards through the next st to smooth the last round.
Bind off leaving a long tail for sewing.
Using a scrap of BLK, sew a straight line across the center of each eye, just inside the unworked sts on the outside edge. Repeat so the line is 2 strands thick.
Nostrils
(Make 2)
With SPG, ch 3.
(Ch 2 of Row 1 counts as a dc)
Row 1: 4 dc in the 3rd ch from hook, turn. (5)
Row 2: Change to GRN, inc in the next 4 sts, inc in the top of ch 2. (10)
Bind off leaving a long tail for sewing. Weave in all other ends.
Eyebrows
With GRN, ch 12.
Row 1: Sc in the second ch from the hook, 4 sc, 3 sc in the next st, 5 sc, turn. (13)
Row 2: Ch 1, inc, 5 sc, 3 sc in the next st, 5 sc, inc. (17)
Bind off leaving a long tail for sewing.
Wings
(Make 2)
With GRN, ch 22.
Row 1: Sc in the second ch from the hook, 20 sc, turn. (21)
Row 2: Change to SPG, Ch 1, dec, 13 sc, leave remaining 6 sts unworked, turn. (14)
Row 3: Do not chain, 12 sc, dec, turn. (13)
Row 4: Ch 1, dec, 8 sc, leave remaining 3 sts unworked, turn. (9)
Row 5: Do not chain, 7 sc, dec, turn. (8)
Row 6: Ch 1, 5 sc, leave remaining 3 sts unworked, turn. (5)
Row 7: Do not chain, 5 sc, turn. (5)
Row 8: Ch 1, inc, sc, leave remaining 3 sts unworked, turn. (3)
Row 9: Do not chain, 2 sc, inc, turn. (4)
Row 10: Ch 1, inc, leave remaining 3 sts unworked, turn. (2)
Row 11: Do not chain, sc, inc, turn. (3)
Row 12: Ch 1, working across on unworked sts, 19 sc, change to GRN, sc, leave remaining st unworked, turn. (20)
Row 13: Do not chain, 20 sc, turn. (20)
Row 14: Change to SPG, Ch 1, dec, 13 sc, leave remaining 5 sts unworked, turn. (14)
Row 15: Do not chain, 12 sc, dec, turn. (13)
Row 16: Ch 1, dec, 8 sc, leave remaining 3 sts unworked, turn. (9)
Row 17: Do not chain, 7 sc, dec, turn. (8)
Row 18: Ch 1, 5 sc, leave remaining 3 sts unworked, turn. (5)
Row 19: Do not chain, 5 sc, turn. (5)
Row 20: Ch 1, inc, sc, leave remaining 3 sts unworked, turn. (3)
Row 21: Do not chain, 2 sc, inc, turn. (4)
Row 22: Ch 1, inc, leave remaining 3 sts unworked, turn. (2)
Row 23: Do not chain, sc, inc, turn. (3)
Row 24: Ch 1, working across on unworked sts, 18 sc, change to GRN, sc, leave remaining st unworked, turn. (19)
Row 25: Do not chain, 19 sc, turn. (19)
Row 26: Change to SPG, Ch 1, dec, 13 sc, leave remaining 4 sts unworked, turn. (14)
Row 27: Do not chain, 12 sc, dec, turn. (13)
Row 28: Ch 1, dec, 8 sc, leave remaining 3 sts unworked, turn. (9)
Row 29: Do not chain, 7 sc, dec, turn. (8)
Row 30: Ch 1, 5 sc, leave remaining 3 sts unworked, turn. (5)
Row 31: Do not chain, 5 sc, turn. (5)
Row 32: Ch 1, inc, sc, leave remaining 3 sts unworked, turn. (3)
Row 33: Do not chain, 2 sc, inc, turn. (4)
Row 34: Ch 1, inc, leave remaining 3 sts unworked, turn. (2)
Row 35: Do not chain, sc, inc, turn. (3)
Row 36: Ch 1, working across on unworked sts, 20 sc, change to GRN, sc, turn. (21)
Row 37: Do not chain, 21 sc, turn. (21)
Bind off and weave in ends.
Assembly
Eyes
Place eyes on the face piece, centered with 2 sts between them. The top edge of the eyes should cover Rnd 3 at the top and Rnd 1 at the bottom. Eyes will be just slightly above the horizontal centerline.
Sew using sewing tails from eyes, working in a mattress stitch so the unfinished last round is visible.
Eyebrows
Align eyebrows over eyes so that the tip of the center point is between the eyes, just covering the Foundation Row of the face. The top edges of the eyebrows should touch Rnd 6, where the rolled edge of the bowl begins.
Sew using the sewing tail along top edges and along the starting chain (top, inside edge of ‘V’). Weave the end back to the tip of ‘V’ and tack down the tip between the eyes. Do not sew along the underside of ‘V’.
Nostrils
Align nostrils so the unfinished last round is facing up and the flat bottom edge is touching Row 6 of the face, where the rolled edge of the bowl begins. Center on the face with 3 sts between. Nostrils will be slightly wider apart than eyes.
Using the sewing tail from nostrils, attach nostrils to Rnd 6 of the face in a straight line across the flat edge. Do not sew down the arched outside edge of the nostrils. Allow them to stick up away from the bowl.
Horns
Align horns on the outside of the rolled edge, along Rnd 9. Center horns on face with 8 sts between them.
Using the sewing tail from horns, sew through both layers of the last round of horns to attach to Rnd 9 on the outside of the bowl.
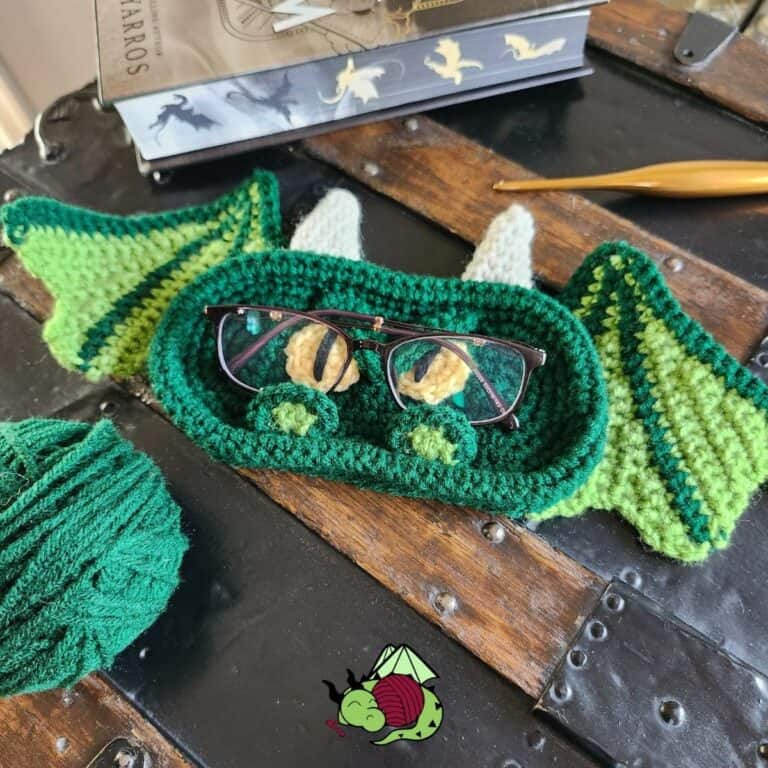
Wings
Lay wings on a table next to one another, fanning downward, with the inside tips touching, forming a 90-degree angle where they touch. The center tips of the wings will be level with one another. Lay the bowl on top of the wings so that the horns are level with the center tips of the wings. Center so that wings stick out on either side of the bowl, showing 1 ½ of the 3 SPG sections.
Using a scrap of GRN or SPG, sew the wing to the back of the bowl along the edge of the bowl and tack down any floppy wing so the glasses holder lays flat.
Weave in all attachment ends when parts are positioned as desired.