Crochet Thick Coasters: A Delightful Handmade Project

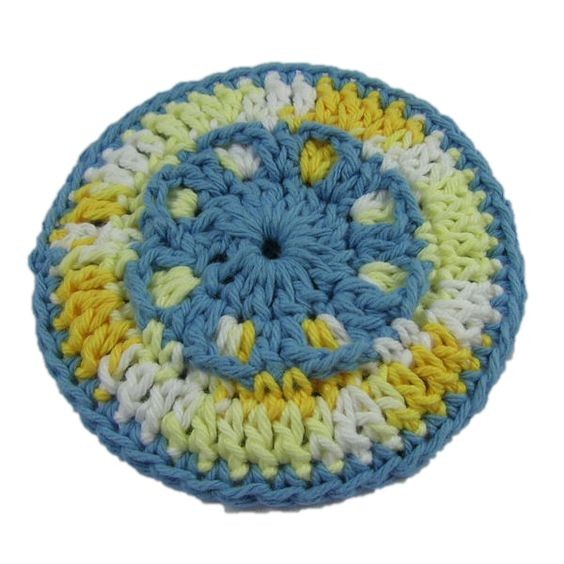
Crochet thick coasters are not just practical accessories for your home; they're also a delightful way to add a touch of handmade charm to your decor. These sweet little coasters are not only functional for protecting your tables from pesky water rings but also serve as adorable accents that bring warmth and coziness to any space. With their thick texture and intricate crocheted patterns, they make for a lovely conversation piece when entertaining guests. Plus, crafting them yourself can be a fun and relaxing activity that lets you unleash your creativity and create something truly unique. So, whether you're a seasoned crocheter or a beginner looking for a new project, these crochet thick coasters are a fantastic way to infuse your home with a touch of handmade goodness.
Materials Needed
- Worsted weight cotton yarn in 2 colors: a solid color and a variegated color.
- Size H/8 or 5mm aluminum crochet hook.
- 4" round plastic canvas circle.
- Yarn needle for weaving in ends.
Specifications
Yarn Thickness:
3mmGauge:
Center circle is 1¾ inches in diameter.Finished Size:
5" diameterSkill Level:
Beginner to intermediate
Instructions
Front Circle
RND 1: With color 1: Ch4. Join with slst to first ch to form ring. Ch3, 15 dc in ring. Join with slst to top of ch3. (16dc.)
RND 2: Ch3, dc in same st as slst. Ch2. Sk next dc. *2Dc in next dc. Ch2. Sk next dc. Rep from * around. Join with slst to top of ch3. Fasten off color 1.
RND 3: Join color 2 in same st as slst. Ch1. Sc in next dc. (3dc in skipped dc of RND 1 behind ch2 sp.) *Sc in each of the next 2 dc. Rep bet () once. Rep from * around. Join with slst to ch1.
RND 4: Ch3. (Dc in each of the next 2 sts. 2dc in next st. Dc in next st.) *Dc in next st. Rep bet () once. Rep from * around. Join with slst to top of ch3. Fasten off and weave ends into back of work.
Back Circle
RND 1: Repeat RND 1 of Front Circle.
RND 2: Ch3. Dc in same st as slst. 2dc in each st around. Join with slst to top of ch3.
RND 3: Ch3. 2dc in next dc. *Dc in next dc. 2dc in next dc. Rep from * around. Join with slst to top of ch3. Fasten off and weave ends into back of work.
Assembly
Place both pieces together wrong sides facing each other and the front circle facing you. Join color 1 to the same st as slst through both pieces. Ch1. Sc in each sc around through both layers all the way around but be sure to slip the plastic canvas circle inside before closing. Join with slst to ch1. Fasten off and weave all ends into back of work.