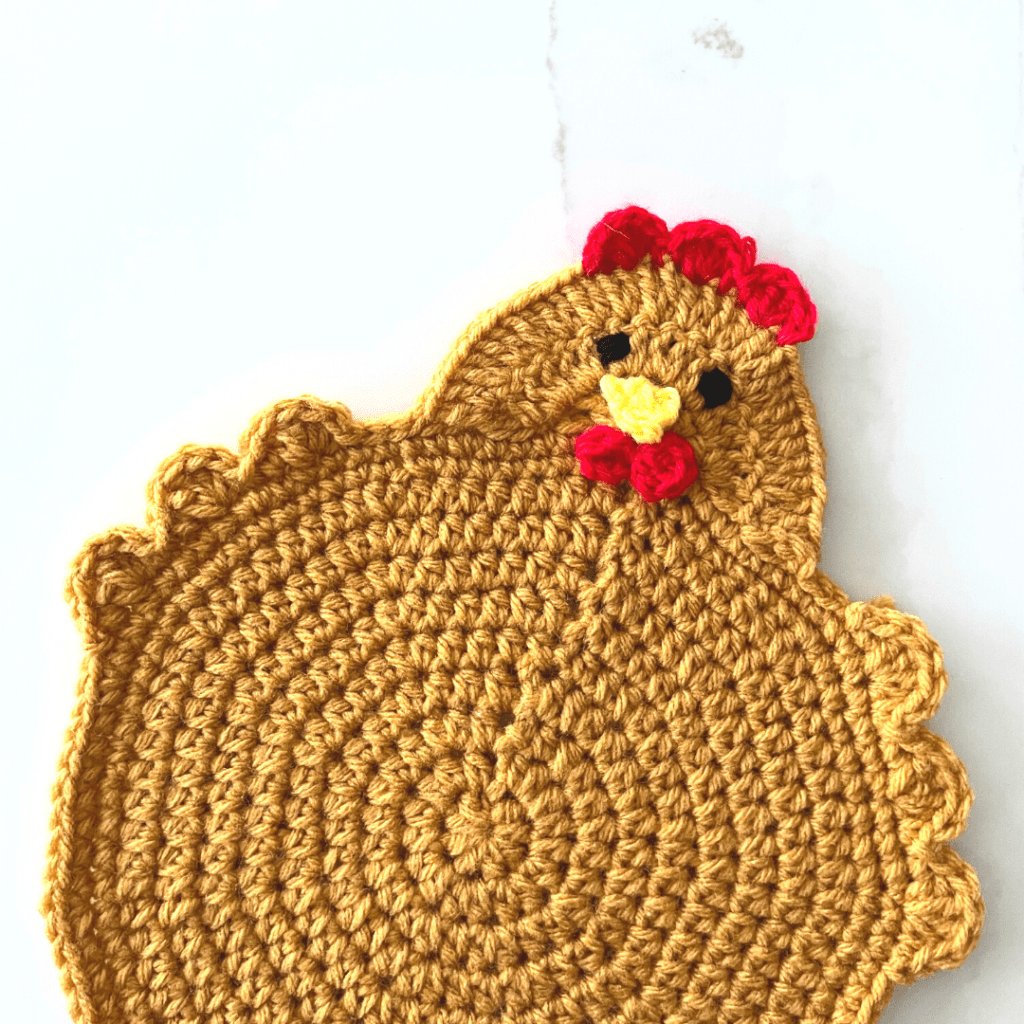
Crochet Farmhouse Chicken Potholder

Discover the charm of the Crochet Farmhouse Chicken Potholder, a delightful addition to your kitchen decor. This unique potholder is handcrafted with love and attention to detail, making it a true work of art. The intricate crochet stitches create a beautiful texture that not only adds visual interest but also provides excellent heat protection for your hands. The Crochet Farmhouse Chicken Potholder is not just a practical kitchen accessory, but also a conversation starter. Its rustic farmhouse design brings a touch of country charm to your home, evoking a warm and cozy atmosphere. The vibrant colors and intricate patterns of the crochet stitches make this potholder a standout piece that will surely catch the eye of your guests. Whether you're using it to handle hot pots and pans or simply displaying it as a decorative item, the Crochet Farmhouse Chicken Potholder is sure to add a touch of whimsy and personality to your kitchen.
Materials
Medium Weight 4 Yarn – Lily Sugar’N Cream 100% Cotton in Black, Yellow, Red + Main Body Color
- Black – 1 Skein
- Red – 1 Skein
- Yellow – 1 Skein
- Body Color – 2 Skeins
4.5mm & 3.5mm Hook (My FAVORITE crochet hooks!)
Tapestry Needle
Scissors
Optional – Stitch Markers
Optional – Stitch Counter
Both stitch markers and stitch counters are very helpful for those who easily lose track of their row/stitch counts.
Stitches & Techniques
- CH – Chain
- SC – Single Crochet
- HDC – Half Double Crochet
- DC – Double Crochet
- SL – Slip Stitch
- ST – Stitch
Pattern Notes
Skill Level – Advanced Beginner/Intermediate
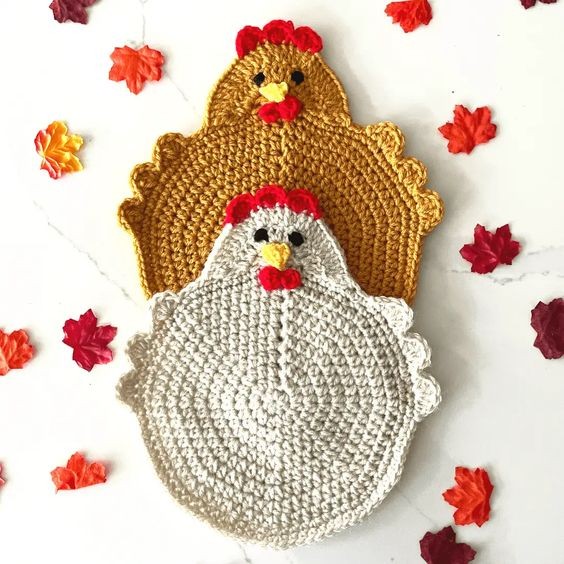
Measurements – 9″ x 10″
Gauge – 20 CH = 4″
This pattern follows US crochet terms. This pattern requires basic crochet skills and knowledge and is suitable for intermediate crocheters. The success of this pattern is not dependent upon gauge or yarn type.
Farmhouse Chicken Potholder Crochet Pattern
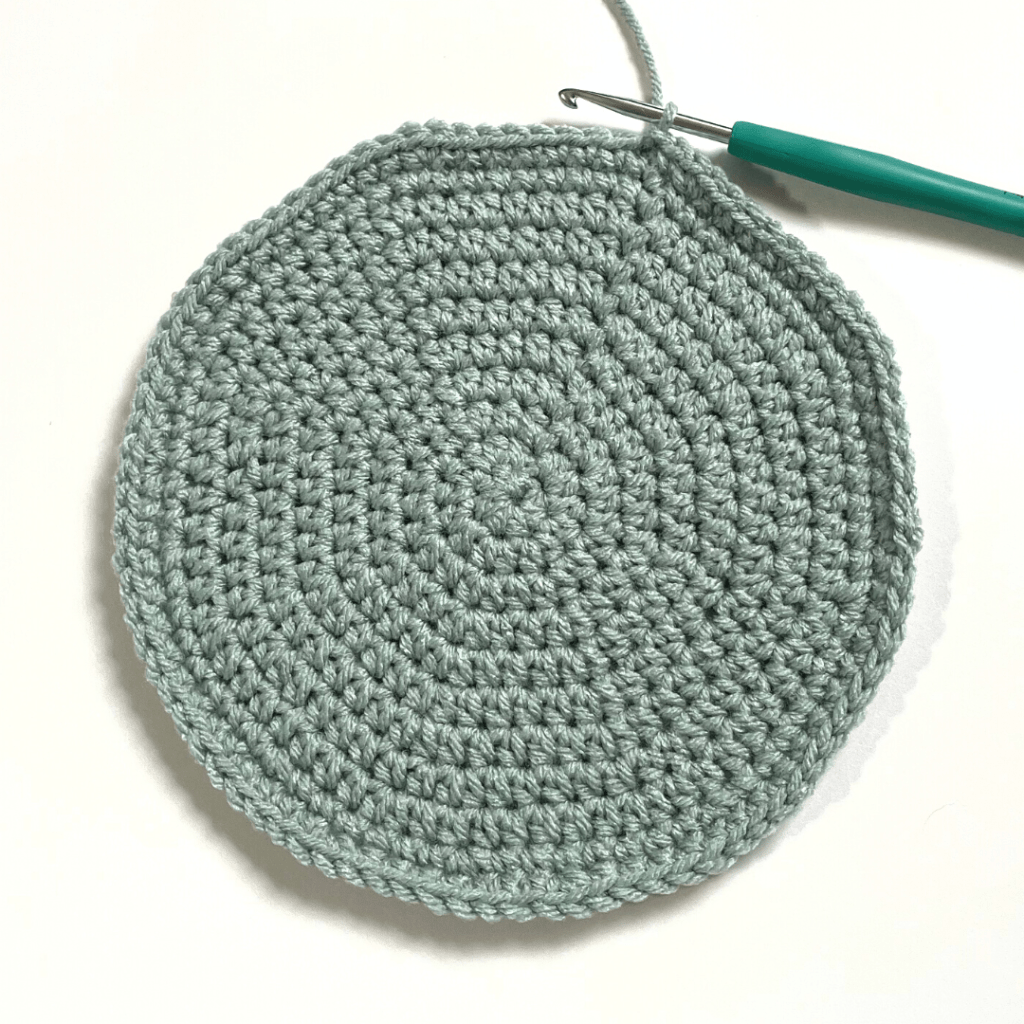
Body (4.5mm Hook)
R1: To begin, make a magic circle. HDC 8 into the magic circle, pull gently to close the circle, SL into the beginning of the row.
R2: CH 2 (this will count as 1 HDC), HDC 1 in the same space, HDC 2 into each ST (16), SL into the top of the CH 2 space.
R3: CH 2, HDC 1 in the same space, HDC 1 into the next ST, HDC 2 into the following ST, repeat for the rest of the round (HDC 2 same space, HDC 1, HDC 2 same space, HDC 1…), SL into the top of the CH 2 space.
R4: CH 2, HDC 1 in the same space, HDC 1 into the next 2 ST, HDC 2 into the following ST, repeat for the rest of the round (HDC 2 same space, HDC 2, HDC 2 same space, HDC 2…), SL into the top of the CH 2 space.
R5: CH 2, HDC 1 in the same space, HDC 1 into the next 3 ST, HDC 2 into the following ST, repeat for the rest of the round (HDC 2 same space, HDC 3, HDC 2 same space, HDC 3…), SL into the top of the CH 2 space.
R6: CH 2, HDC 1 in the same space, HDC 1 into the next 4 ST, HDC 2 into the following ST, repeat for the rest of the round (HDC 2 same space, HDC 4, HDC 2 same space, HDC 4…), SL into the top of the CH 2 space.
R7: CH 2, HDC 1 in the same space, HDC 1 into the next 5 ST, HDC 2 into the following ST, repeat for the rest of the round (HDC 2 same space, HDC 5, HDC 2 same space, HDC 5…), SL into the top of the CH 2 space.
R8: CH 2, HDC 1 in the same space, HDC 1 into the next 6 ST, HDC 2 into the following ST, repeat for the rest of the round (HDC 2 same space, HDC 6, HDC 2 same space, HDC 6…), SL into the top of the CH 2 space.
R9: CH 2, HDC 1 in the same space, HDC 1 into the next 7 ST, HDC 2 into the following ST, repeat for the rest of the round (HDC 2 same space, HDC 7, HDC 2 same space, HDC 7…), SL into the top of the CH 2 space.
R10: CH 1, SC 7, SC 2 into the 8th ST, repeat for the rest of the round (SC 2 same space, SC 7, SC 2 same space, SC 7…), SL into the CH 1 space.
R11: Repeat R10
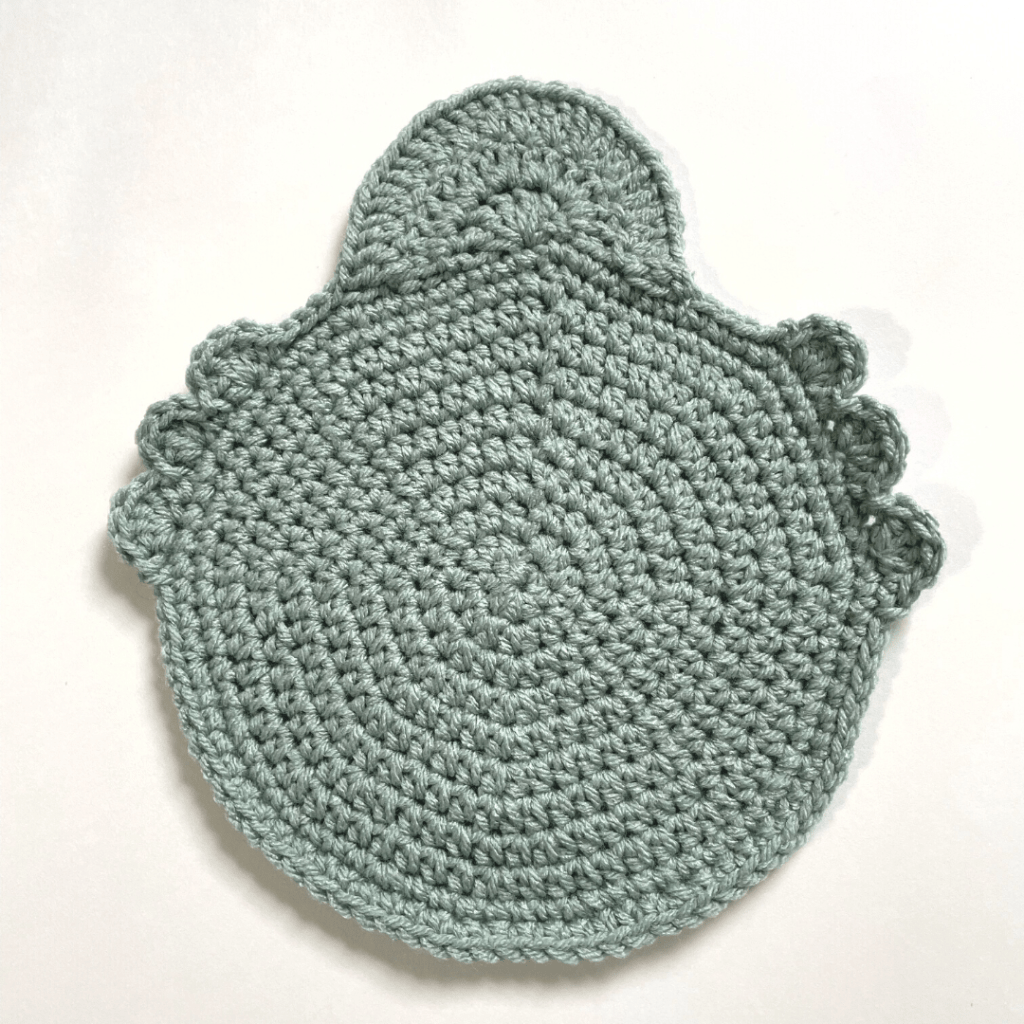
Head (4.5mm Hook)
CH 2, turn. SL into the 2nd ST from the hook, turn. DC 5 into the next ST, SL into the 3rd ST from the hook (you will be skipping 2 ST and going into the 3rd ST away from the head, creating an open space.
This will begin to make the head wider), turn. Skipping the open space you have just created, DC 1 into the 1st ST of the previous section of the head, DC 2 into the next 8 ST, SL into the 3rd ST from the hook, turn. DC 1 into the 1st ST, DC 2 into the next 16 ST.

Wings (4.5mm Hook)
SL into the next 3 ST from the head, DC 4 into the next ST, SC 1, SL into the following ST, SC 1, DC 4 into the next ST, SC 1, SL 1. Repeat one more time, tie off and weave in any yarn ends.
To complete the wing on the other side, attach the yarn to the 15th ST away from the head. SC 1, DC 4 into the next ST, SC 1, SL 1. Repeat twice to finish the wing, tie off and weave in any yarn ends.
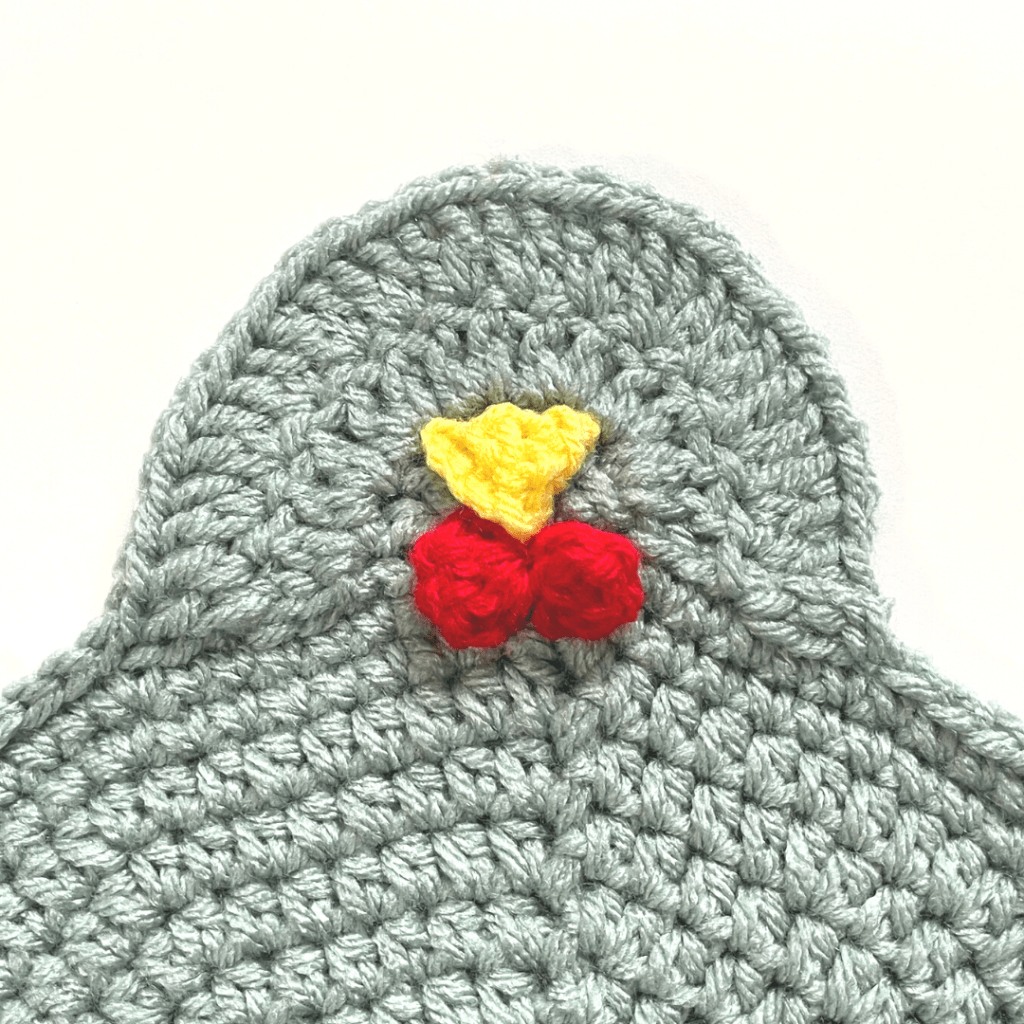
Beak (3.5mm Hook)
Taking the yellow yarn, CH 4, SL 3, CH 1, turn. SL 2, CH 1, turn. SL 1, CH 1, tie off. Thread the yarn ends through the body and tie at the back to attach the beak.
Bow (3.5mm Hook)
Taking the red yarn, make a magic circle, CH 2, DC 2 into the magic circle, CH 2, SL 1 into the circle. CH 2, DC 2 into the circle, CH 2, SL 1 into the circle, pull closed. CH 1, tie off.
Thread the yarn ends through the body and tie at the back to attach the bow.
Comb (3.5mm Hook)
Attach the red yarn to the 9th ST up from the beginning of the head on the right edge. CH 1, DC 4 into the next ST, SL 1, SC 1, DC 4 into the next ST, SL 1, SC 1, DC 4 into the next ST, SC 1, tie off and weave in any yarn ends.
Eyes
To create the eyes, tie the black yarn off to the desired spot for the eye using a tapestry needle. Then, sew the yarn around the ST several times using the tapestry needle and tie off and weave in any yarn ends.