Adorable Crochet Chicken Potholder Pattern

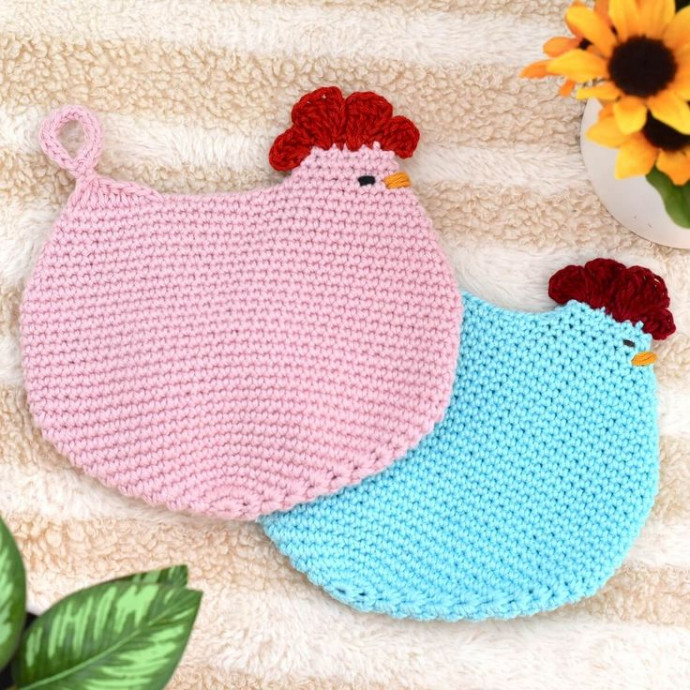
If you're looking to add a touch of whimsy to your kitchen, why not try out a crochet chicken potholder? These adorable little creations not only keep your hands safe from hot pots and pans but also bring a smile to your face every time you use them. With their bright colors and fun designs, they are sure to become a favorite kitchen accessory. So, grab your yarn and hook and get ready to add some charm to your cooking routine with a delightful crochet chicken potholder! Happy crocheting!
Materials
- 93 yards of worsted weight (4) cotton yarn.
- Scraps of black (or dark brown) and orange yarn for embroidering the eyes and beak.
- A small amount of red cotton yarn – approximately 3 yards.
- 4 mm (G) Clover Amour Crochet Hook.
- 3 stitch markers.
- Tapestry needle.
- Scissors.
Project Size
Approximately 7” x 7” (18 cm x 18 cm) with Mainstays and 24/7 cotton yarn and 9” x 9” (23 cm x 23 cm) with Sugar n’ Cream cotton yarn.
Gauge
The first seven rounds of this crochet chicken potholder pattern will measure approximately 4 7/8” (11 cm) across the increasing ends.
Abbreviations (US Terms)
- ch(s): chain(s)
- dc: double crochet
- dc3tog: three double crochet stitches together
- dec: single crochet decrease or two single crochet stitches together
- hdc: half double crochet
- inc: increase or two single crochet stitches in the same stitch
- mc: magic circle
- rep: repeat
- Rnd: Round
- sc: single crochet
- st(s): stitch(es)
- [ ]: stitch count in a round
Instructions
Step #1: Creating the Body
Start from the bottom up with the main yarn color.
Rnd 1: 8 sc in a mc.
Rnd 2: inc 8x [16].
Rnd 3: *5 sc in next st, sc in each of next 7 sts, rep from the asterisk one more time. [24].
Rnd 4: sc in each of next 2 sts, 5 sc in next st, sc in each of next 11 sts, 5 sc in next st, sc in each of next 9 sts. [32].
Rnd 5: sc in each of next 4 sts, 5 sc in the st, sc in each of next 15 sts, 5 sc in next st, sc in each of next 11 sts. [40].
Rnd 6: sc in each of next 6 sts, 5 sc in next st, sc in each of next 19 sts, 5 sc in next st, sc in each of next 13 sts. [48].
Rnd 7: sc in each of next 8 sts, 5 sc in next st, sc in each of next 23 sts, 5 sc in next st, sc in each of next 15 sts. [56].

Rnd 8: sc in each of next 10 sts, 3 sc in next st, sc in each of next 27 sts, 3 sc in next st, sc in each of next 17 sts. [60].
Rnd 9: sc in each of next 11 sts, 3 sc in next st, sc in each of next 29 sts, 3 sc in next st, sc in each of next 18 sts. [64].
Rnd 10: sc in each of next 12 sts, 3 sc in next st, sc in each of next 31 sts, 3 sc in next st, sc in each of next 19 sts. [68].
Rnd 11: sc in each of next 13 sts, 3 sc in next st, sc in each of next 33 sts, 3 sc in next st, sc in each of next 20 sts. [72].
Rnd 12: sc in each of next 14 sts, 2 sc in the next st, sc in each of the next 35 sts, 2 sc in the next st, sc in each of the next 21 sts. [74].
Rnd 13-22: sc around. [74].
Rnd 23: sc in each of next 17 sts, dec, sc in each of next 35 sts, dec, sc in each of next 18 sts. [72].
Rnd 24: sc in each of next 16 sts, dec, sc in each of next 34 sts, dec, sc in each of next 18 sts. [70].
Rnd 25: sc in each of next 16 sts, dec, sc in each of next 33 sts, dec, sc in each of next 17 sts. [68].
Rnd 26: sc in each of next 16 sts, dec, sc in each of next 32 sts, dec, sc in each of next 16 sts. [66].
Rnd 27: sc in each of next 16 sts, dec, sc in each of next 31 sts, dec, sc in each of next 15 sts. [64].
Rnd 28: sc in each of next 16 sts, dec, sc in each of next 30 sts, dec, sc in each of next 14 sts. [62].
Rnd 29: sc in each of next 16 sts, dec, sc in each of next 29 sts, dec, sc in each of next 13 sts. [60].
Rnd 30: sc in each of next 16 sts, dec (place a st marker in this dec), sc in each of next 28 sts, dec (place a st marker in this dec), sc in each of next 12 sts. [58].
Cut the yarn. FO.
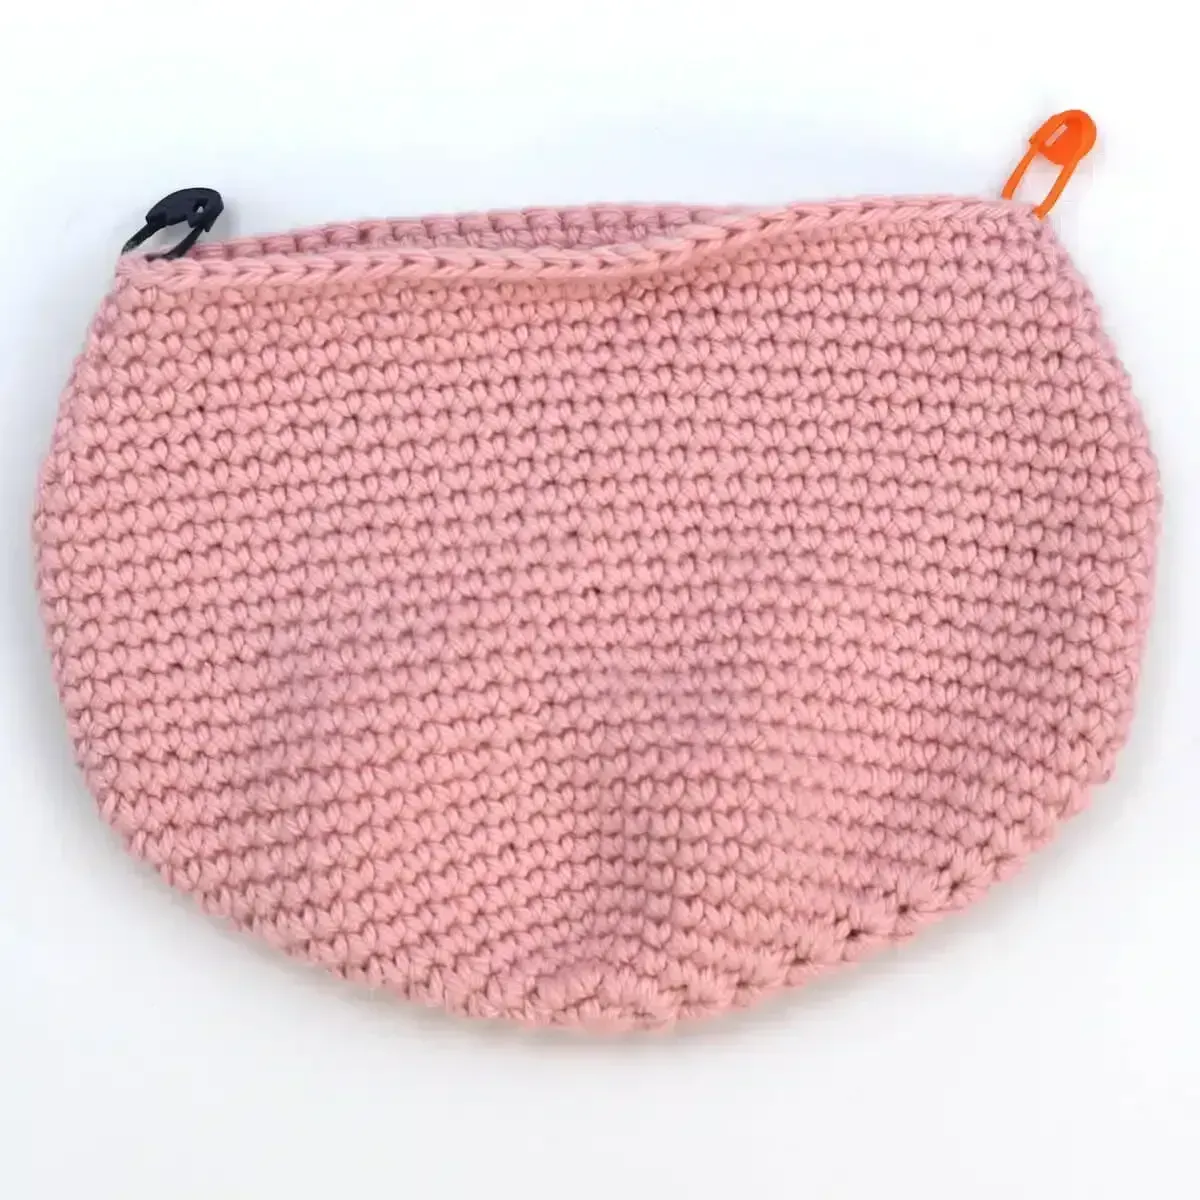
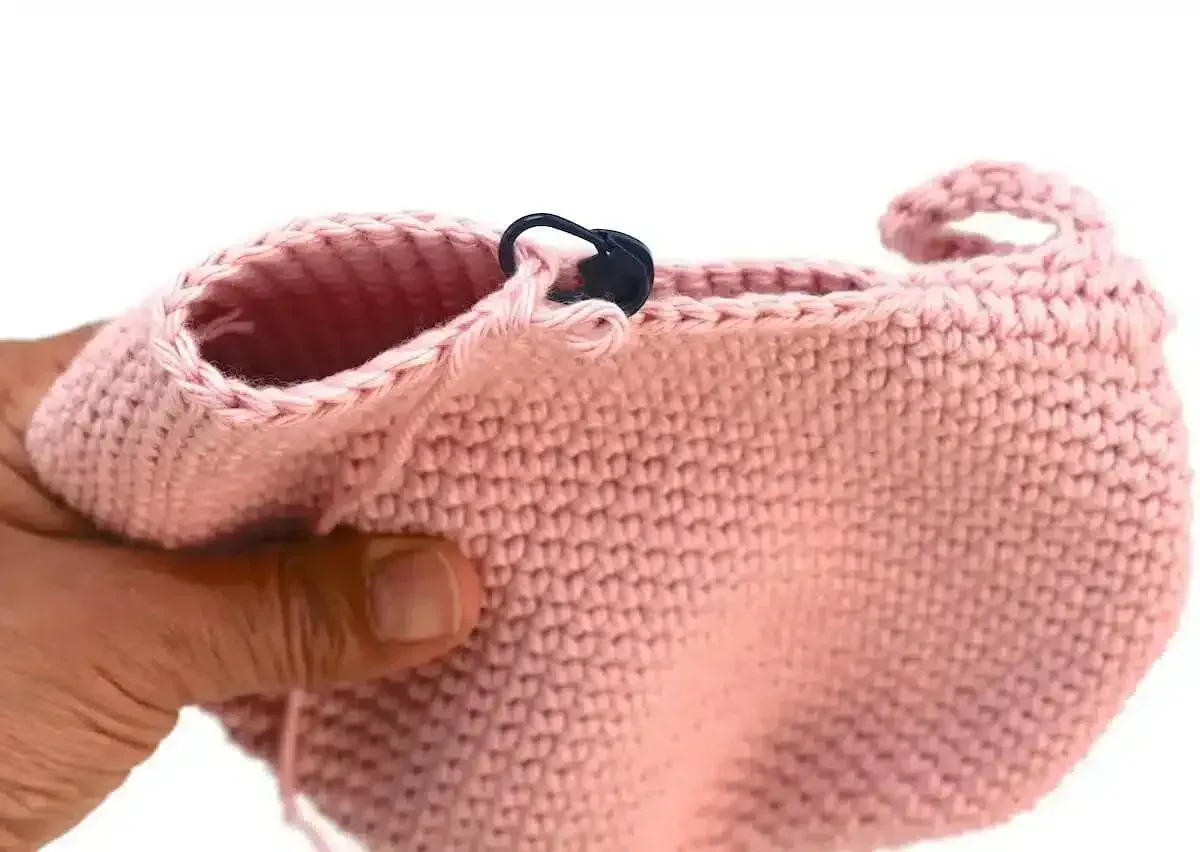
Step #2: Making the Tail and Hanging Loop
Start by squeezing the top opening of the crochet chicken potholder with one stitch marker at each end (stitch markers placed in round 30). We are also making the hanging loop here.
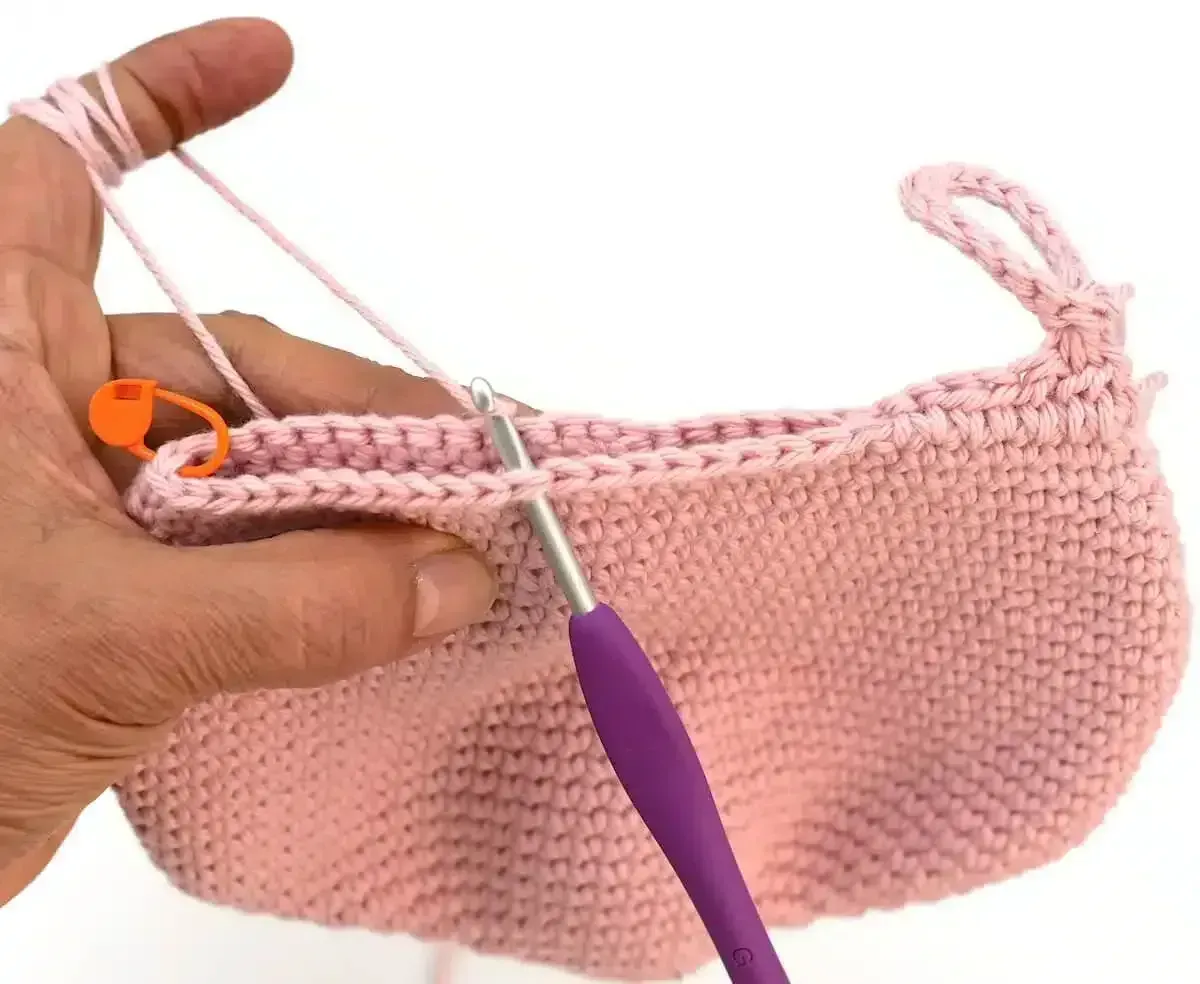
Then, pick either end to make the tail and attach the main color yarn 9 sts away from the st marker in both stitch layers for this and all remaining sts. Pull up a loop in that st, but do not sc or ch. Remove the st marker.
Next, sc in each of the next 2 sts, hdc in each of the next 2 sts, dc in next st, dc3tog in next three sts. Ch 16 to create the hanging loop, sl st in the back bump of each ch across, sl st into the top of the dc3tog with the other end to create a loop. FO. Cut the yarn.
Step #3: Making the Head
In the same way you started the tail, attach the main color yarn 12 sts away from the st marker at the other end. However, this time, you’re not crocheting in both layers. Instead, crochet one st at a time, in rounds, to create a “cup.” Pull up a loop in the 12th st, but do not sc or ch.
Rnd 1: sc in each of next 10 sts, dec, sc in each of next 10 sts. [21].
Rnd 2: sc in the first st of rnd 1, sc in each of the next 9 sts, dec, sc in each of next 9 sts. [20].
Rnd 3: (dec, sc in each of the next 8 sts) 2x. [18].
Rnd 4: (dec, sc) 6x. [12].
FO. Cut the yarn.
Step #4: Embroidering the Eyes and Beak
Use the black and orange (or yellow) yarn scraps to embroider the chicken’s eyes and beak. Fasten off inside using the back opening and weave in the ends.
Embroider the eyes two or three rows below the top of the head and three sts away from the front edge of the head.
Embroider the beak in the same row as the eyes, inserting the needle from one side to the opposite side, two sts away from the front edge of the head.

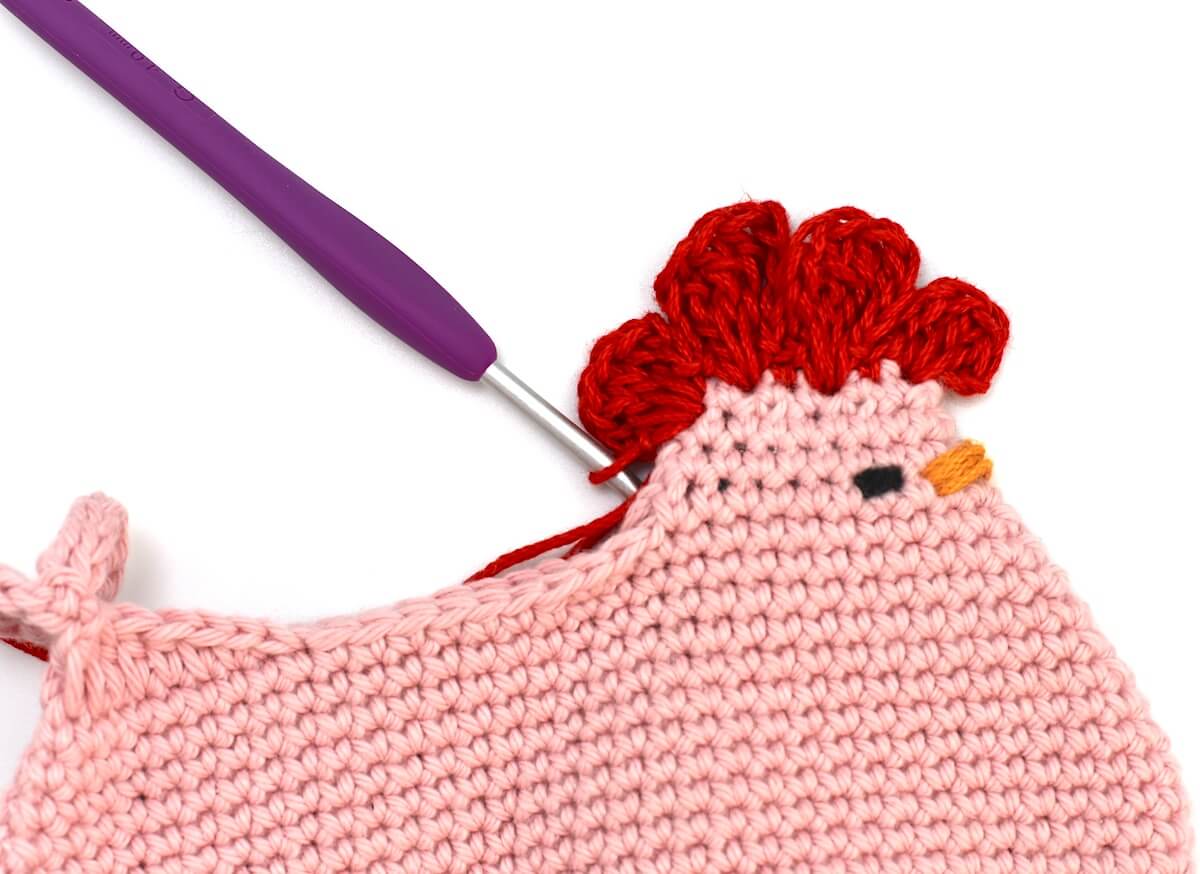
Step #5: Creating the Comb (Red)
Attach the red yarn to the front of the head of the crochet chicken potholder, inserting the hook in both layers of sts to close the head opening as you crochet the comb.
Then, (ch 2, 3 dc, ch 2 again, sl st) in the first st, *sc in the next st, (sl st, ch 3, 4 tr, ch 3 again, sl st) in next st, repeat from the asterisk once more. Next, you will do one more comb on the back of the head, (sc, ch 2, 3 dc, ch 2 again, sl st) right past the last comb st.
Cut the yarn. FO. Use the back opening to weave in the yarn ends.
Step #6: Finishing the Potholder
Thread the needle with a strand of the main color yarn and sew the remaining open sts to close the back of the chicken. FO. Weave in the ends.
You have completed your crochet chicken potholder. I hope you enjoyed crocheting this project as much as I enjoyed designing it.