How to Make Adorable Crochet Heart Potholders for Your Kitchen


Crochet heart potholders are a delightful addition to any kitchen. These charming creations not only protect your hands from hot pots and pans but also add a touch of warmth and love to your cooking space. With their intricate patterns and vibrant colors, crochet heart potholders make practical yet heartwarming gifts for friends and family. Whether you're a seasoned crocheter looking for a fun project or a beginner eager to learn a new skill, making these sweet potholders is a surefire way to spread joy and creativity in the heart of your home.
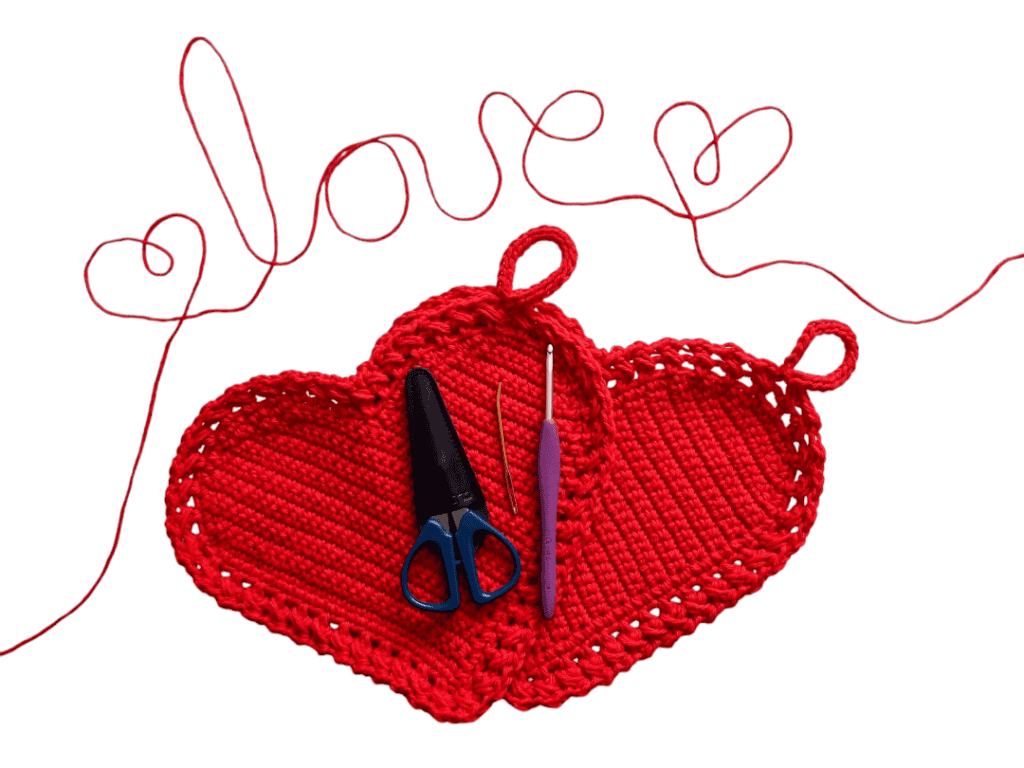
Materials
- Clover Amour Crochet Hook G (4.0 mm)
- Clover Jumbo Tapestry Needle (Bent Point)
- Clover Patchwork Mini Scissors
- Tape Measure
- Cotton worsted weight (#4) yarn (about 80 yards)
Notes
- Read the pattern carefully before starting.
- This pattern uses US crochet terms.
- This pattern is worked in rows and after establishing the heart-shaped design, you will be working around it.
- The beginning ch 1 does not count as a stitch.
- * * repeat instructions between asterisks as many times as directed or repeat at specified locations.
- A number before a stitch indicates how many of that specific stitch to work into the same stitch; for example, 2 SC means to single crochet 2 times in the same stitch.
- A number after a stitch indicates how many times you need to work that specific stitch in a row; for example, “SC 3” means work 3 single crochet stitches into the next 3 stitches.
- The number of stitches in each row is indicated by the numbers at the end of the round.
Gauge: 18 sts X 18 rows = 4 inches in Single Crochet Stitch
Skill Level: Adventurous beginner
Finished Measurement: Approximately 8.5 (height) x 8.5 (width) inches (unstretched, unblocked)
Abbreviations
- ch(s): chain(s)
- hdc: half double crochet
- rep: repeat
- sc: single crochet
- sc2tog: single crochet two stitches together (decrease)
- sc3tog: single crochet three stitches together (decrease)
- slst(s): slip stitch(es)
- sp(s): space(s)
- st(s): stitch(es)
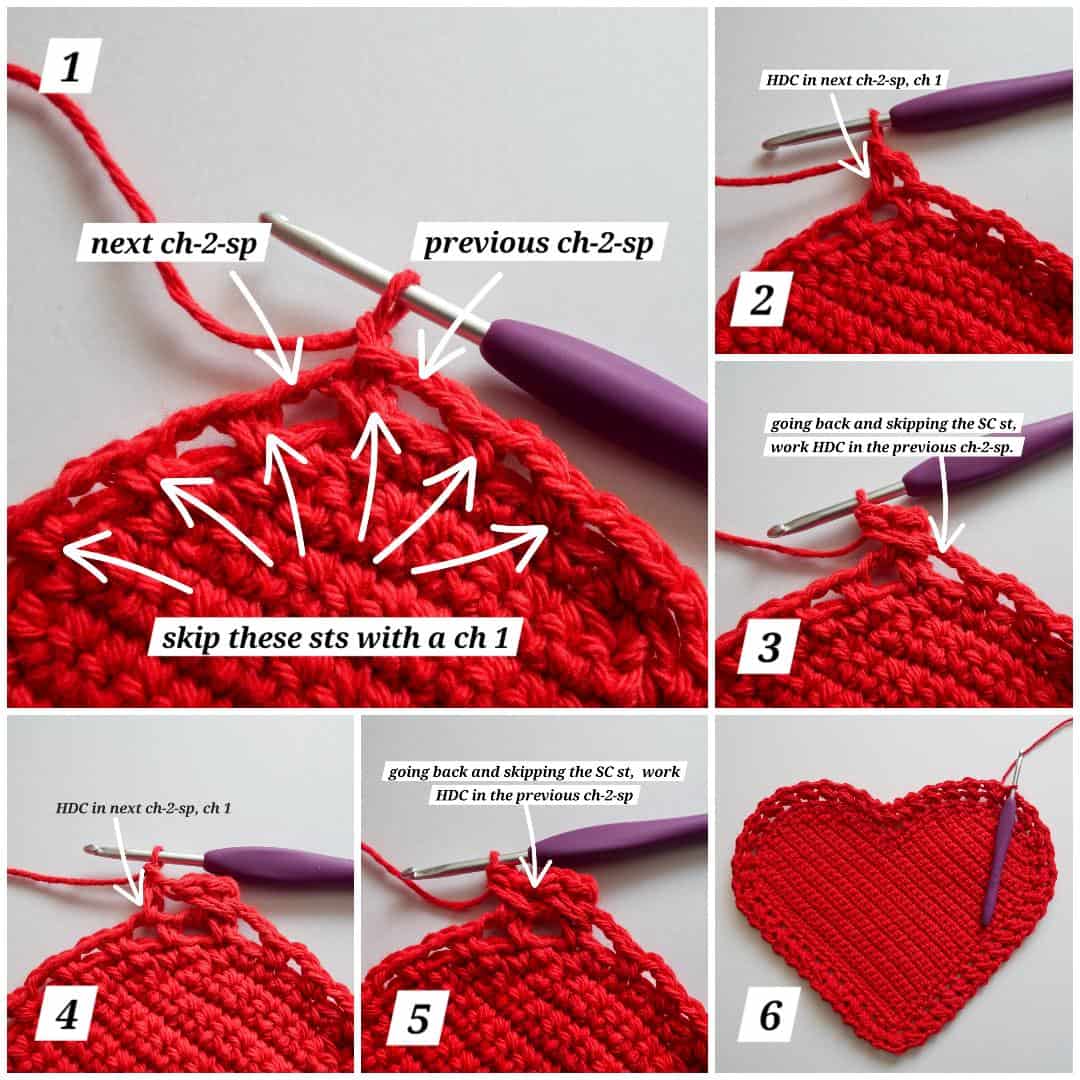
chdc: crossed half double crochet: This stitch is worked over chain spaces, with a chain 1 in between and skipping the stitch in the middle. Work the first half double crochet in the next ch-2-sp, ch 1, going back (crossing the half double crochet just made) and skipping the stitch in the middle, work the second half double crochet in the previous ch-2-sp.
Potholder Pattern
Rows 1-24
- Row 1: Ch 26, SC in the 2nd ch from the hook and in each ch across. Turn. 25 sts
- Row 2: Ch 1 (does not count as a st throughout), 2 SC, SC 24. Turn. 26 sts
- Row 3: Ch 1, SC 25, 2 SC. Turn. 27 sts
- Row 4: Ch 1, 2 SC, SC 26. Turn. 28 sts
- Row 5: Ch 1, SC 27, 2 SC. Turn. 29 sts
- Rows 6-11: Ch 1, SC 29. Turn. 29 sts
- Row 12: Ch 1, SC2tog, SC 27. Turn. 28 sts
- Row 13: Ch 1, SC 26, SC2tog. Turn. 27 sts
- Row 14: Ch 1, SC2tog, SC 25. Turn. 26 sts
- Row 15: Ch 1, SC 24, SC2tog. Turn. 25 sts
- Row 16: Ch 1, SC2tog, SC 23. Turn. 24 sts
- Row 17: Ch 1, SC 16. Turn, leaving the remaining sts unworked. 16 sts
- Rows 18-24: Ch 1, SC 16. Turn. 16 sts
Rows 25-30
- Row 25: Ch 1, SC 15. Turn. 15 sts
- Row 26: Ch 1, SC2tog, SC 12. Turn. 13 sts
- Row 27: Ch 1, SC2tog, SC 10. Turn. 11 sts
- Row 28: Ch 1, SC2tog, SC 8. Turn. 9 sts
- Row 29: Ch 1, SC2tog, SC 6. Turn. DO NOT turn. 7 sts
- Row 30: Please refer to the photo (below) and note down where the SC sts are placed. Working counter-clockwise, ch 1, SC 12, SC3tog, SC 46, 3 SC, SC 34. Slst in 1st st to join. DO NOT turn. 96 sts
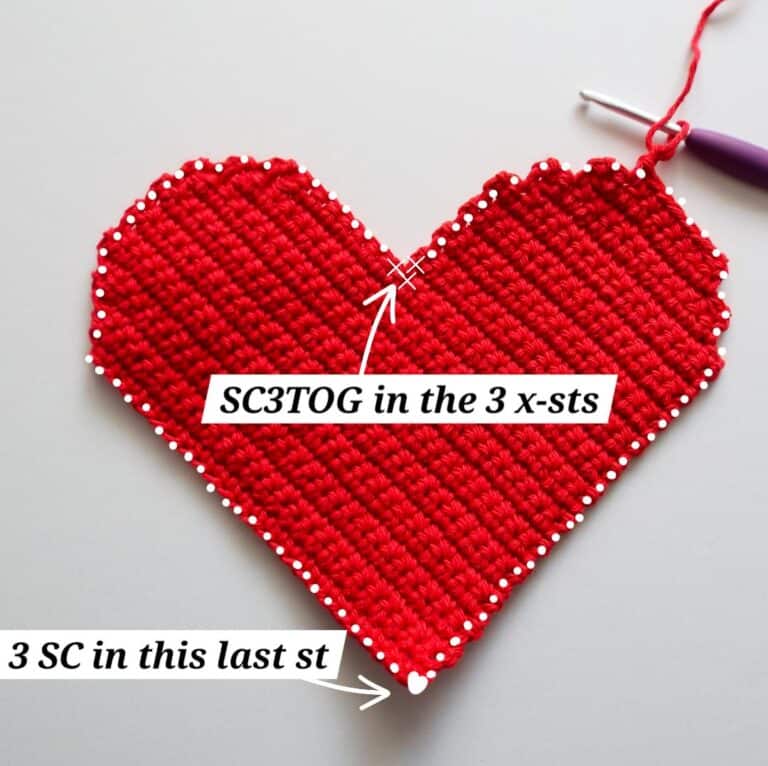
With the exception of the indicated increases (3 SC) and decreases (SC3tog), work a single crochet in the dotted stitches.
Rows 31-32
- Row 31: Ch 1, SC in 1st st, ch 2, sk a st, *SC in next st, ch 2, sk a st*; Rep from * to * around. Slst in 1st st to join. DO NOT turn. 48 SC sts, 48 ch-2-sps
- Row 32: Ch 1, CHDC around. Slst in 1st st to join. DO NOT fasten off.
Adding the Handle
Ch 21, slst in the 2nd ch from the hook and in each ch across to the base. Fasten off leaving a long tail for sewing. With the yarn tail and needle, connect the end of the handle by sewing it to the base to form a ring. Securely fasten off and weave in all ends.