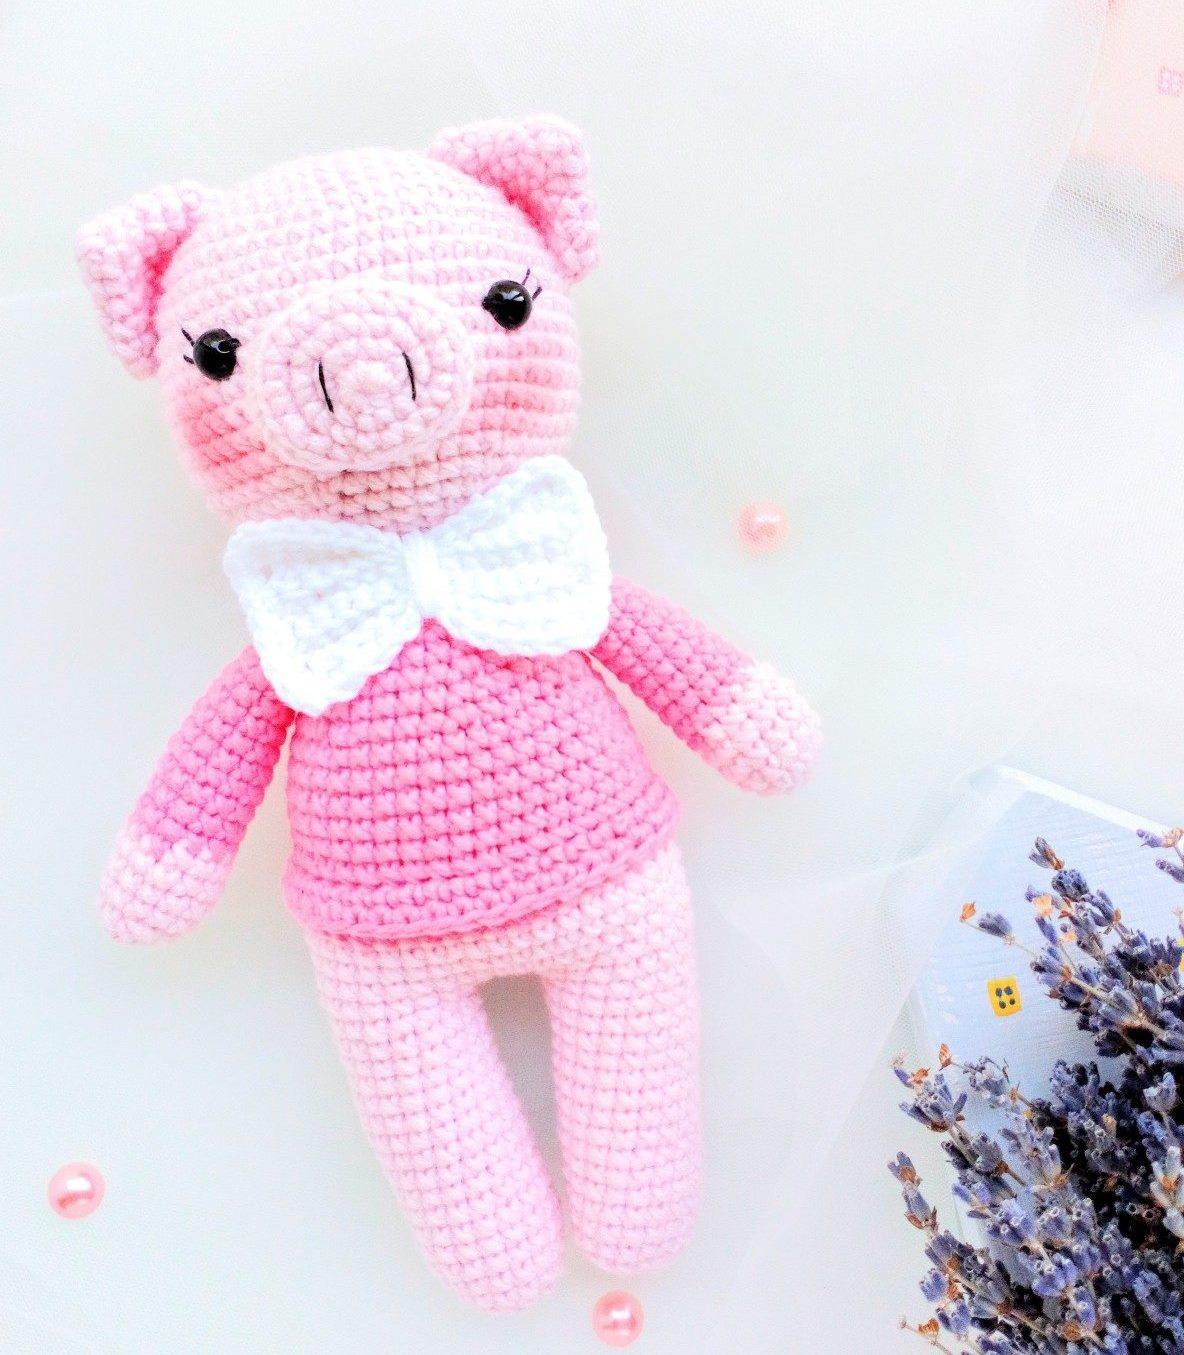
Crochet Pig Amigurumi: A Fun and Creative Project


Are you looking for a fun and creative project to try your hand at crochet? Look no further than the delightful world of amigurumi! And what better way to start than with a cute crochet pig amigurumi? This adorable little piggy will steal your heart with its charm and bring a smile to anyone's face. Whether you're a seasoned crocheter or just starting out, creating a crochet pig amigurumi is a delightful project that will bring joy and satisfaction. It's a perfect gift for a loved one or a charming addition to your own collection. So grab your crochet hook and let your imagination run wild as you bring this adorable little piggy to life!
Materials Required
- Yarn
- Hook size: 1.5 mm
- 8 mm safety eyes
- Embroidery floss for lashes and nostrils
- Sewing needle and scissors
- Fiberfill
Abbreviations Used
R = row
mc = magic circle
ch = chain
sc = single crochet
inc = 2 sc in the next stitch
dec = single crochet 2 stitches together
sl st = slip stitch
BLO = back loop only
(12) = number of stitches you should have at the end of the round/row
( ) * 6 = repeat whatever is between the brackets the number of times stated
Crochet Pig Free Amigurumi Pattern
Head
R 1. 6 sc in mc (6)
R 2. (inc)*6 (12)
R 3. (1 sc, inc)*6 (18)
R 4. (2 sc, inc)*6 (24)
R 5. (3 sc, inc)*6 (30)
R 6. (4 sc, inc)*6 (36)
R 7. (5 sc, inc)*6 (42)
R 8. (6 sc, inc)*6 (48)
R 9. (7 sc, inc)*6 (54)
R 10-19. 54 sc (10 rows)
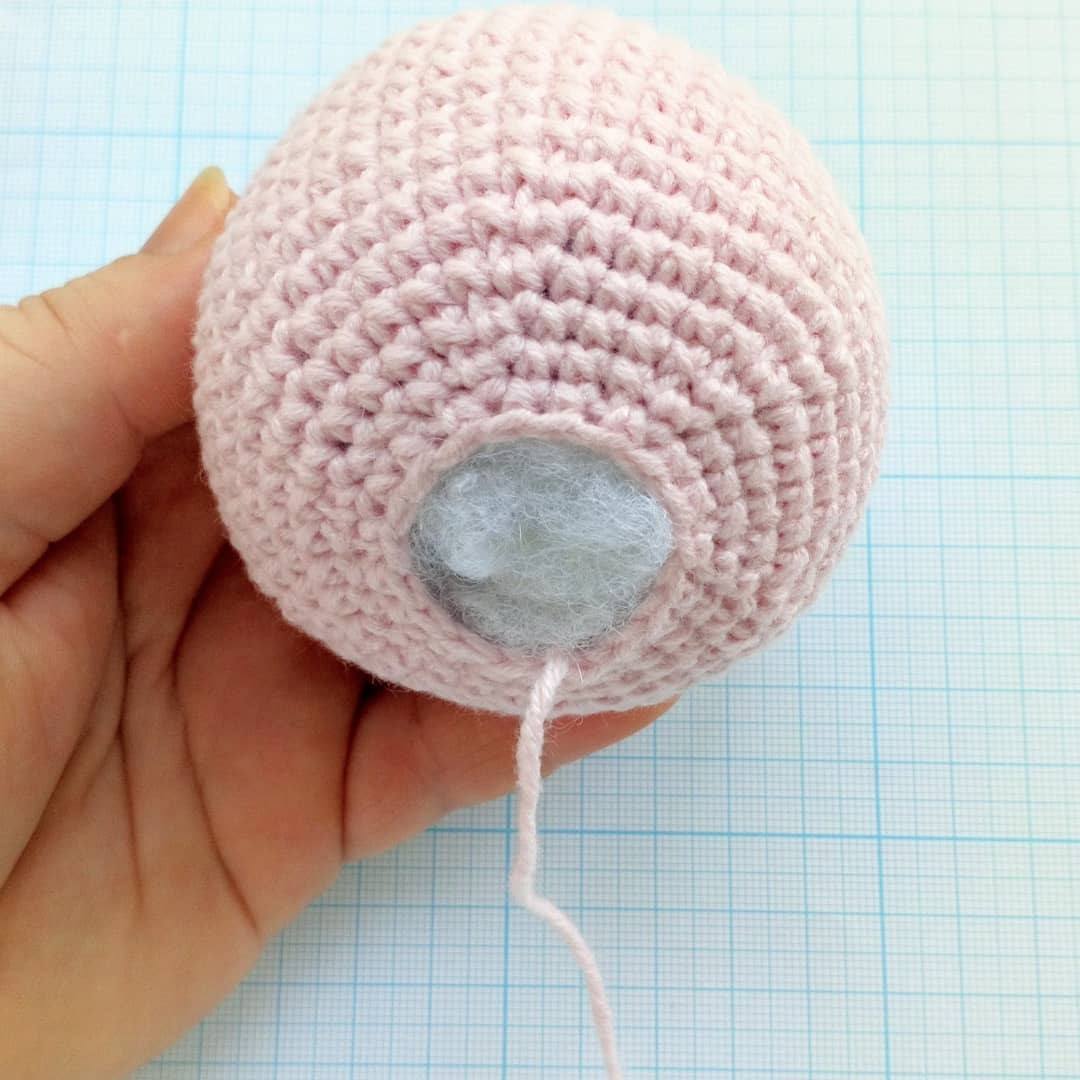
Insert safety eyes between R 14 and R 15 at the distance of 10 stitches from each other.
R 20. (7 sc, dec)*6 (48)
R 21. (6 sc, dec)*6 (42)
R 22. (5 sc, dec)*6 (36)
R 23. (4 sc, dec)*6 (30)
R 24. (3 sc, dec)*6 (24)
R 25. (2 sc, dec)*6 (18)
F.o. and leave a 20 cm long tail for sewing.
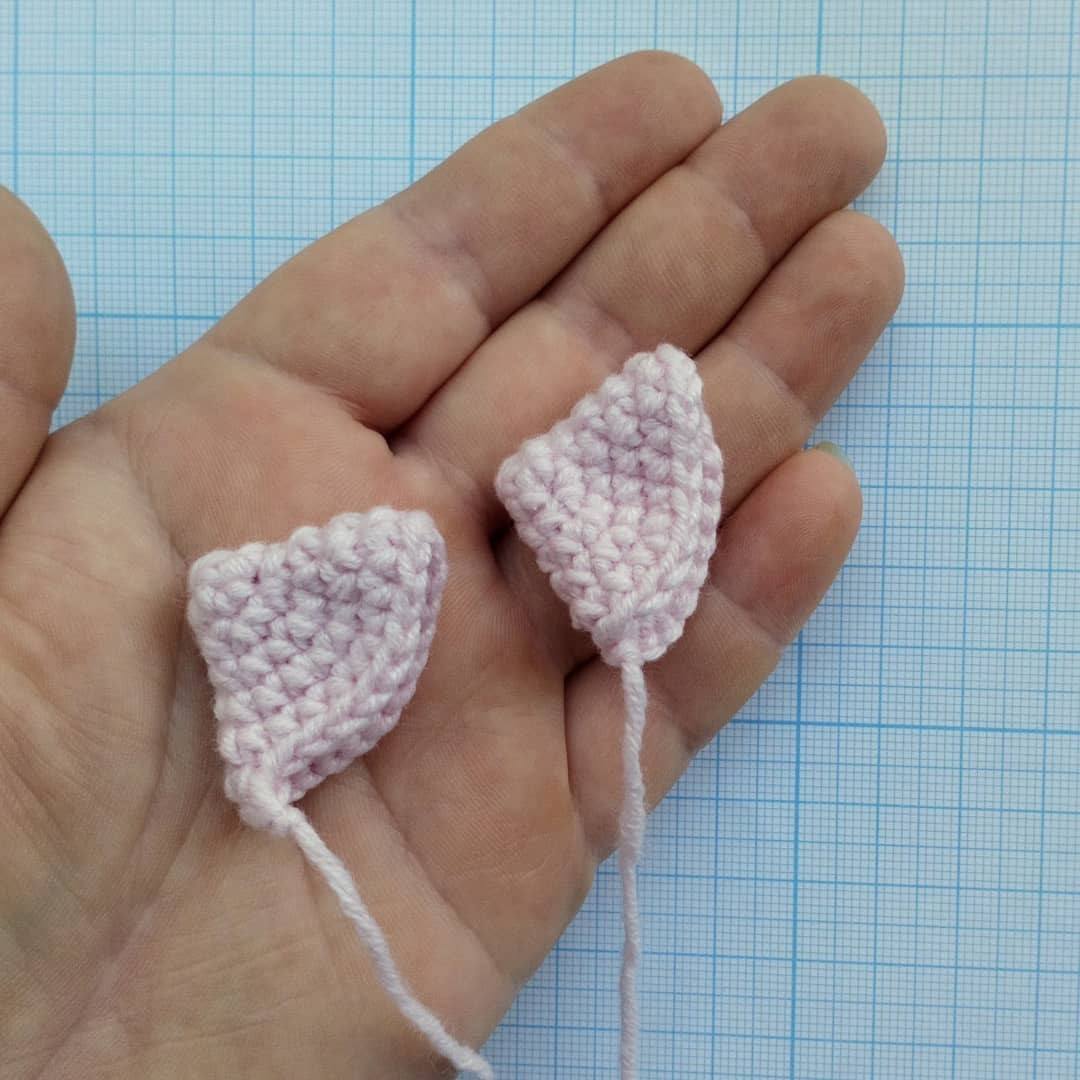
Ears (Make 2)
R 1. 6 sc in mc (6)
R 2. 6 sc (6)
R 3. (inc)*6 (12)
R 4. (2 sc, inc)*4 (16)
R 5. (3 sc, inc)*4 (20)
R 6. (4 sc, inc)*4 (24)
F.o. and leave a 20 cm long tail for sewing.
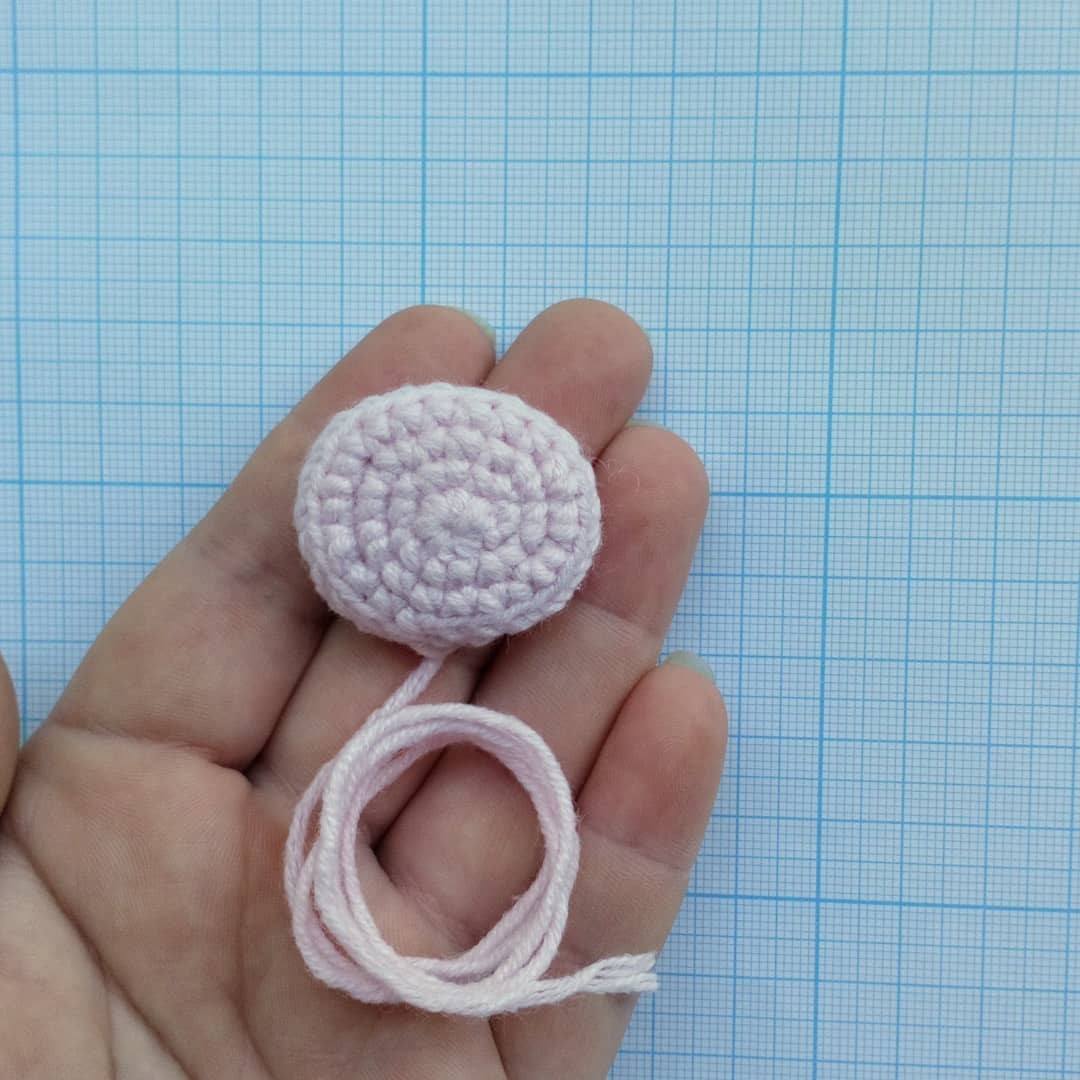
Muzzle
R 1. 6 sc in mc (6)
R 2. (inc)*6 (12)
R 3. (3 inc, 3 sc)*2 (18)
R 4. 3 sc, 3 inc, 6 sc, 3 inc, 3 sc (24)
R 5. BLO 24 sc
R 6. 24 sc
F.o. and leave a long tail for sewing.
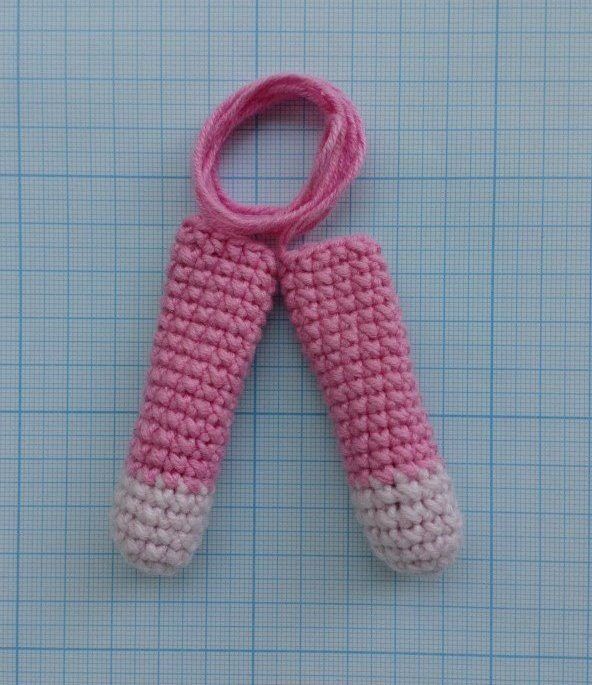
Arms (Make 2)
With pink yarn:
R 1. 6 sc in mc (6)
R 2. (inc)*6 (12)
R 3-6. 12 sc (4 rows)
With bright pink yarn:
R 7-20. 12 sc (14 rows)
Stuff gently.
F.o. and leave a long tail for sewing.
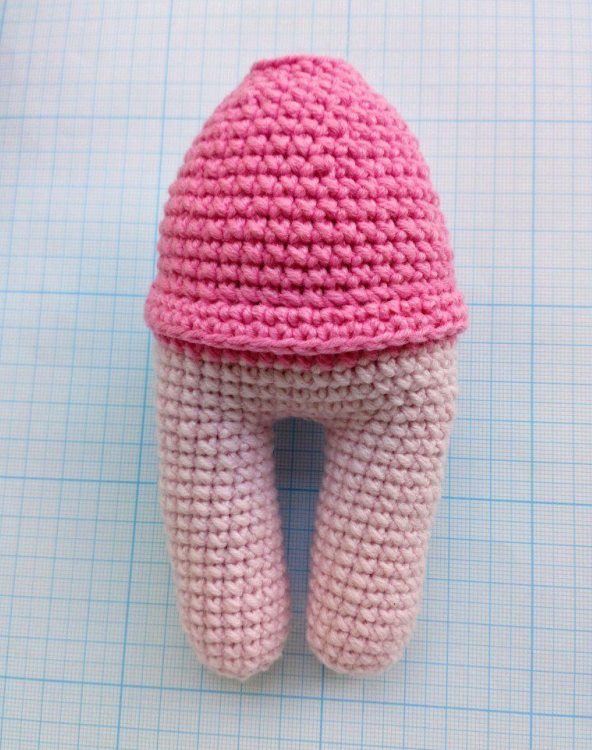
Legs (Make 2)
With pink yarn:
R 1. 6 sc in mc (6)
R 2. (inc)*6 (12)
R 3. (1 sc, inc)*6 (18)
R 4-18. 18 sc (15 rows)
Stuff legs.
Don’t fasten off after finishing the second leg. Continue crocheting the body starting from the second leg.
Crochet 3 ch from the second leg and join it with the first one with sl st.
R 19. sc in next 18 st of the first leg, sc in next 3 ch, sc in next 18 st of the second leg, sc in next 3 ch (opposite side) (42)
R 20-23. 42 sc (4 rows)
With bright pink yarn:
R 24-26. 42 sc (3 rows)
R 27. BLO 42 sc
R 28-33. 42 sc (6 rows)
R 34. (5 sc, dec)*6 (36)
R 35. 36 sc (36)
R 36. (4 sc, dec)*6 (30)
R 37. 30 sc (30)
R 38. (3 sc, dec)*6 (24)
R 39. 24 sc (24)
R 40. (2 sc, dec)*6 (18)
R 41. 18 sc (18)
Stuff the body, sew the head to the body.
Assembly
Sew arms between R 38 and R 39 of the body.
Sew ears, starting on the R 6 of the head.
Sew muzzle to the head between eyes. Put some stuffing inside the muzzle before you finish.
Embroider lashes, nostrils. Tint with dry pastel cheeks and ears.
The Bow
Make 15 ch.
R 1-10: From the 2nd ch from hook 14 sc, turning at the end of every row.
Tie in the middle and sew to the neck.