
Crochet Bunny Hat Pattern: Hop into Cuteness!

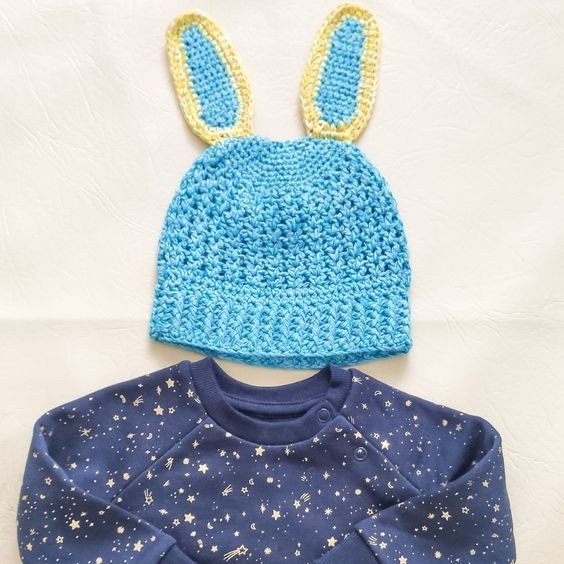
Get ready to hop into cuteness overload with our Crochet Bunny Hat! This charming accessory is perfect for adding a touch of whimsy to any outfit, whether it's for a costume party, Easter celebration, or simply to bring a smile to your little one's face. Handcrafted with love and attention to detail, this hat features floppy bunny ears that are sure to capture everyone's attention. The soft and cozy yarn ensures comfort and warmth, making it ideal for chilly days or as a delightful fashion statement. With its vibrant colors and playful design, our Crochet Bunny Hat is a must-have for any bunny lover! Crafted with precision and care, this hat is a true work of art. The intricate crochet stitches bring the bunny ears to life, giving them a realistic and adorable appearance. The hat itself is designed to fit snugly, ensuring a comfortable and secure fit for hours of wear. Whether you're attending a themed party, participating in a cosplay event, or simply want to add a touch of whimsy to your everyday look, our Crochet Bunny Hat is the perfect choice. So go ahead, hop into the world of cuteness and let your inner bunny shine!
Supplies Needed for This Crochet Bunny Hat Pattern
Yarn —You can use any DK-weight yarn in the color of your choice for this project. The prototype was made using 2 strands of Hobbii Dahlia Mixo, Fingering weight, #2 (100% Cotton, 874 yards/800 m per 7 oz/200g Ball) held together to get a #3 weight.
Please note that I used two strands of fingering weight, which is graded for DK weight.
Estimated Yardage
MC = 70 (80, 90, 100) yards
CC = 40 yards
Hook and Other Materials – 4 mm Crochet Hook.
Gauge
18 sts over 14 rows = 4”/10 cm Square made in hdc before blocking.
Adjust hook size if necessary, to obtain gauge.
Pattern Notes
1. Please kindly read through the pattern before starting.
2. Similar #3 weight yarn can be substituted; please check the gauge.
3. Ch 2 does not count as a stitch.
Construction Notes
1. The beanie is worked in one piece.
2. Section 1 – Brim and body in rounds.
3. Section 2 – Bunny ears in rows and then joined to the beanie.
Difficulty Level – Intermediate
Terms – US Terminology
Stitches Abbreviations
- Ch(s) – Chain(s)
- Hdc – Half Double Crochet
- Dc – Double Crochet
- FPdc – Front Post-Double Crochet
- BPdc – Back Post-Double Crochet
- Sc – Single Crochet
- Sc2tog – Single Crochet 2 stitches together
- Rep – Repeat
Special Stitch
V st = dc, ch 1, dc in indicated stitch.
6 – 12 months 17”
Adjustments/Fittings
Length: increase or decrease the repeats when making the brim and the body as you would prefer.
How to Crochet Bunny Hat Pattern
Section 1: Beanie
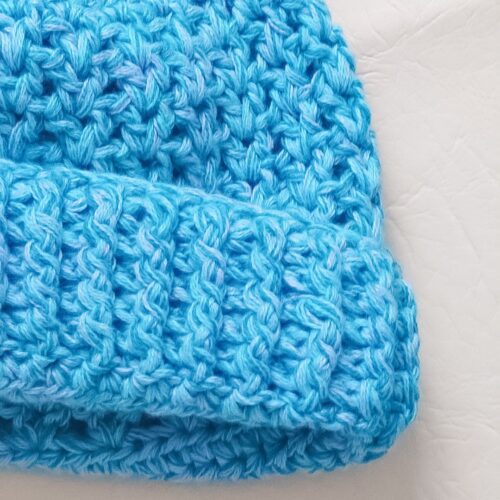
Brim
With A, Chain 52 (56, 60, 64), join with a sl st to beginning ch.
Round 1: Ch 2, hdc in each st around, join with a sl st to the beginning ch. 52 (56, 60, 64) hdc
Round 2: Ch 2, *FPdc in next st, BPdc in next st, rep from * around, join with a sl st to the beginning ch. 26 (28, 30, 32) FPdc/BPdc
Rounds 3 – 6: Rep Round 2.
Body
Round 1: Ch 2, hdc in each st around, join with a sl st to the beginning ch. 52 (56, 60, 64) hdc
Round 2: Ch 2, 2 hdc in first 3 sts, hdc in next 27 sts, 2 hdc in next 6 sts, hdc in each of the remaining sts until last 3 sts, 2 hdc in last 3 sts, join with a sl st to the beginning ch. 64 (68, 72, 76) hdc
Round 3: Ch 2, *Skip next 2 sts, V st in next st, rep from * to the end, join with a sl st to the beginning ch. 21 (22, 24, 25) V st
Round 4: Ch 2, V st in each ch 1 sp (V st) from the previous round, join with a s st to the beginning ch. 21 (22, 24, 25) V st
Rounds 5 – 9: Rep Round 4.
Round 12: Ch 2, 2 sc in each V st around, join with a sl st to the beginning ch. 42 (44, 48, 50) sc
Round 13: Ch 1, sc in each st around, join with a sl st to the beginning ch. 42 (44, 48, 50) sc
3-6 months and 9 – 12 months alone
Round 14: Ch 1, 2 sc in first 2 sts, sc in each sts until last 2 sts, 2 sc in last 2 sts, join with a sl st to beginning ch. 48 (54) sc
Round 1: Ch 1, *sc2tog, sc in next 5 sts, rep from * to end, join with a sl st to the beginning ch. 35 (40, 40, 45) sc
Round 2: Ch 1, sc in each st around, join with a sl st to the beginning ch. 35 (40, 40, 45) sc
Round 3: Ch 1, *sc2tog, sc in next 4 sts, rep from * to the last 3 (2, 2, 1) st(s), sc in the remaining sts, join with a sl st to the beginning ch. 29 (33, 33, 37) sc
Round 4: Ch 1, sc in each st around, join with a sl st to the beginning ch. 29 (33, 33, 37) sc
Round 5: Ch 1, *sc2tog, sc in next 3 sts, rep from * to last 2 (1, 1, 2) st(s), sc in remaining sts, join with a sl st to the beginning ch. 23 (26, 26, 30) sc
Round 6: Ch 1, *sc2tog, sc in next 2 sts, rep from * to last 1 (0, 0, 0) st, sc in remaining sts, join with a sl st to the beginning ch. 17 (19, 19, 22) sc
Round 7: Ch 1, sc2tog around, join with a sl st to the beginning ch. 9 (10, 10, 11) sc
Leave a long tail for sewing, cut yarn.
Sew the remaining stitches to close the opening of the crown.
Crochet Bunny Hat Pattern Free: Bunny Ears
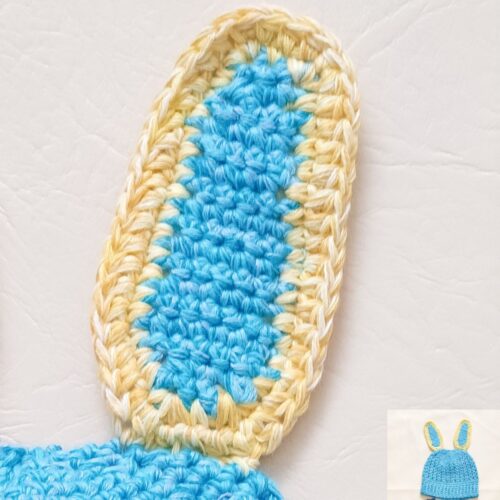
Make 2 pcs with MC and 2 pcs with CC
Row 1: Chain 4, sc in 2nd ch from hook, and in remaining chains, turn. 3 sc
Row 2: Ch 1, sc in each st across, turn. 3 sc
Row 3: Ch 1, 2 sc in first st, sc in next st, 2 sc in last st, turn. 5 sc
Row 4: Ch 1, sc in each st across, turn. 5 sc
Rows 5 – 7: Rep Row 4.
Row 8: Ch 1, sc in next 4 sts, 2 sc in last st, turn. 6 sc
Row 9: Ch 1, sc in each st across, turn. 6 sc
Rows 10 – 12: Rep Row 9.
Row 13: Ch 1, 2 sc in first st, sc in each of the remaining sts, turn. 7 sc
Row 14: Ch 1, sc in each st across, turn. 7 sc
Row 15: Ch 1, sc2tog, sc in next st 3 sts, sc2tog, turn. 5 sc
Row 16: Ch 1, sc2tog, sc in next st, sc2tog, turn. 3 sc
Row 17: Ch 1, sc in each st across, turn. 3 sc
Fasten off.
Finishing
– Place 1 MC on 1 CC, using CC.
– Crocheting over both pcs.
– Join yarn with a sl st to the end of Row 17.
Round 1: Ch 1, sc in each st around, join with a sl st to the beginning ch.
Round 2: Ch 2, hdc in each st around, aim for 2 hdc at each corner, join with a sl st to the beginning ch.
Fasten off.
Repeat with the second set.
Joining the Ears to the Beanie
– Count 4 sts away from the center of the beanie on either side.
– Using stitch markers, position the ears at this point (4th st on either side).
– Adjust according to your preference.
– Sew with a darning needle from the tip of the ear to the beanie.
Fasten off.