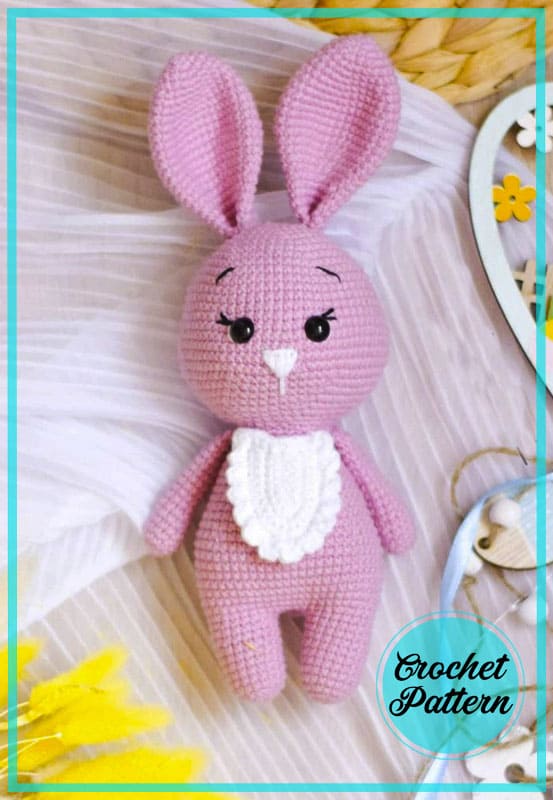
Crochet Your Own Adorable Pink Bunny Amigurumi

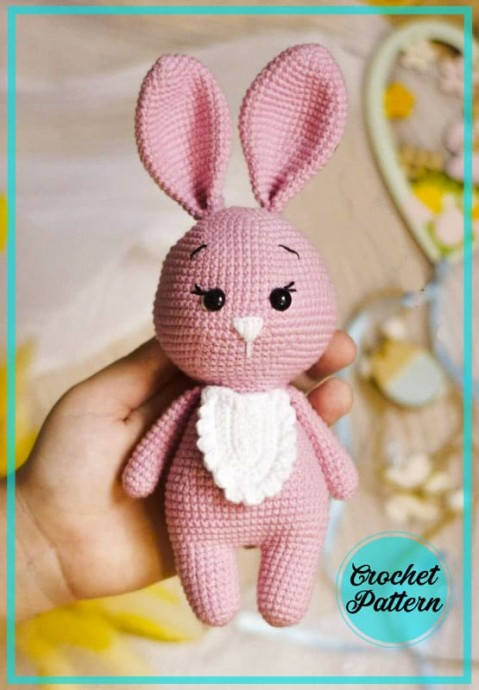
Create your very own adorable pink bunny amigurumi with the art of crochet! This delightful craft project allows you to bring a cute and cuddly bunny to life using just a hook and some yarn. With its soft pink color, this bunny will surely melt hearts and make a perfect gift for a loved one or a charming addition to your own collection. Whether you're a seasoned crocheter or a beginner, this project is a fantastic way to explore the art of crochet and create a lovable companion that will bring smiles to faces young and old. So grab your crochet hook, select your favorite shade of pink yarn, and let your imagination run wild as you bring this charming bunny to life!
Materials
– Yarnart JEANS yarn
No: 62 (white)
No: 36 (light pink)
– Hook 1.9 mm.
– Filler
– Eyes 8 mm.
– Marker of the beginning of the row
– Needle for stitching parts
– Mouline yarn for feeding
– Scissors
Abbreviations
AR – Amigurumi Magic ring
LL – Lifting loop
MR – Amigurumi Magic ring
App – Application
sc – Single Crochet
inc – Increase
dec – Decrease
tr – Triple Crochet/ Treble Crochet
st – Stitch
dc – Double Crochet
hdc – Half Double Crochet
sl-st – Slip Stitch
ch – Chain
..in – Make increase into the same stitch as many times as the number which is given in front of “inc” abbreviation (e.g., 3inc, 4inc).
FLO – Crochet into front loops only
BLO – Crochet into back loops only
BL – Bobble Stitch – Do 5dc all in the same stitch and then yarn over and pull through all the loops on your hook (the original loop + 1 loop for each partially completed dc).
Head
1. 6 in MR
2. 6 inc (12)
3. (sc, inc) x6 (18)
4. (2 sc, inc) x6 (24)
5. (3 sc, inc) x6 (30)
6. (4 sc, inc) x6 (36)
7. (5 sc, inc) x6 (42)
8. (6 sc, inc) x6 (48)
9. (7 sc, inc) x6 (54)
10. (8 sc, inc) (60)
11-15. 60 sc (5 rows)
16. (9 sc, inc) x6 (66)
17. (10 sc, inc) x6 (72)
18. (17 sc, inc) x4 (76)
19-20. (76 sc) (2 rows)
21. (dec, 17 sc) x4 (72)
22. (10 sc, dec) x6 (66)
23. (9 sc, dec) x6 (60)
24. (8 sc, dec) x6 (54)
25. (7 sc, dec) x6 (48)
26. (6 sc, dec) x6 (42)
27. (5 sc, dec) x6 (36)
28. (4 sc, dec) x6 (30)
29. (3 sc, dec) x6 (24)
Make sl-st, cut, leave a long yarn for sewing.
Legs (2 details)
1. 6 in MR
2. 6 inc (12)
3. (sc, inc) x6 (18)
4-11. 18 sc (8 rows)
Make sl-st, cut the yarn, hide.
Similarly, we crochet the second leg, only without sl-st, do not cut the yarn.
Body
12. From the first leg, we make 3 ch, attach it to the second leg. Further along the leg 18 sc, 3 sc along the chain from ch, 18 sc along the leg, 3 sc along the chain from ch (42)
13. (6 sc, inc) x6 (48)
14. (7 sc, inc) x6 (54)
15-21. 54 sc (7 rows)
22. (7 sc, dec) x6 (48)
23-24. 48 sc (2 rows)
25. (6 sc, dec) x6 (42)
26. 42 sc
27. (5 sc, dec) x6 (36)
28. 36 sc
29. (4 sc, dec) x6 (30)
30. 30 sc
31. (3 sc, dec) x6 (24)
32. 24 sc
Make sl-st. Hide the yarn.
Hands (2 parts)
1. 6 in MR
2. 6 inc (12)
3-4. 12 sc
5. dec, 10 sc (11 sc)
6. 11 sc
7. dec, 9 sc (10 sc)
8-16. 10 sc (9 rows)
Fold together, crochet 3 sc, sl-st. Cut, leave yarn for sewing.
Tail
1. 6 in MR
2. 6 inc (12)
3-4. 12 sc (2 rows)
5. dec, 4 sc, dec, 4 sc (10)
Make sl-st, cut, leave yarn for sewing.
Ears (2 parts)
1. 5 in MR
2. 5 inc (10)
3. (sc, inc) x5 (15)
4. (2 sc, inc) x5 (20)
5. 20 sc
6. (3 sc, inc) x5 (25)
7. 25 sc
8. (4 sc, inc) x5 (30)
9. 30 sc
10. (5 sc, inc) x5 (35)
11-15. 35 sc (5 rows)
16. (5 sc, dec) x5 (30)
17. 30 sc
18. (4 sc, dec) x5 (25)
19. 25
20. (3 sc, dec) x5 (20)
21-24. 20 sc (4 rows)
Fold together, crochet 9 sc, sl-st. Fold the ends of the base of the ear together and sew to normalize the fold. Cut, leave yarn for sewing.
Bib
We start crocheting with 8 stitches.
From the second loop from the hook, crochet 6 sc, 4 sc in 1 loop, on the other side we crochet 6 sc (16)
Expand crocheting in the reverse direction.
1. Ch, 6 sc, 4 inc, 6 sc (20) Expand crocheting in the reverse direction.
2. Ch, 8 sc, 4 inc, 8 sc (24). Now we tie the base of the bib with single crochets in the free holes (I got 8 sc). Then we begin to crochet a frill. Crochet 1 sc, 1 dc, 1 dc, 1 sc into 1 loop, then sl-st and repeat to end of the base. It looks like this (sc, 2 dc, sc), sl-st. Cut it off, leave the yarn for sewing on the bib.