Crochet Cozy Amira Sweater

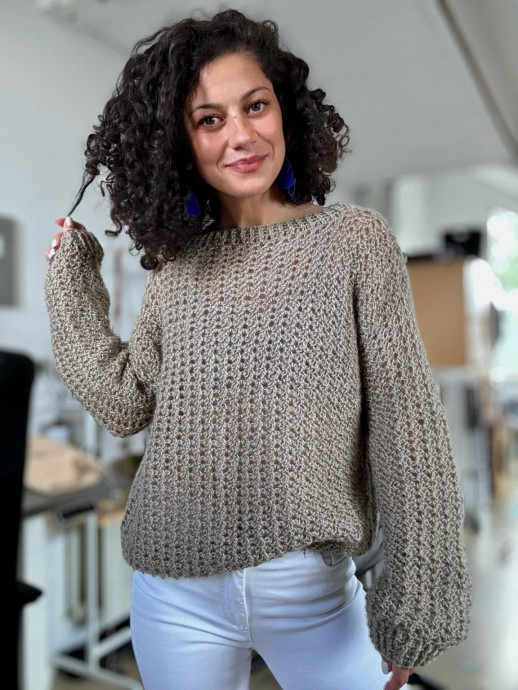
The Crochet Cozy Amira Sweater is the epitome of warmth and comfort for any chilly day. This stylish garment features intricate crochet details that add a touch of elegance to its coziness. Its soft material makes it a joy to wear, perfect for snuggling up with a good book or enjoying a cup of hot cocoa by the fireplace. The versatile design of the sweater makes it easy to pair with jeans for a casual look or dress it up with a skirt for a more polished ensemble. With the Crochet Cozy Amira Sweater, you'll not only stay snug and stylish but also radiate a friendly and inviting vibe wherever you go.
Materials
Yarn: Size 2, Sport weight yarn
- Crochet Hook:
- 6.5 mm crochet hook
- 4 mm crochet hook for cuffs, bottom hem, and collar
- Yarn needle for weaving in ends
- Stitch markers
- Scissors
Notes About Design
The Amira Sweater features a relaxed drop shoulder construction, with a positive ease of about 20cm around bust circumference. The back and front panels are worked separately and then joined at the shoulders. The sleeves are worked from the top down, starting at the armholes. To assemble the sweater, sew the side edges from the sleeve cuffs down to the bottom hem. Finish by adding a stretchy border to the cuffs, bottom hem, and collar.
The use of thinner yarn with a larger crochet hook makes the Amira Sweater incredibly light, while the seams provide structure and stability. The stitch pattern is simple yet elegant, offering a slightly lacy appearance that adds both breathability and style.
While the sample uses a blend of mohair, wool, and acrylic, which pairs beautifully with the larger hook size and stitch pattern, you can experiment with different yarns or hook sizes to achieve a fabric that feels comfortable and pleasing to you. The pattern includes instructions on how to adjust for a different gauge, allowing for customization to suit your preferences.
Measurements and Sizes
The Amira Sweater Pattern is available in 9 sizes, from XS up to 5X Large. The model is 168 cm tall, with a 88 cm bust circumference, and wears a size Extra Small.
The numbers are written below as follows: XS (S, M, L) (XL, 2XL, 3XL, 4XL, 5XL);
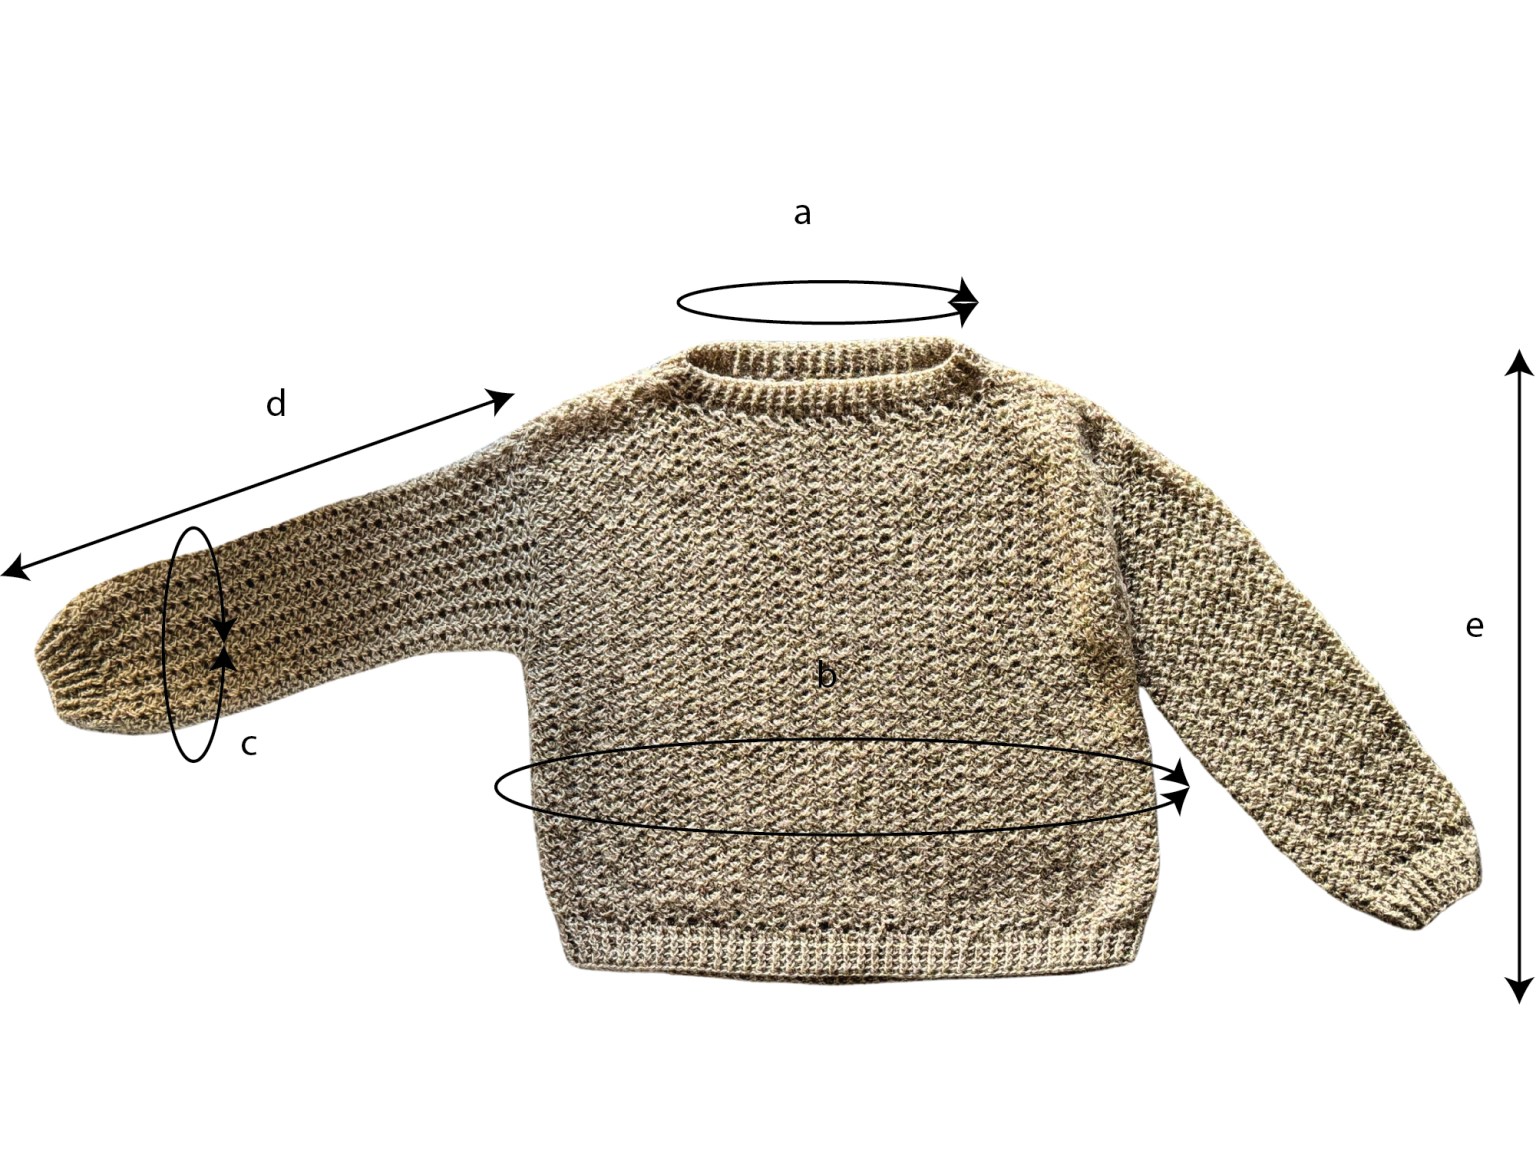
- Neck Circ. a: 54 cm (54, 54, 54) (54, 54, 54, 54, 54)
- Bust Circ. b: 108 cm (112, 116, 124), (132, 140, 152, 160, 172)
- Sleeve Circ. c: 34 cm (34, 38, 42) (42, 42, 46, 46, 50)
- Sleeve Length d: 47 cm (47, 49, 49) (50, 50, 51, 51, 51)
- Length e: 58 cm (58, 58, 58) (59, 59, 60, 60, 60)
*The neckline circumference is measured after the ribbing; it can be adjusted while working on the front panel.
Yarn
For the Amira Sweater, I used Durable Mohair by Durable Yarn, in color 422, Sesame.
Yarn composition: 55% acrylic, 25% Mohair, 20% Wool; Each skein has 50 grams and is approximately 190 meters.
For each size, you will approximately need: 1040 (1070, 1140, 1230) (1310, 1370, 1520, 1580, 1700) meters.
Abbreviations
- Ch – chain
- Sc – single crochet
- scVst – (1sc, 3ch, 1sc) in the same st or space
- dc – double crochet
- fpdc – front post double crochet
- bpdc – back post double crochet
- ss – slip stitch
- St(s) – stitch(es)
- R – row
- ** – repeated section.
Tension
Using 6.5 mm crochet hook in scVst stitch pattern:
- 5scVst = 10 cm
- 9 rows = 10 cm
Stitch Pattern and Techniques
Single Crochet V Stitch
The primary stitch pattern used in the Amira Sweater is a variation of Vst but using single crochet stitches and 3ch as separating chain.
This stitch pattern requires a multiple of 3+1 stitches.
Pattern (use it for the gauge swatch)
- Chain the required number of stitches.
- R1: ch2 (1ch will count as a sc and the second as ch-sp), 1sc into the 3rd stitch, * skip 2sts, 1scVst (1sc, 3ch, 1sc) in the next st, skip the next 2sts; *rep the section to the end of the row; finish the row with (1sc, 1ch, 1sc) into the last st, 2ch and turn;
- R2: 1sc into the first 1ch-sp, *1scVst in the next 3ch-sp, *rep to the end of the row; finish the row with 1sc and 1ch onto the last 1ch-sp, 1sc into the first ch (the second one counting from right to left).
Front Post, Back Post Double Crochet Ribbing
For the collar, cuffs, and bottom hem we will work a ribbing pattern alternating 1fpdc and 1bpdc.
Instructions
Back Panel
Working the Back Panel (Bottom-Up):
If you’d like to use a different yarn or hook size, and adjust the number of stitches to match your gauge, follow these steps:
- Make a gauge swatch in the scVst pattern and measure the number of scVsts and rows within a 10 cm square.
- Take your bust measurement, or refer to standard body measurements for bust circumference, and add your desired amount of positive ease. Divide this number in half to determine the back panel width.
- Using your gauge, calculate the number of scVsts needed to achieve the desired panel width.
- Multiply the number of scVsts required for the back panel width by 3, then add 1 more stitch to the total. This will be the number of stitches you need to start with.
Start: ch 82 (85, 88, 97) (100, 106, 115, 121, 130) sts
R1: ch2 (1ch will count as a sc and the second as ch-sp), 1sc into the 3rd stitch, * skip 2sts, 1scVst (1sc, 3ch, 1sc) in the next st, skip the next 2sts; *rep the section to the end of the row; finish the row with (1sc, 1ch, 1sc) into the last st, 2ch and turn;
R2: 1sc into the first 1ch-sp, *1scVst in the next 3ch-sp, *rep. to the end of the row; finish the row with 1sc and 1ch onto the last 1ch-sp, 1sc into the first ch (the second one counting from right to left).
Rep. R2 until you reach the desired length or until you have: 46 (46, 46, 46) (47, 47, 48, 48, 48) rows;
Final Row (To Straighten the Edge)
To straighten the edge of the panel, work the last row as follows:
- ch1 at the end of the previous row and turn;
- 1sc into the first st, 2ch, *1sc in next 3ch-sp, 2ch; *rep to the end of the row; finish the row with 1sc into the last st (ch).
Fasten off.
Front Panel
Working the Front Panel (Bottom-Up):
Follow the same pattern as for the back panel, but work 3 rows fewer (approximately 3 cm). For the last 3 rows, work only into the shoulder stitches to create a lowered neckline edge.
Work into the same pattern as for the back panel until you have 43 (43, 43, 43) (44, 44, 45, 45, 45) rows;
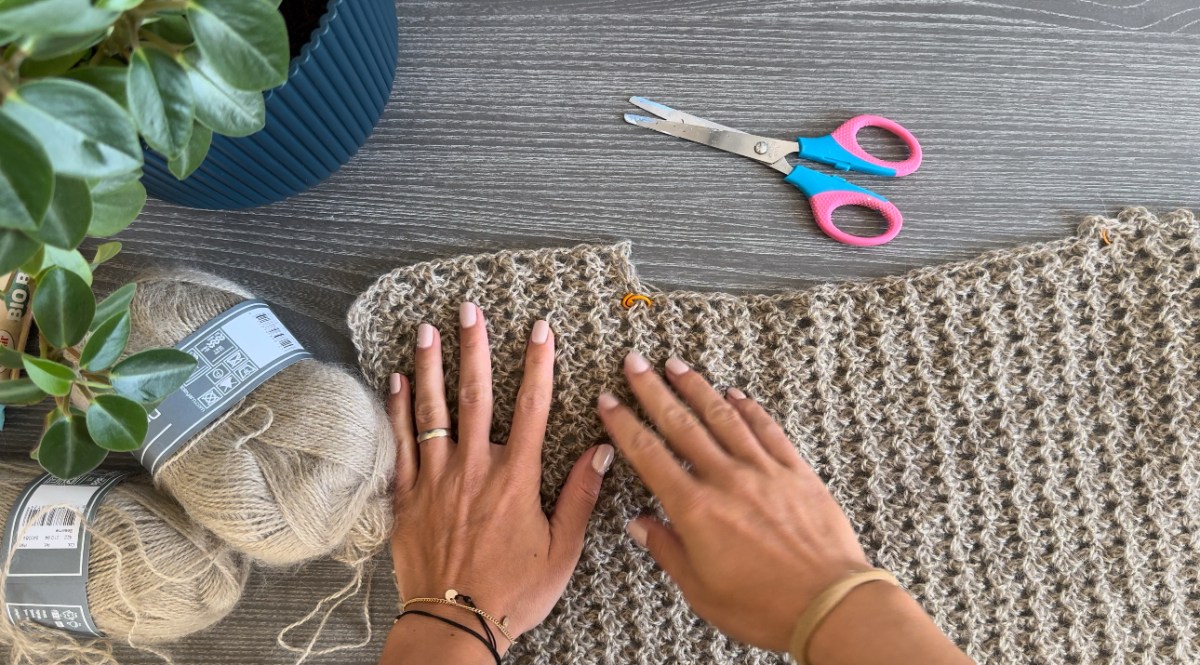
Marking the Shoulder Stitches
Use 2 stitch markers to mark the shoulder stitches. For this particular design and sample, I left more stitches for the neckline width, as the collar ribbing will be worked with a smaller hook size, which will reduce the overall neckline circumference.
Feel free to adjust the neckline width to your preference.
Dividing the Front Panel Width into Shoulders and Neckline
To divide the front panel, do not include the first and last half scVst when counting.
- Shoulder scVsts (same for both shoulders):
- 7 (7, 8, 9) (10, 11, 12, 13, 15)
- Neckline scVsts:
- 13 (14, 13, 14) (13, 13, 14, 14, 13)
Note: Feel free to adjust the number of scVsts for each section to suit your preferences.
Next Row
Continue working in the established stitch pattern to the first stitch marker (marking the last stitch of the current shoulder). To straighten the neckline edge, work as follows: 1 sc in the next 3-ch space, 2 ch, 1 sc in the next 3-ch space; repeat this section until you reach the next stitch marker (the first scV stitch of the second shoulder). Then, work 1 scV stitch in each 3-ch space to the end of the row. Finish the row with 1 sc in the last 1-ch space, 1 ch, and 1 sc in the last stitch.
Next 3 Rows (or more for a deeper neckline)
Continue working in the established stitch pattern, focusing only on the shoulder stitches. On the first row, when you reach the last 3-ch space of the shoulder, work as follows: 1 sc, 1 ch, 1 sc.
To finish the shoulder edge, work as follows:
- ch1 at the end of the previous row and turn;
- 1sc into the first st, 2ch, *1sc into the next 3ch-sp, 2ch; *rep to the end of the row; finish the row with 1sc into the last st;
To work the second shoulder, rejoin yarn into the first 3ch-sp of the shoulder, next to the neckline;
Next 3 Rows (or more for a deeper neckline)
Continue working in the established stitch pattern, focusing only on the shoulder stitches. On the first row, when you begin into the first 3-ch space of the shoulder, work as follows: 1 sc, 1 ch, 1 sc;
To finish the shoulder edge, work as follows:
- ch1 at the end of the previous row and turn;
- 1sc into the first st, 2ch, *1sc into the next 3ch-sp, 2ch; *rep to the end of the row; finish the row with 1sc into the last st;
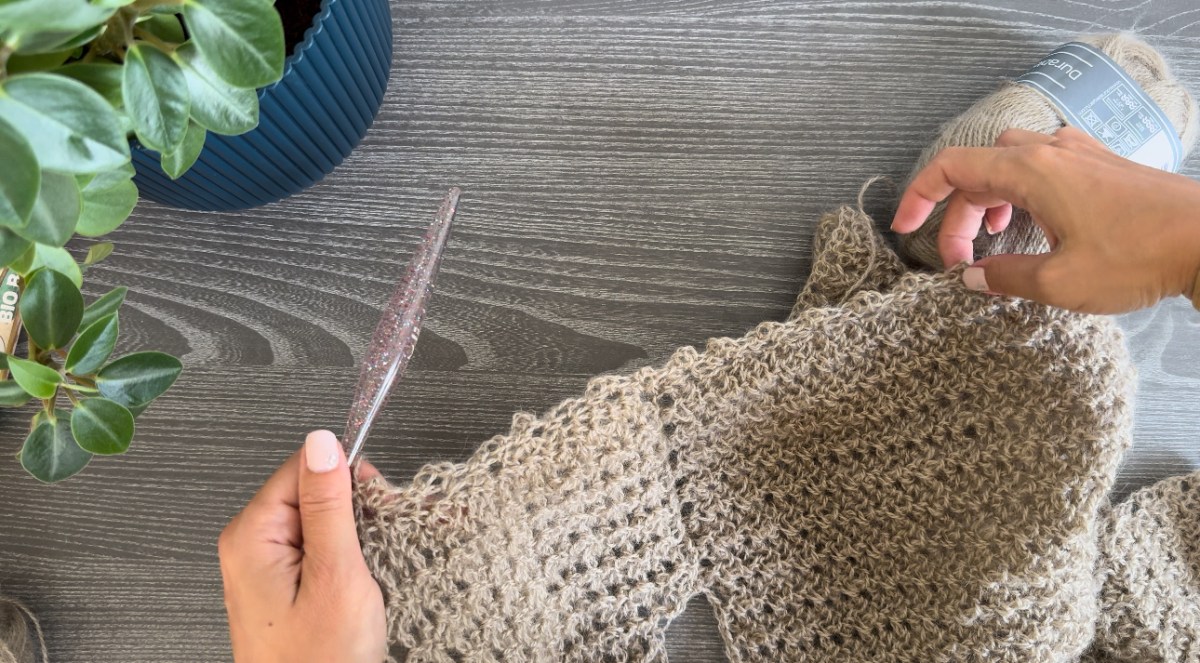
Joining the Shoulders
Place the front and back panels side by side, aligning the shoulder edges. Stitch the shoulder stitches together using your preferred sewing method, or join them with slip stitches or single crochet stitches.
I used the ladder stitch for my joining.
SLEEVES
Use two stitch markers to mark the desired sleeve width. To do this, count the side rows from the shoulder seam towards the back panel, and then count the same number of side rows towards the front panel.
If you want to adjust the sleeve width, refer to your gauge. Determine how many scV stitches are needed for the desired sleeve width. Multiply the number of scV stitches by 3, and the result will be the number of side rows you need to count from both the front and back panel edges. Add one more side row to the count as the stitch pattern requires a multiple of 3+1 sts;
Marking the sleeves side rows (mark the same number on both panels, counting from the shoulder seam):
- 25 (25, 28, 31) (31, 31, 34, 34, 37) side rows
Rejoin yarn on the right side, into the first marked side row;
R1: 2ch, 1sc into the same side row, *skip the next 2 side rows, 1scVst into the next side row, *rep to the shoulder seam, skip the shoulder seam and then **1sc Vst into the next side row, skip the next 2 side rows; ** rep to the end of the row; finish the row with 1sc, 1ch, 1sc into the last side row;
Continue working into the established stitch pattern until you get to the desired length or until you have 39 (39, 40, 40) (41, 41, 42, 42, 42) rows.
To Finish the Sleeve Edge Work as Follows:
- ch1 at the end of the previous row and turn;
- 1sc into the first st, 2ch, *1sc into the next 3ch-sp, 2ch; *rep to the end of the row; finish the row with 1sc into the last st;
Sleeves’ Cuff Ribbing
Change to a 4mm crochet hook.
ch3 at the end of the previous row and turn; (ch3 will count as dc)
R1: 1dc in each st to the end of the row; ch3 and turn.
R2: 1fpdc in next st, 1bpdc in next st; Alternate 1fpdc and 1bpdc to the end of the row; ch3 and turn;
Row 3 (Decrease Row): In Row 3, we will make some decreases. You can work the decreases around either the front post stitches or back post stitches. To make a decrease, work two stitches around the same post together. This will require you to skip 1 stitch in between. So, instead of 1bpdc, 1fpdc, 1bpdc, you will have only 1bpdc by working the 2bpdc together and skipping the fpdc in between;
R3: bpdc2tog, then alternate 1 fpdc and 1 bpdc for the next 5 stitches; repeat this pattern as many times as your stitch count allows. To finish the row, work the remaining stitches, alternating fpdc and bpdc.
R4-R6: Alternate front post double crochet (fpdc) with back post double crochet (bpdc), working each post stitch as established in the previous row.
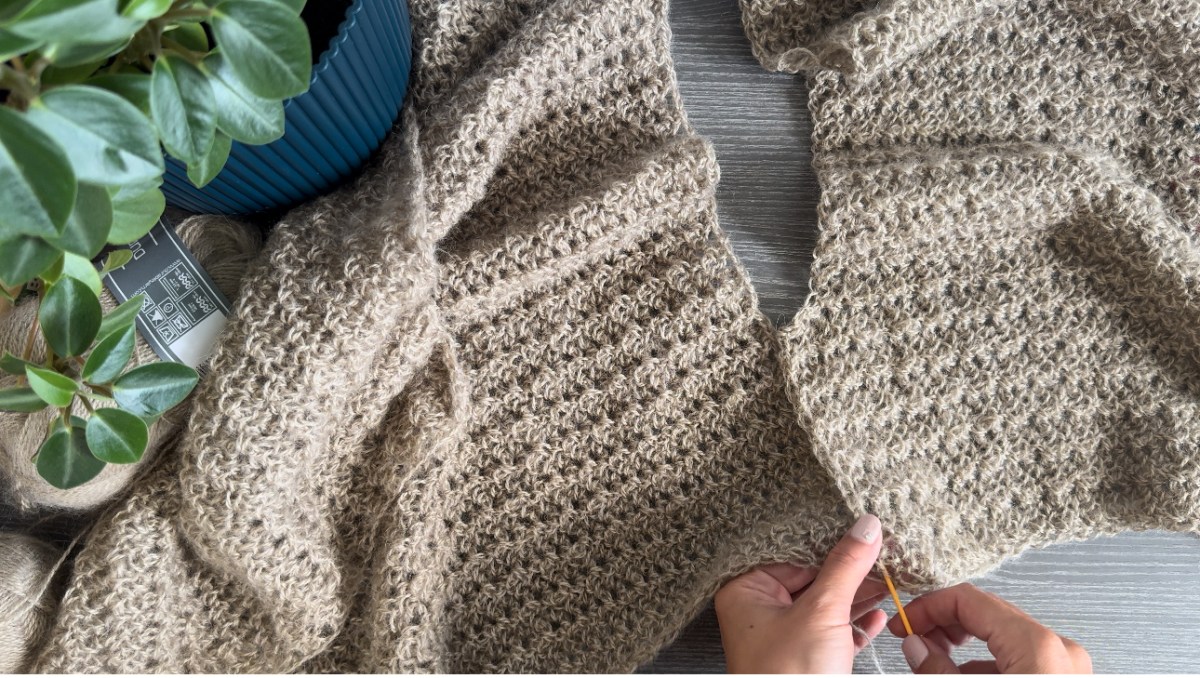
Assembling
After completing the sleeves, fold the piece with the front panel over the back panel, aligning the side edges. Join the side edges using your preferred sewing method. I used the ladder stitch, the same as for the shoulder seam. To ensure you have enough yarn on the needle, measure out a length that is three times the length of the seam you need to sew.
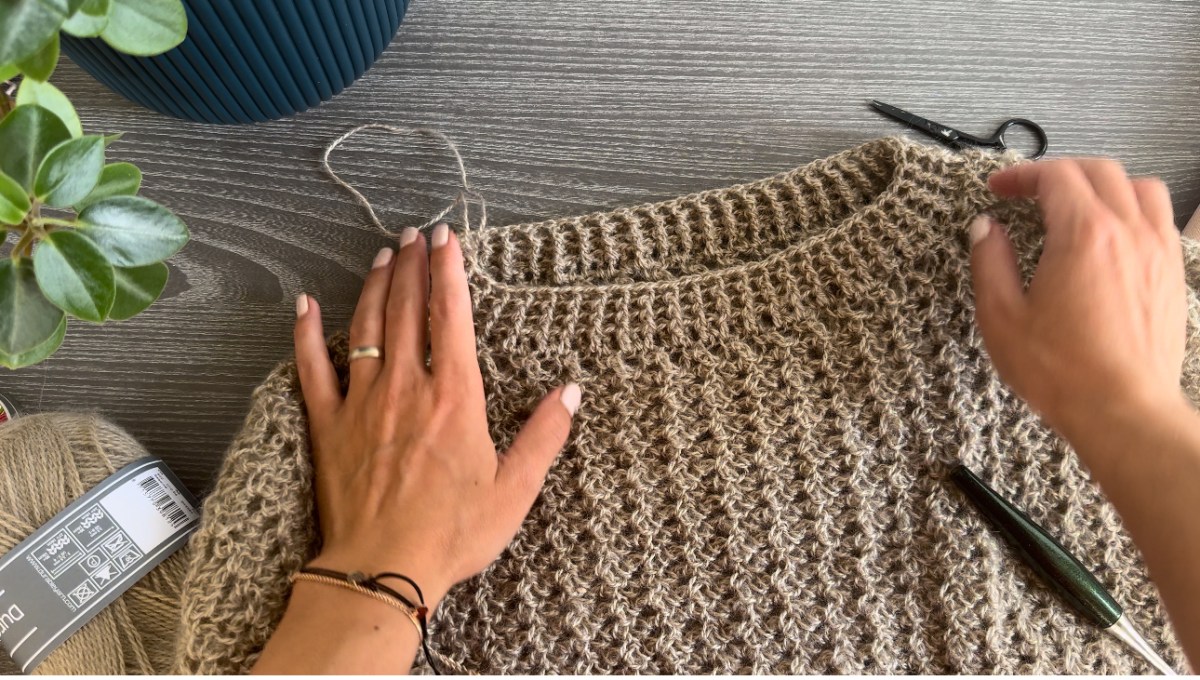
Bottom Hem and Collar Ribbing
For both the collar and bottom hem ribbing, use a 4mm crochet hook. The ribbing pattern will be the same as for the cuffs, alternating 1 front post double crochet (fpdc) with 1 back post double crochet (bpdc).
Work the ribbing in the round, and close each round with a slip stitch into the third chain. The 3 chains at the beginning of each round will count as a back post double crochet.
R1: 3ch, 1dc in each st around; close the round with a slip stitch into the third ch.
R2: 3ch, *1fpdc, 1bpdc; Alternate to the end of the round; slip stitch into the third ch.
Rep. R2 until you have 5 round or until your ribbing has the desired width;
To Finish
- Weave in all loose ends.
- Block the sweater to measurements.
- Funny Pictures
-
 Hilarious Memes for Those Bored to Tears
-
 Weekly Treat of Funniest Parenting Memes for Good Laugh out Loud Right Now
-
 Really Funny Pics to End These Weekend Perfectly
- Recipes
-
 Crispy Baked Avocado Fries
-
 Scrambled Chickpea and Spinach Pitas
-
 Cinnamon Pancakes
- Lifehacks
-
 Crochet Basics: Aligned Cobble Stitch
-
 Brick Stitch Crochet Tutorial
-
 Crochet Basics: Wattle Stitch
- Crochet Ideas
-
 Crochet Snorlax Plushie Doll
-
 Crochet Beautiful Penguin Toy
-
 Crochet Tiny Snowman
- DIY
-
 DIY Santa Craft For Kids
-
 Paper Plate Angel Craft
-
 Upcycled Mason Jar Chicken Vase
- Knitting Ideas
-
 Knitted Bridger Cowl
-
 Knitted Keepsake Bag
-
 Knitted Cutie Cupcake Dolls