Crochet Ripple Turban Beanie Guide

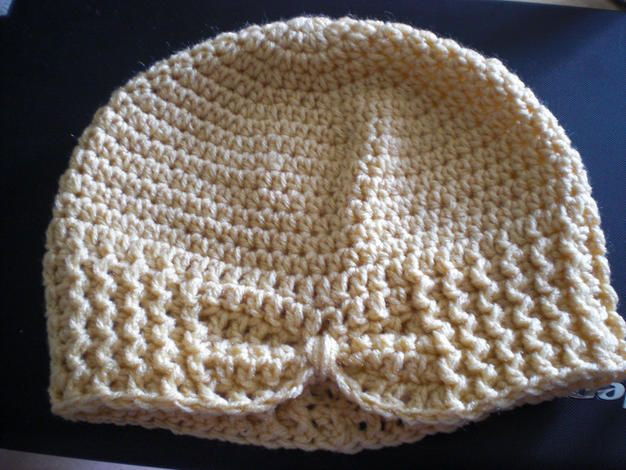
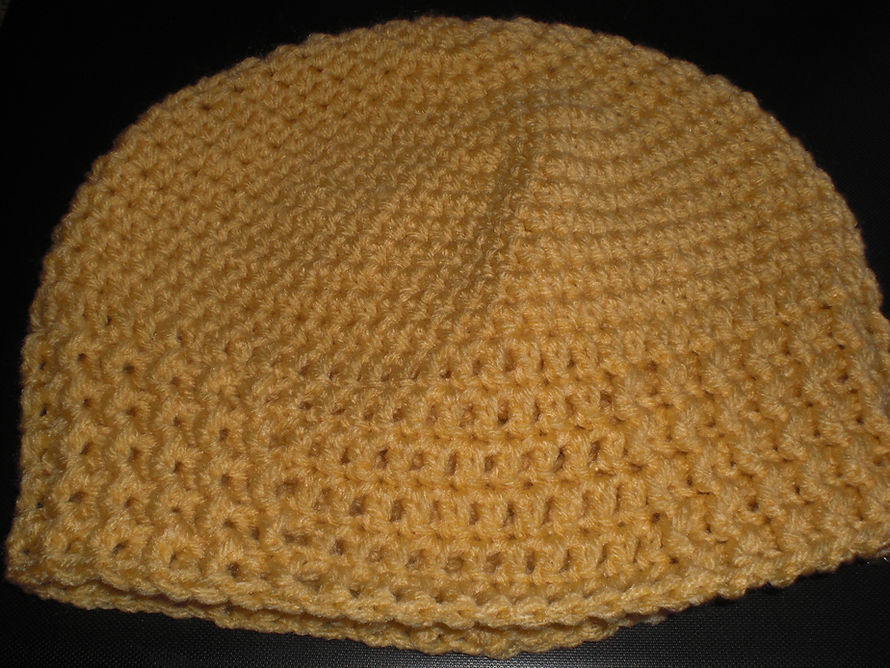
The Crochet Ripple Turban Beanie is a cozy and stylish accessory that will keep you warm and on-trend during the colder months. Its unique ripple design adds a touch of fun and personality to your outfit, making it a versatile piece to complement both casual and dressy looks. Crafted with love and attention to detail, this beanie is not only fashionable but also a practical choice for those chilly days. Whether you're running errands or hanging out with friends, this turban beanie will be your go-to accessory for a cute and comfy style. Wear it slightly slouched for a relaxed look or pull it down snug for extra warmth - either way, you'll be rocking a fashionable and cozy vibe all season long.
Materials
- Size H (5.00 mm) hook
- Redheart Super saver yarn (your color choice)
- Scissors
- Tapestry/yarn needle
- 3 stitch markers or scrap pieces of yarn
Skills Needed
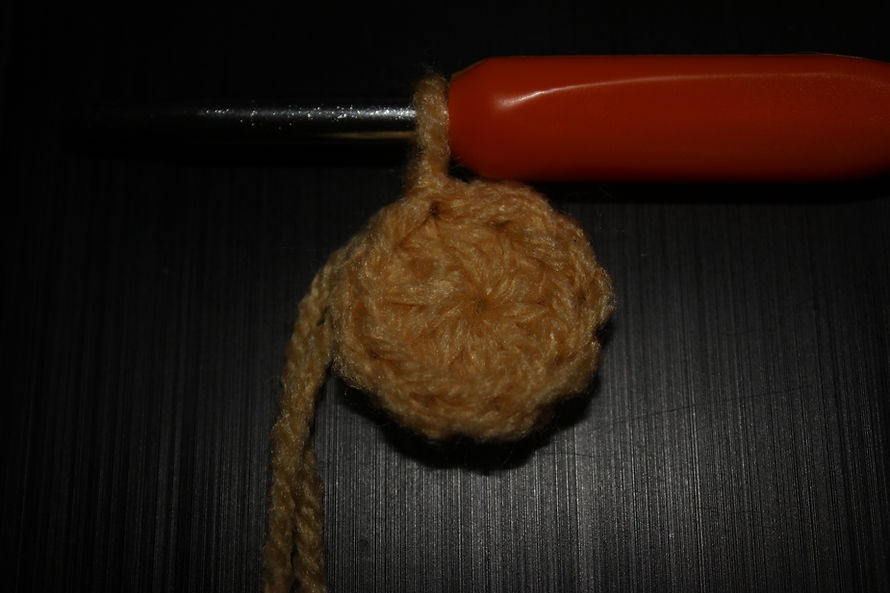
- Create a magic circle
- Ch - Chain Stitch
- Hdc - Half Double Crochet
- Dc - Double Crochet
- Sl St - Slip Stitch
- FP - Front Post
- BP - Back Post
Crocheting the Beanie
Create a magic circle and then Ch 2 (this Ch2 will count as your first Hdc). Now place 9 Hdc stitches in your magic circle. Counting your Ch 2, you will have a total of 10 Hdc crochet at the end of this row. Close your magic circle and Sl St through the top Ch of the Ch 2.
Row 2
Ch 2; place your first Hdc in the same space as your Ch2; now in each stitch place 2 Hdc till you reach the end of the row (18 st total); Sl St to Ch2.
Row 3
Ch 2; Hdc in same space as Ch2; (Hdc; 2Hdc) repeat this till you reach the last stitch (27); Sl St.
Row 4
Ch 2; Hdc in same space as Ch2; (Hdc; Hdc; 2Hdc) repeat this till you reach the last stitch (36); Sl St.
Row 5
Ch 2; Hdc in same space as Ch2; (Hdc; Hdc; Hdc; 2Hdc) repeat this till you reach the last stitch (45); Sl St.
Row 6
Ch 2; Hdc in same space as Ch2; (Hdc; Hdc; Hdc; Hdc; 2Hdc) repeat this till you reach the last stitch (54); Sl St.
Row 7
Ch 2; Hdc in same space as Ch2; (Hdc; Hdc; Hdc; Hdc; Hdc; 2Hdc) repeat this till you reach the last stitch (63); Sl St.
Row 8
Ch 2; Hdc in same space as Ch2; (Hdc; Hdc; Hdc; Hdc; Hdc; Hdc; 2Hdc) repeat this till you reach the last stitch (72); Sl St.
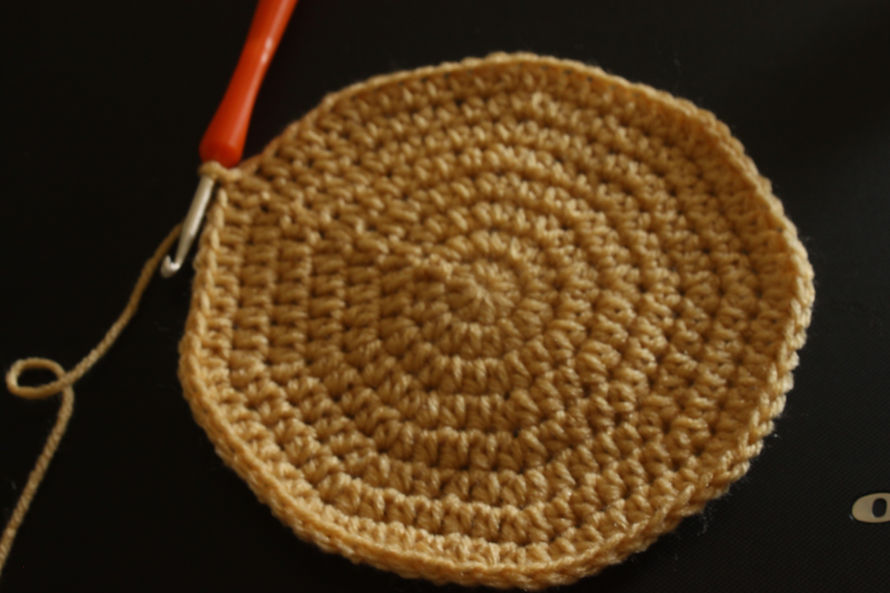
Rows 9-14
Ch 2; Hdc in each stitch (72); Sl St.
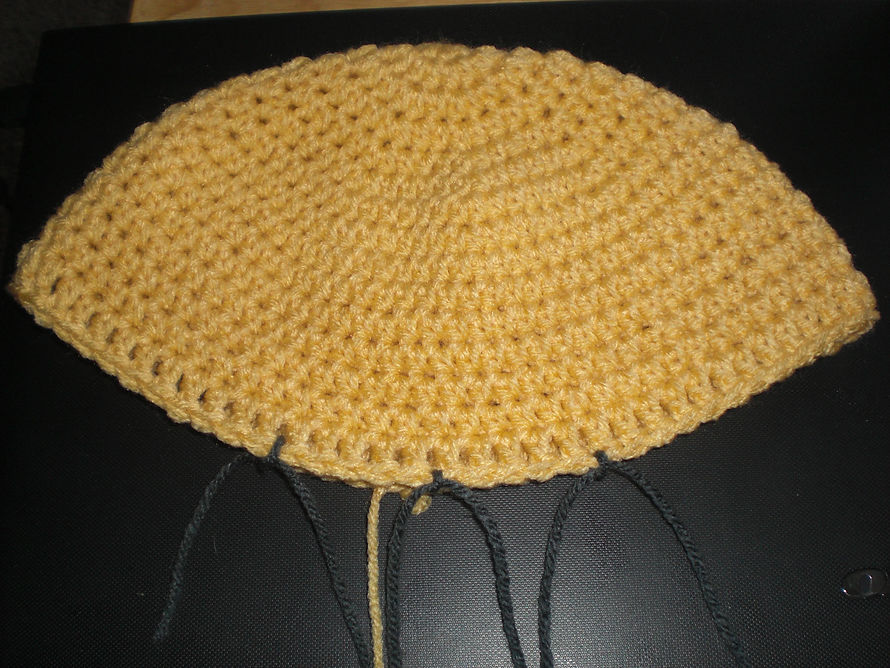
Row 15
Ch 2; Dc in each stitch (72); Sl St.
Now to create the ripple of this hat we will be using FP and BP on the next 5 rows, but first we need to determine the halfway mark of our hat. Starting at the seam, count to half. Since we have 72 stitches in our hat, 36 will be half. Using your stitch markers or scrap yarn, mark your 36th stitch. Count 5 spaces both forward or backward from this mark and place a marker in each space.
These will be your markers for the section where you will use Dc instead of FP/BP. This section will be your bow when you finish the hat.
Row 16
Ch 2; (Fp; Bp) repeat this till you reach your first stitch marker (30 stitches); 10 dc; (Fp; Bp) repeat till you reach the end (31 stitches); Sl St. You will have a total of 71 stitches; note you lose a stitch because of the switching from Fp/Bp to the Dc. This is normal.
You can leave your markers in until you finish the project if you use yarn scraps. I don't know if it will work to leave in actual stitch markers or not. You can, however, remove the middle marker.
Row 17
Ch 2; (Fp; Bp) (30 stitches); *see note and photos to make sure stitches are lining up right* 10 Dc; (Fp/Bp) (31 stitches) (71); Sl St.
Note: Place your first Dc in the stitch in the next stitch.
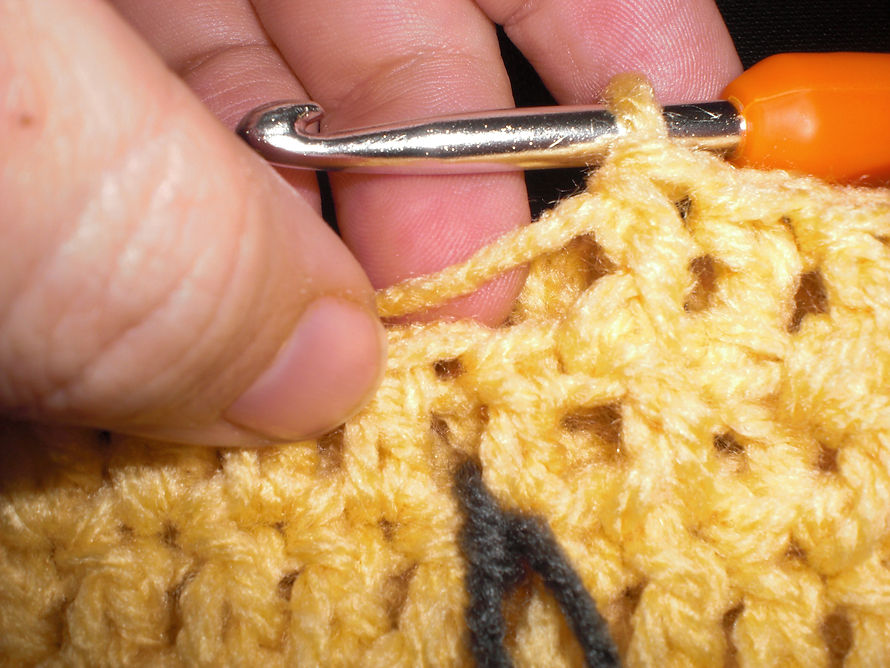
On your last Dc, you will place your stitch in the space above your marker as well. Your next stitch is an Fp, and you will do this by going into the same space where you placed the Dc, however you will go around the Fp from the previous row.

Continue to do this for Rows 18-21. Fasten off and weave in the ends.
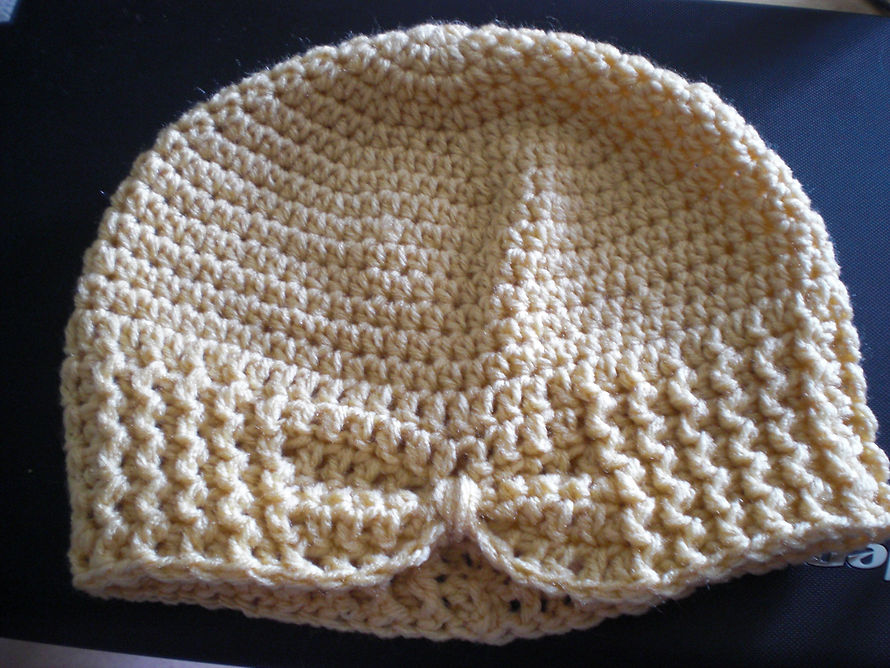
Creating the Bow
In the area where you created the 10 Dc stitches, start folding up the rows in the middle of this section for 5 rows. Now, using your tapestry needle and a very long piece of yarn, weave through the stitches of the gather.
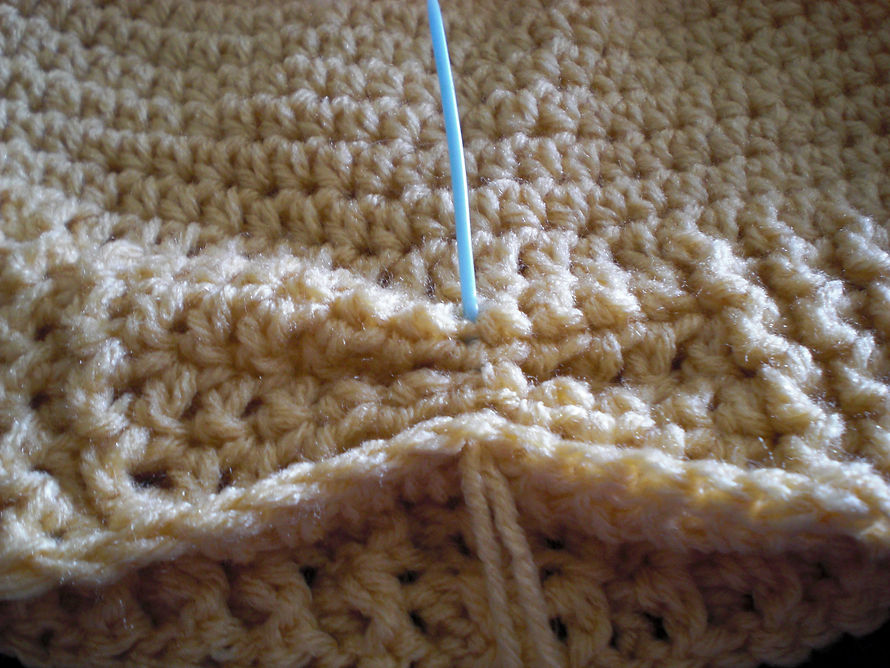
Once you have done this, start making loops around the gathered section to create the middle section of the bow. Now tie your ends together and weave your ends in to create a smooth transition on the inside of the beanie. Be sure to trim any extra yarn once you have finished weaving in the ends.
- Funny Pictures
-
 Cute Cat Memes That Will Make Your Day Brighter
-
 Spot-on and Funny Memes About Introverts Struggles
-
 Top Wonderful Cat Memes on Their Way to Better Your Day
- Recipes
-
 Creamy Old Fashioned Rice Pudding
-
 Russian Tea Cakes (Snowball Cookies)
-
 Rigatoni with Sausage, Tomatoes, and Zucchini
- Lifehacks
-
 How to Crochet a Harlequin Stitch
-
 Removing The Toughest Stains
-
 Crochet Basics: Crumpled Griddle Stitch
- Crochet Ideas
-
 Crochet Christmas Tree
-
 Crochet Goblet of Fire
-
 Crochet Adorable Ammonite
- DIY
-
 DIY Snowman Wreath
-
 Mini Santa Sleigh Ornament
-
 Crochet Gingerbread House Blanket
- Knitting Ideas
-
 Knitted Easter Bunny
-
 Knitted Mobile Phone/Glasses Case
-
 Knitted Cabled Wallet